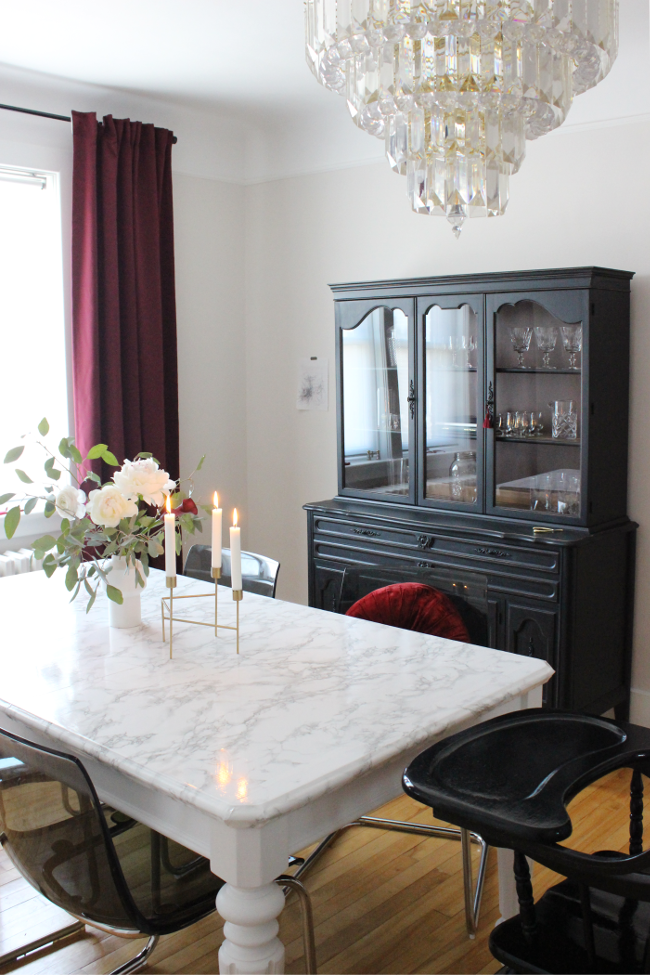
Updating (and childproofing) our secondhand dining table with faux marble contact paper

It’s been in every dining room photo since my One Room Challenge but I never got around to properly introducing it; our updated dining room table! I updated it in May with some faux marble contact paper and I’m only getting around to writing about it now. Story of my life these days, but it was the best update I could have made to that table.

One of the many things the previous tenants left for us was their dining room table. They knew we had next to nothing since emigrating from Dublin and since they’d be buying a dining table for their new house, they decided to really kindly leave their old one.

I was irrationally excited about it as it’s a really solid table [we bought a table last October, but it ended up being very weak and flimsy]. Our dining room is also a really big room so it needs a big table to anchor it and make it feel less like you’re floating around in the middle of the ocean. While I loved the shape and size of the table, I knew I’d want to eventually update it. But exactly how was my next daunting question.
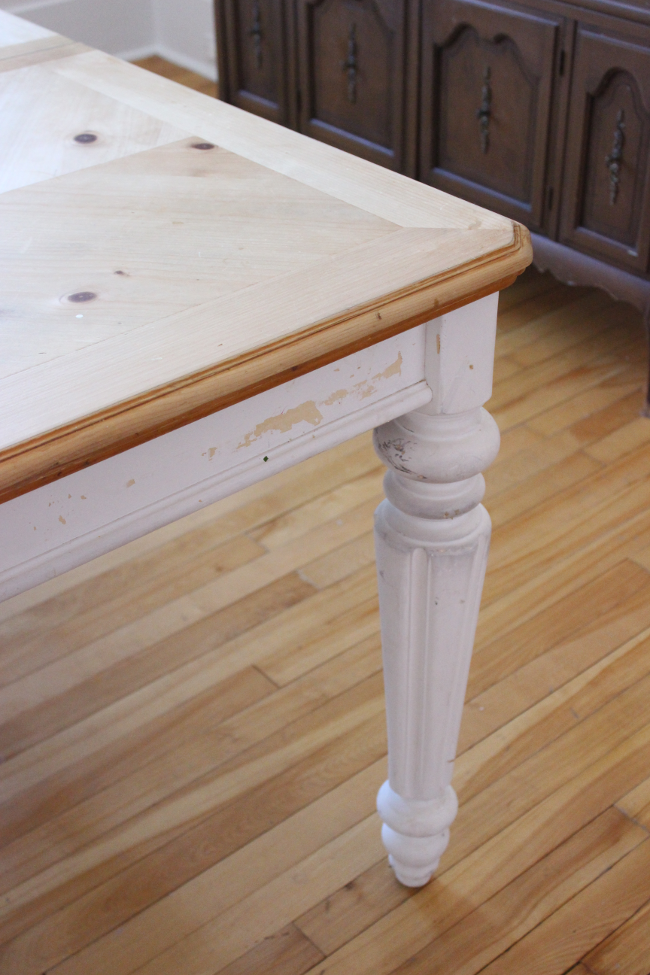
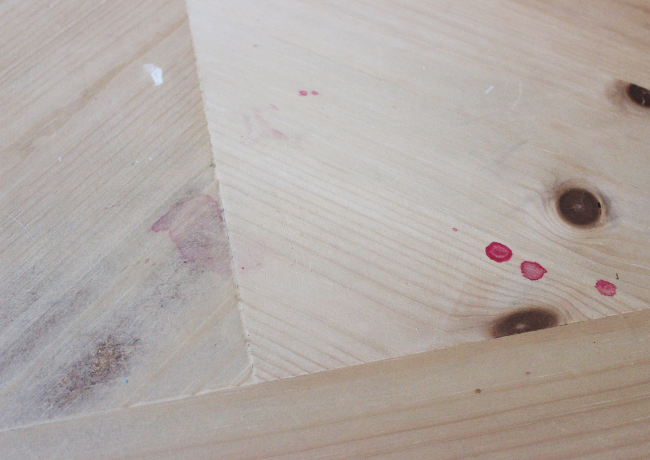
The table is for the most part solid wood, but in a deceptive way. In a few spots [as you can see on the left in the photo above] it’s some sort of MDF just beneath a thin surface of real wood. There was also no finish so the raw, untreated wood had a lot of stains it wasn’t willing to part with; nail polish, coffee and food in general. None of which could be cleaned off.

I first thought about staining the table with a wood stain, but to be honest, I didn’t like the wood pattern on the top and the already dark knots would have ended up looking even darker. My next immediate thought was to cover it in contact paper, but I was hesitant. I mean, that’s a lot of table to cover. And the edges were so fiddly.
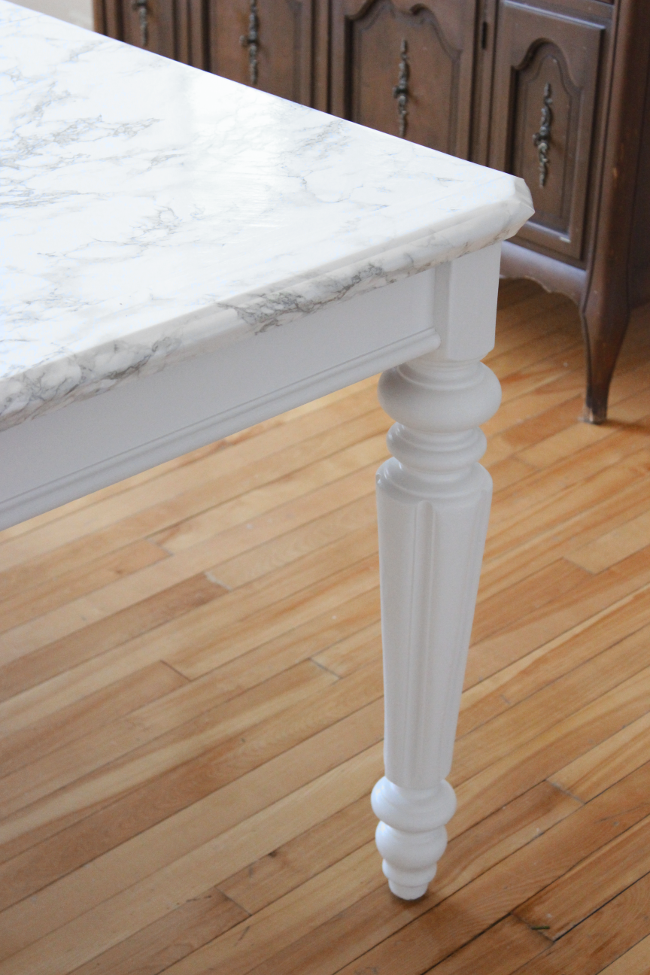
It wasn’t until a few weeks later that I finally made a decision; I was trying to once again clean a smushed blueberry from a few days previous [yay, untreated wood that absorbs everything] when a massive splinter of wood from the edge broke off into the palm of my hand. And I mean it was huge [#ThatsWhatSheSaid]; it was about 5 inches long, razor sharp and decided it would much rather hang out in my hand. What if it had broken off when Cora was around? What if it happened when I wasn’t there to see it? The mind goes to fantastic places once you become a parent, so that afternoon during Cora’s nap I took out the rolls of contact paper and got to work.
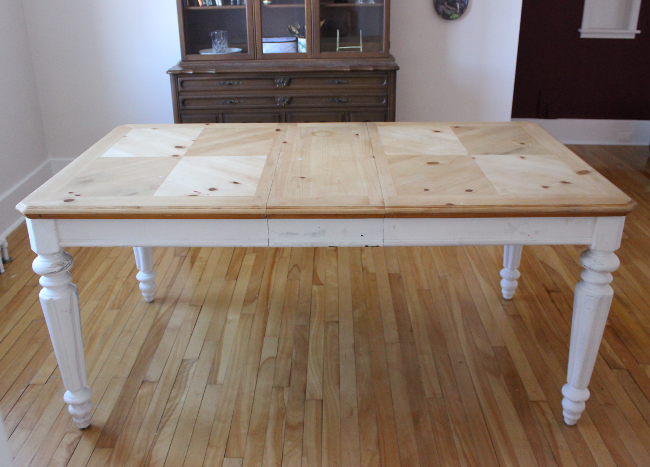
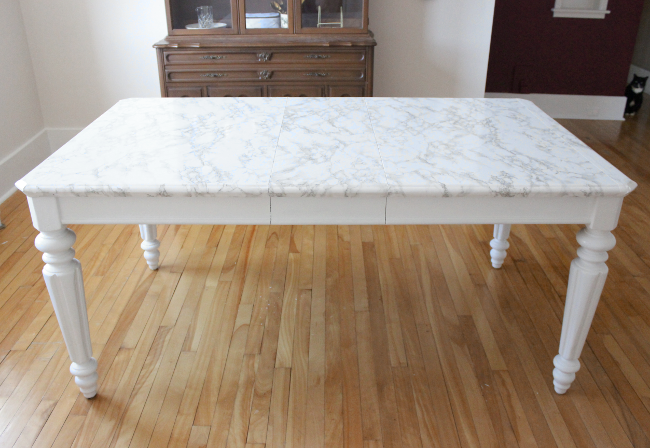
It was time consuming but easy to cover the table. I took the leaves apart and applied the contact paper one section at a time. I used the same technique I used a few years ago to cover our then coffee table – you can see the full step-by-step tutorial here! [p.s. I was about 2 weeks pregnant with Cora in those photos, but didn’t know it 💕]. I also lightly sanded the legs and applied two coats of white paint [I used some leftover Behr’s eggshell paint for baseboards and doors as it was wipe-able and held up really well throughout the dining room].

I will be the first to admit it is not a perfect update. When you stand at the end of the table you can see the wood pattern in the reflection, but only if you’re really concentrating. The end leaves of the table are much wider than the width of the contact paper so there’s a random 2-inch strip of contact paper at either end. But for us right now, this table is perfect. It fits the three of us for dinner plus the hot mess of garbage that gets dumped on it. It’s very sturdy. But above all else, it is a dream to clean. No matter what you spill or drop on it, it wipes off immediately. And when you have a toddler that is an angel one minute and the 11th member of Suicide Squad the next, that’s a deal breaker. Function > form.
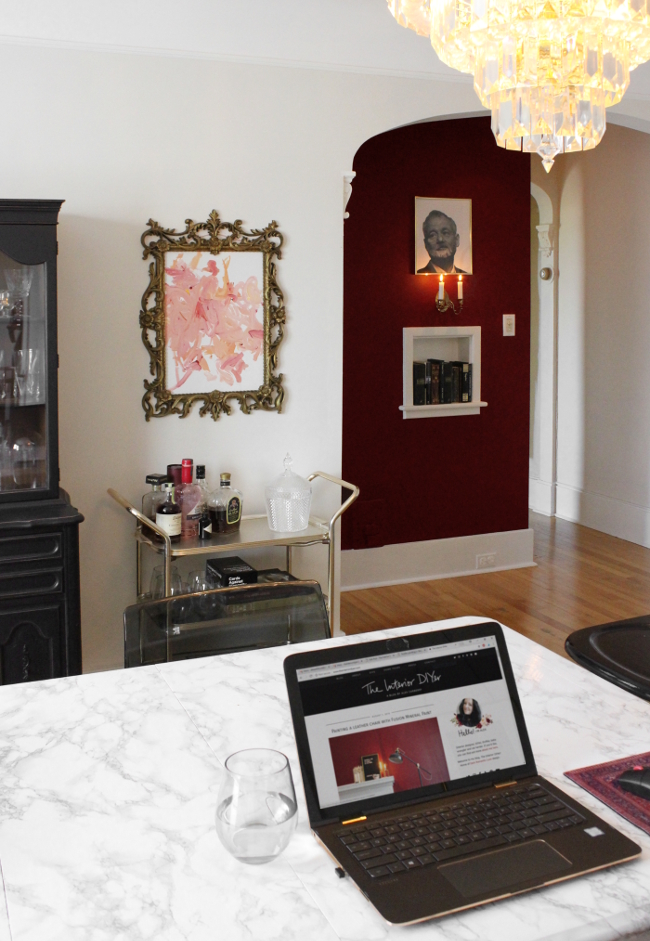
For anyone curious, I ordered my contact paper directly from the manufacturer. They said it’s available in Lowe’s here in Canada [but I couldn’t find it on their shop online], and back in Dublin I bought this exact same contact paper in B&Q.

A simple update with paint

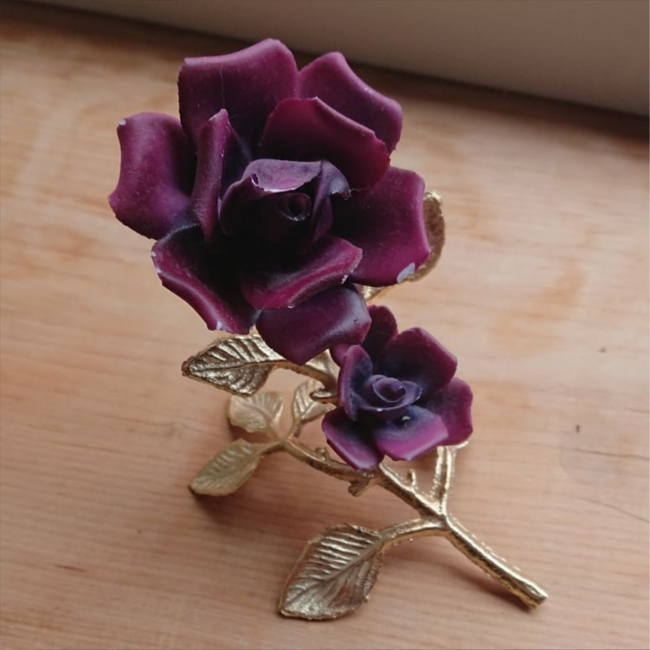
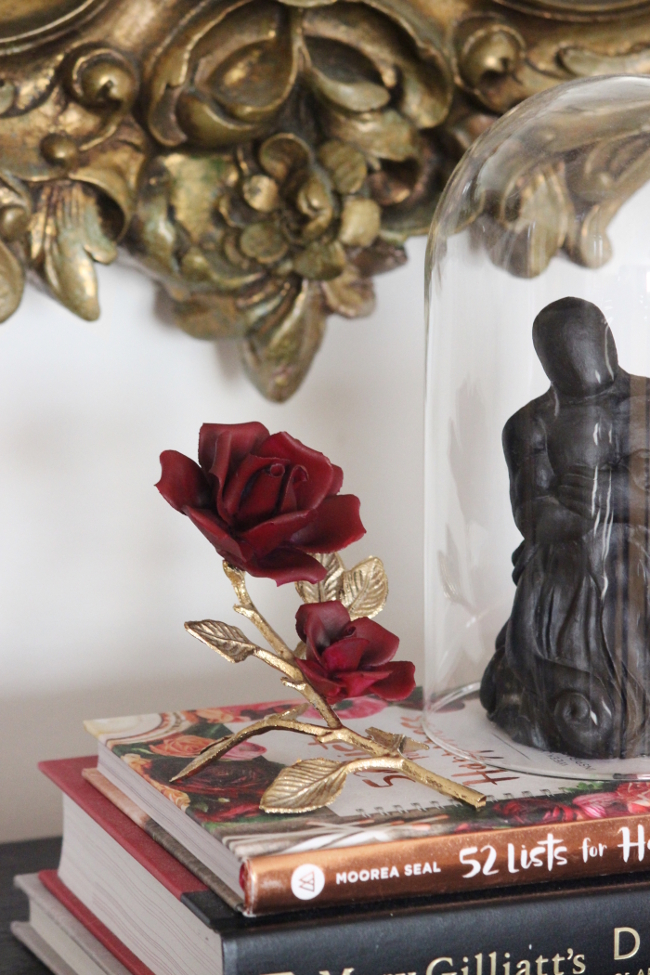
I made a really simple update this weekend to a kitschy rose I bought in Value Village a few weeks ago. The matte porcelain flowers were a shade of purple I wasn’t particularly in love with and they were also worn and chipped in a few places. I grabbed my favourite tin of Classic Burgundy paint from CIL and painted two quick coats of paint on the petals, front and back.

Though this was a really minuscule project [so small infact that I need a magnifying glass to read the likelihood of it being allowed to be even called a ‘project’], it was a kind of project I need right now; something that can be done in 20 minutes.

Have you worked on a tiny project recently? Sometimes I love tiny projects. They’re enough to get finished with a toddler running around in the background and also make me feel like I’ve achieved something other than perpetually cleaning up after said toddler tornado.

Painting a leather chair with Fusion Mineral Paint

This is quickly becoming my new favourite update in our apartment and I will admit, it is taking a lot of restraint for me to not paint all of the things now.

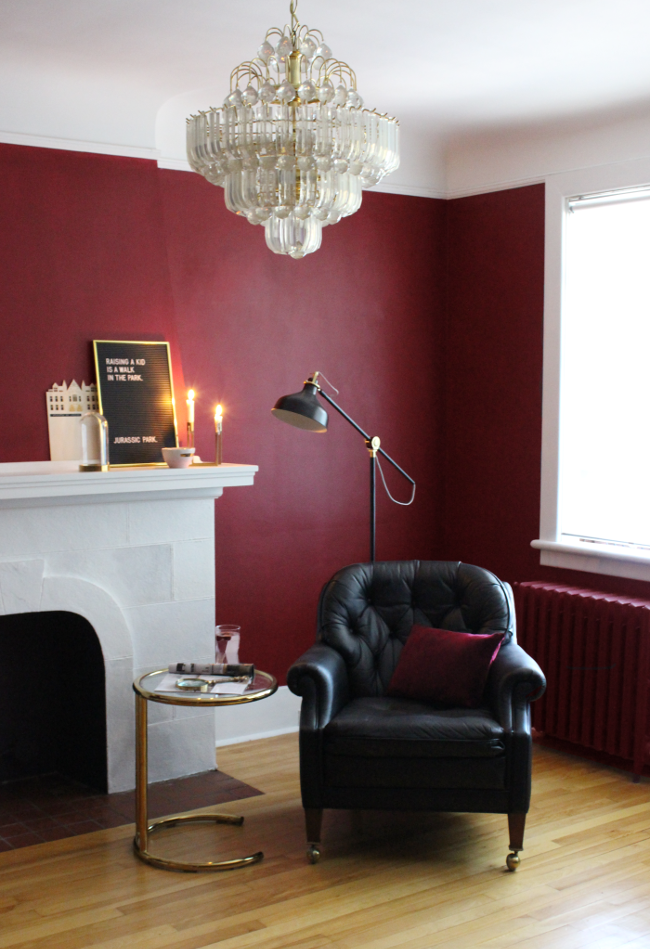
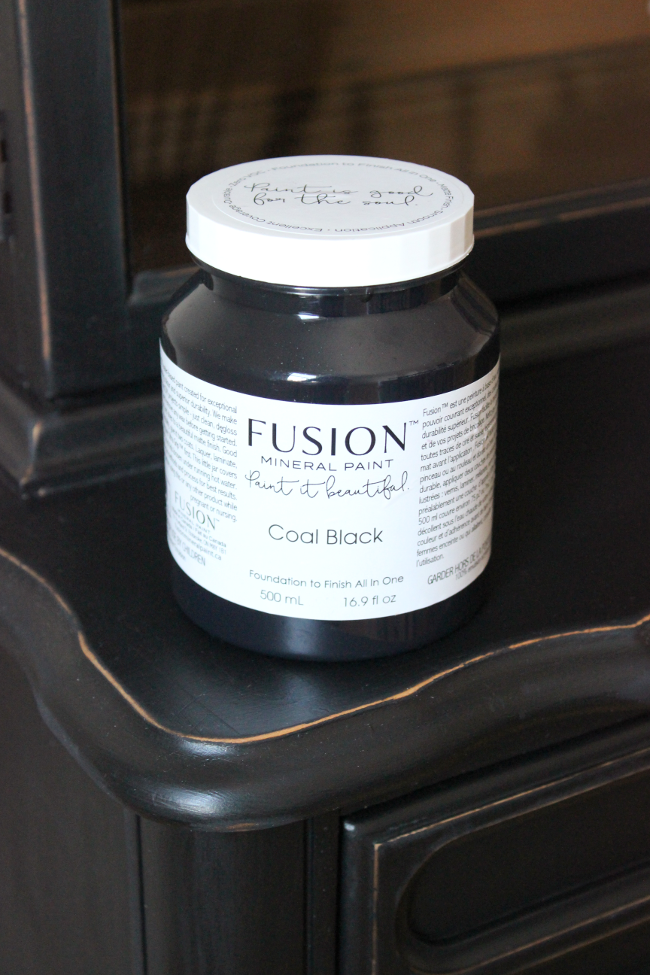
After seeing our dining room hutch update, Fusion Mineral Paint got in contact with me and offered to let them know if I had any upcoming projects in mind and they would send me some paint. I was delighted by their offer, and I of course had some projects in mind! [I never don’t have five projects in mind]. I had thrifted an incredible tufted leather armchair a few months previously so when I finally decided on updating it, Fusion Mineral Paint kindly sent me some of their Coal Black paint [and a few other colours – projects coming soon!].

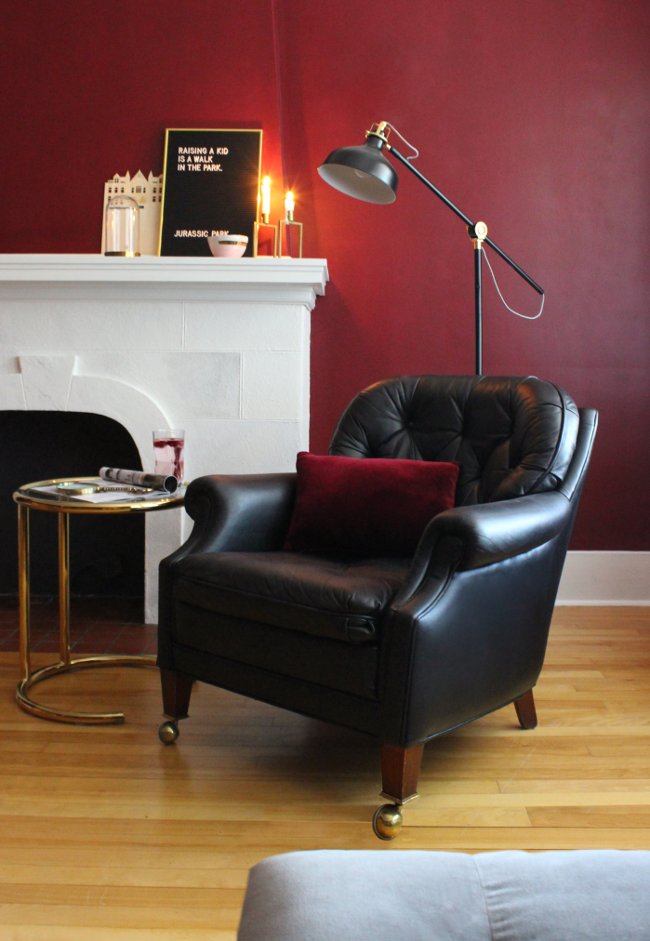
Yes, that’s right. Paint. I painted a leather chair.

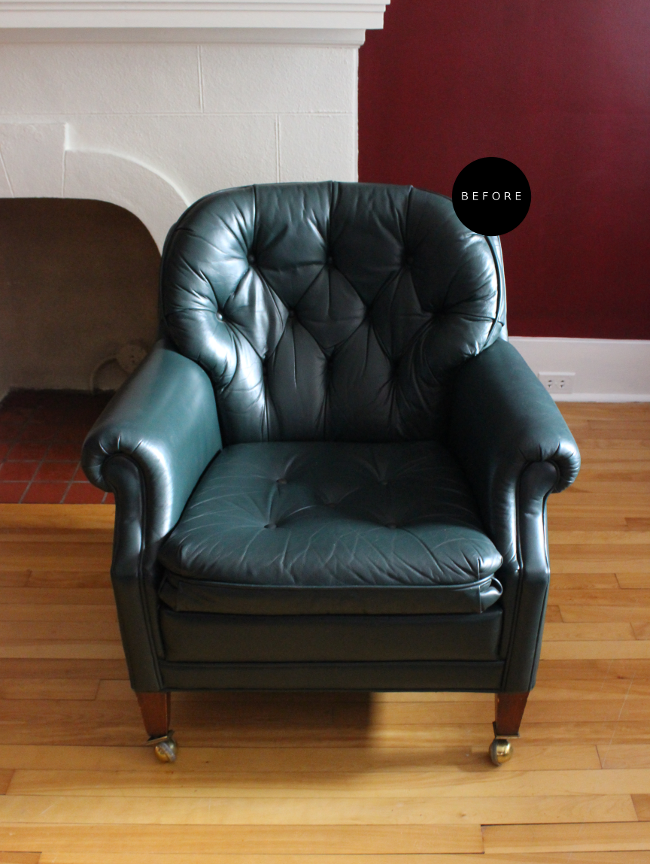
I was at our local Salvation Army in May when I saw among the sea of secondhand furniture, the top of a worn tufted green leather chair. I went straight for it, sat in it, sent a picture to Robert for approval [sometimes when I’m nervous about a piece I need another pair of eyes. Luckily, he replied in capital letters to buy it], and headed straight to the cashier to buy it.

As I told the cashier I’d like to buy the green leather chair at the back, I heard “I was so close to buying that very chair yesterday!”, by an older gentleman behind me in the queue. We chatted about our favourite secondhand finds and as I was asking the cashier about the Salvation Army’s furniture delivery service, the man offered to drop it home with me now. The cynical Dubliner in me seized because who makes offers like that other than people who drug you and then you wake up in a bath full of ice? But my new inner Ottawan knew it wasn’t weird and he was making a genuinely nice offer. Plus, he was going to be driving in our direction, so I didn’t feel too bad.

10 minutes later we were lifting my new chair out of the back of his Jeep and onto the front lawn. It turns out, one of his daughters lived not too far from us a few years ago so he was able to tell me a few things about the area. I could dedicate four blog posts to the incredibly kind encounters we’ve had since moving here. Canadians are making my cold dead heart start to grow in the Grinchiest way possible.

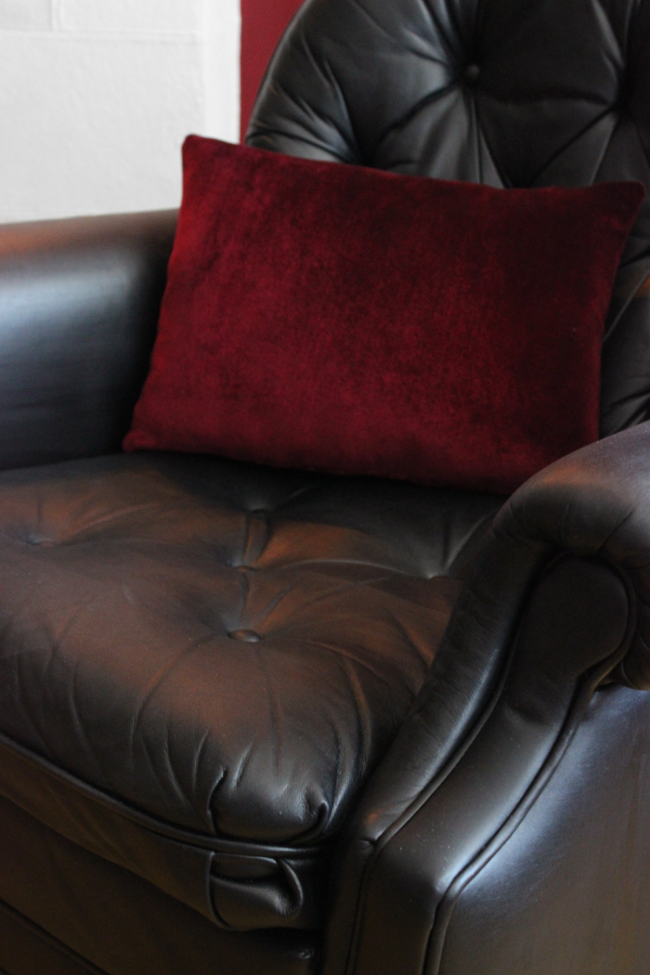
I painted a test patch of paint on the back of the chair and left it for a few days. I came back to it and it was perfect; it was smooth and in no way tacky as Fusion Mineral Paint’s Classic Collection has a soft and almost chalky finish. During Cora’s next nap, I got to work. I took the seat cushion off the chair, cleaned it all over and painted Coal Black over the entire chair. I started with the tufted creases then moved onto the less difficult areas. I waited about 6 hours between coats and painted thin layers each time, two coats in total. I then left the chair cure for a full [agonizing] day before putting the seat cushion back and testing the chair out.

You definitely don’t notice you’re sitting in a painted chair and the finish is so smooth, you can hardly see the brush strokes.

I’ll come back and write an updated post in 6 months time to give an honest review of how our painted chair has held up. So far, even though it’s just been a week, it’s been perfect. Nothing has peeled and we haven’t been delicate with it [especially considering I love sitting with one leg over the arm at any given time. I’m classy like that].

But for now I would say if you’re considering updating a piece of leather furniture in your home, Fusion Mineral Paint is the absolute perfect option. As strange as it sounds to paint a leather chair, the results are worth it.

DISCLOSURE – while this post is not sponsored, I did receive this paint free of charge from Fusion Mineral Paint in exchange for a blog post. I only work with brands that I like and of course, think you will too. Thank you for supporting the companies that support The Interior DIYer.

Shop this look!

IKEA Ranarp Floor Lamp
$59.99
Fusion Mineral Paint ‘Coal Black’
CIL Classic Burgundy
IKEA Begavning Glass Dome
$14.99
Anthropologie Mimira Candle
$24
April & The Bear Letter Board
€60
IKEA Ranarp Floor Lamp
$59.99
Fusion Mineral Paint ‘Coal Black’
CIL Classic Burgundy
IKEA Begavning Glass Dome
$14.99
Anthropologie Mimira Candle
$24
April & The Bear Letter Board
€60
IKEA Ranarp Floor Lamp
$59.99
Fusion Mineral Paint ‘Coal Black’
CIL Classic Burgundy
IKEA Begavning Glass Dome
$14.99
Anthropologie Mimira Candle
$24
April & The Bear Letter Board
€60