Dining room hutch makeover in Coal Black

I really need to update some more pieces of furniture in our home because I am SOOOOOOO happy with how our dining room hutch turned out.

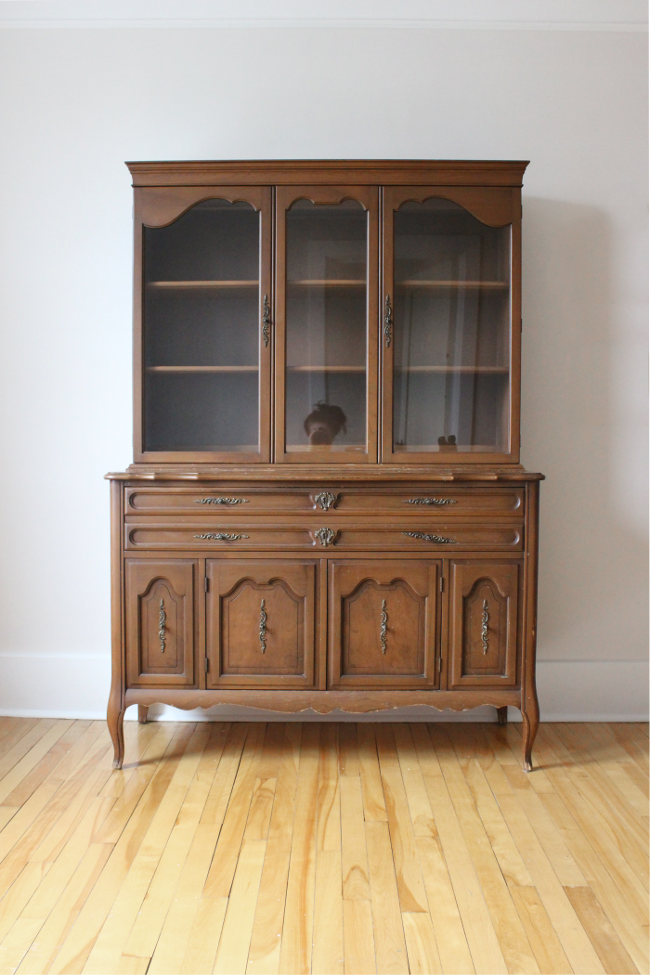
I wanted a display hutch for our dining room ahead of the One Room Challenge so I started looking online months ago because I knew that, especially when you’re looking for something specific secondhand, you need a huge head start as it most likely will not be something you will find in a week or two. Once again, Kijiji did not disappoint. I found this hutch advertised online and I loved the shape of it. The fancy little details are what really got me and I knew that while it didn’t look great as it was, it was a very sturdy piece and with a bit of paint and care, I could have it looking beautiful. A few phone calls later, the dresser was ours for just $30 [it was listed at $40, but I practiced my substandard bargaining and managed to get $10 off 💃].

I once again enlisted in GoFor‘s help to collect and deliver the dresser [and help carry it up the stairs] and that afternoon it was in our dining room just waiting for the One Room Challenge to happen.

Giant lopsided SAHM hair making a special appearance. Haiii!

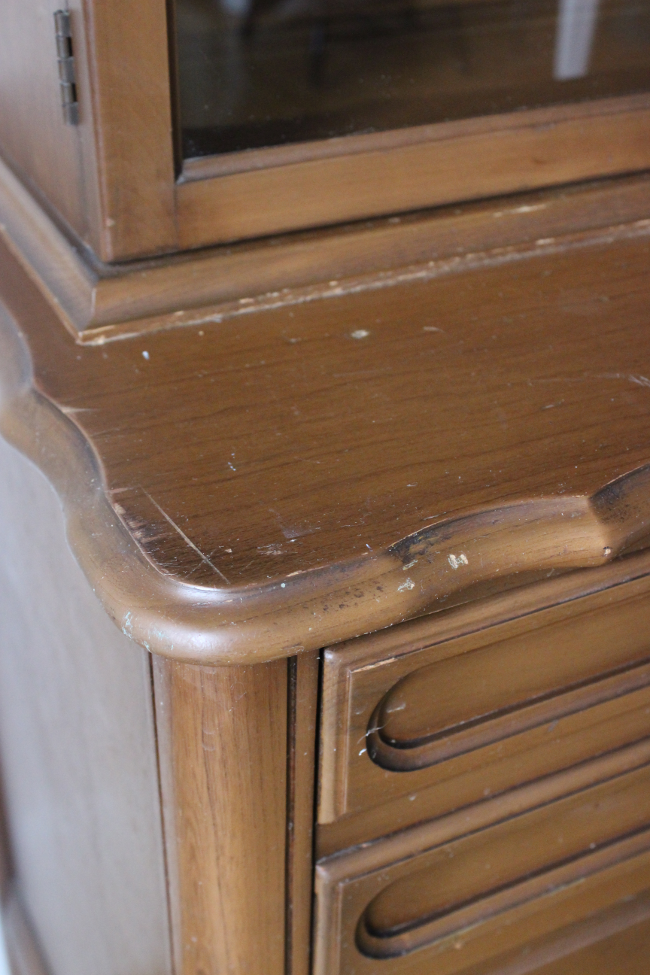
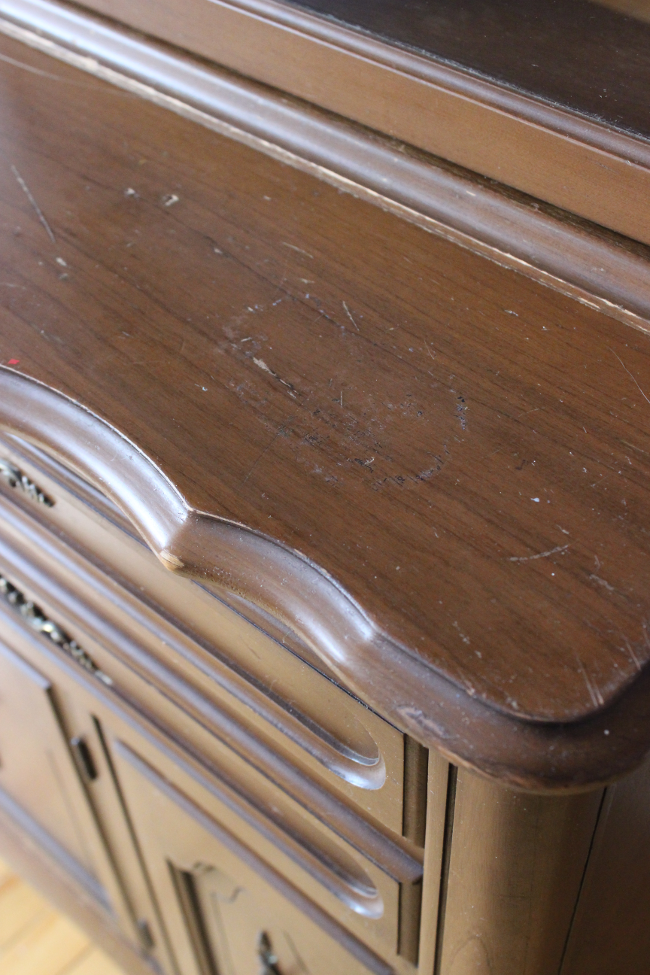
I knew from the condition and finish of the hutch that it was a perfect piece to be updated with paint. There’s nothing I hate more than seeing a beautiful piece of furniture with beautiful wood being mauled by paint. The worst ever; mahogany. Or really beautiful antiques. This hutch was neither of those so I knew I was perfect for paint.

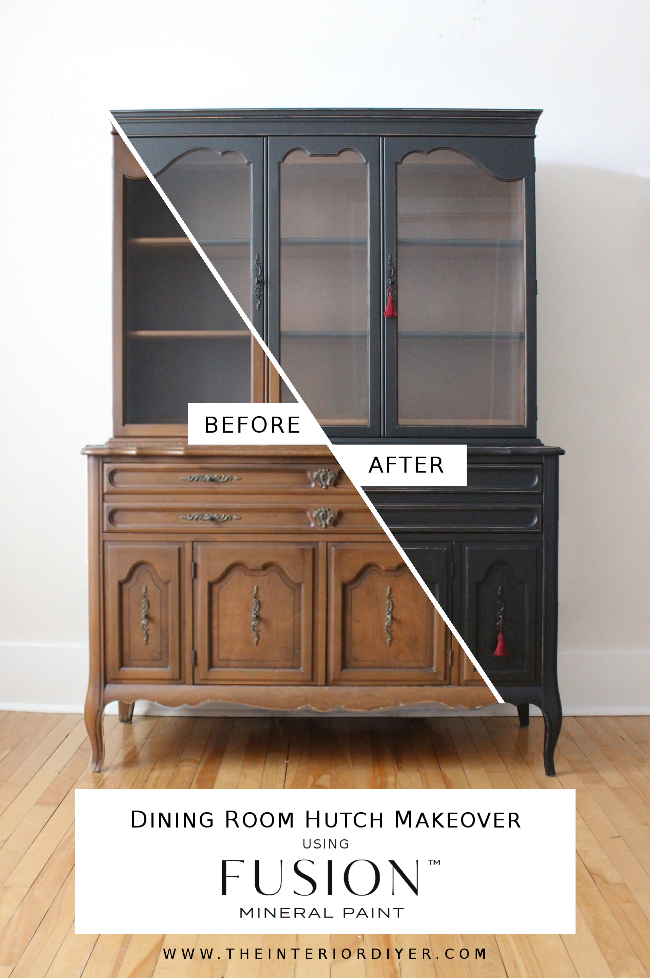
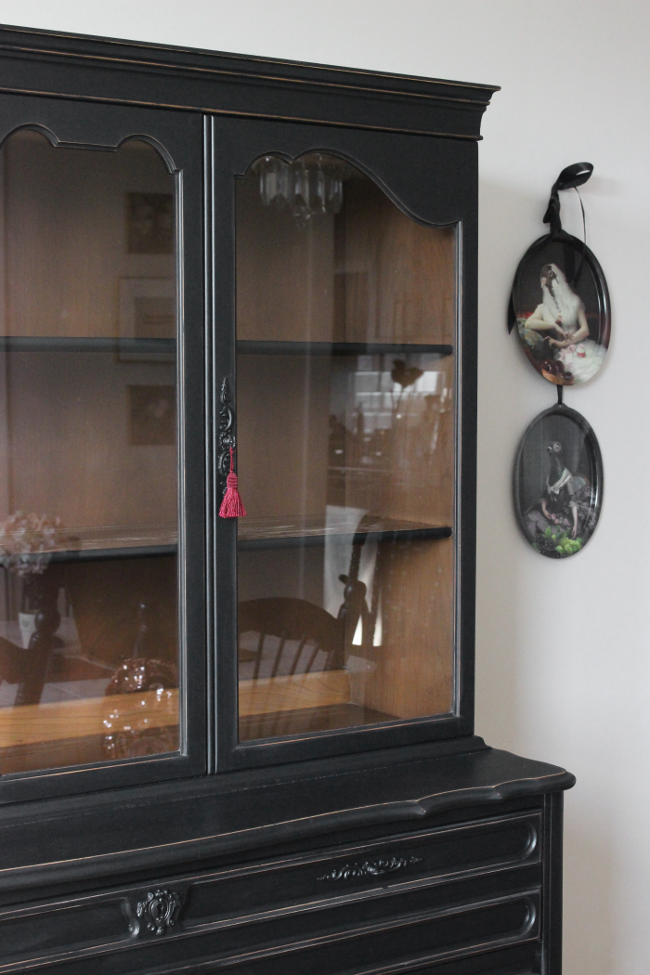
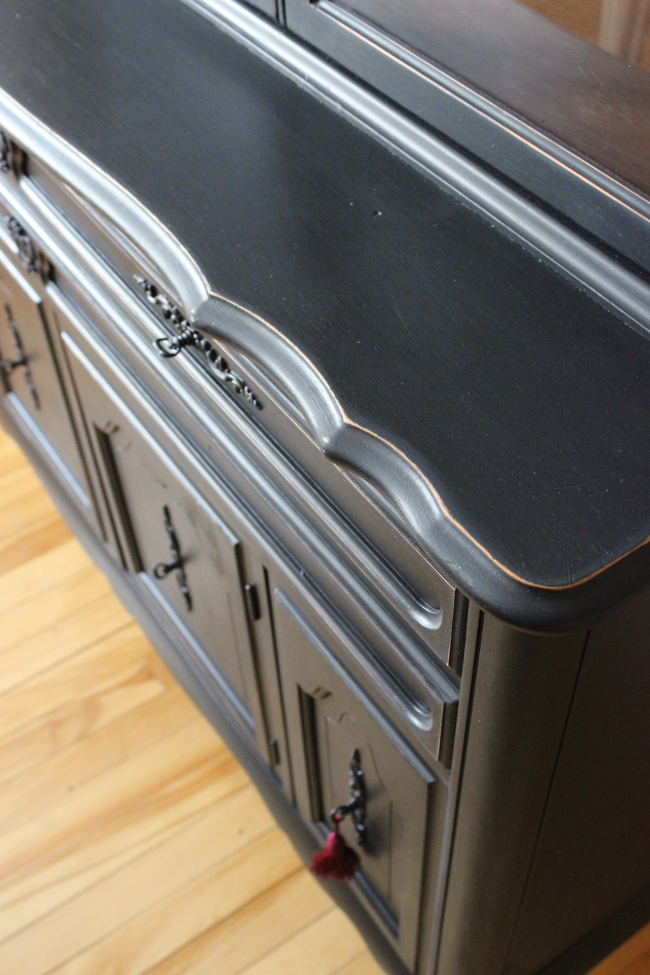
One of the first options that came to mind was to paint it black. But I didn’t want it to be overwhelmingly black, so I thought about lightly distressing it along its many edges.

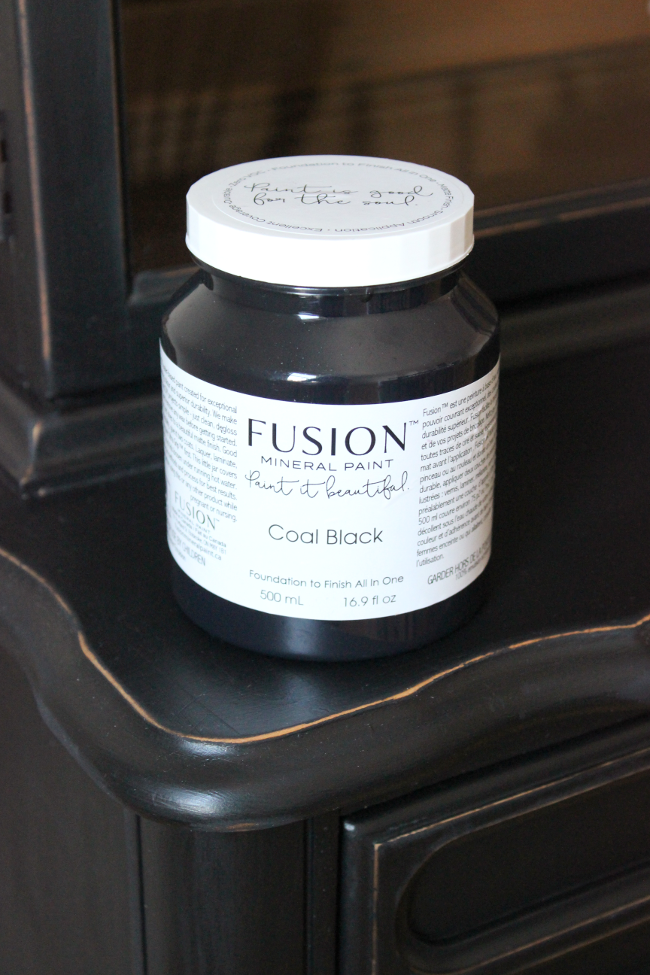
I had heard of the Canadian brand of Fusion Mineral Paint a few times since moving here, so I checked out lots of their customer projects and reviews. I loved the finish it gave and was convinced by all the reviews of their paint so I looked up our local stockist. I headed to Blue Bird Upcycle here in Ottawa and picked up a pot of Fusion Mineral Paint’s Coal Black.

I followed Erin’s advice for preparing the hutch, then painted two coats of Coal Black over the entire piece. I let it dry overnight then the next day I started distressing it with a piece of wet coarse sandpaper. It was looking so good that I distressed the entire thing in one sitting. It did take me about 3 hours [those curves around the glass were tough], but it immediately looking lovelier and lovelier is what kept me going.

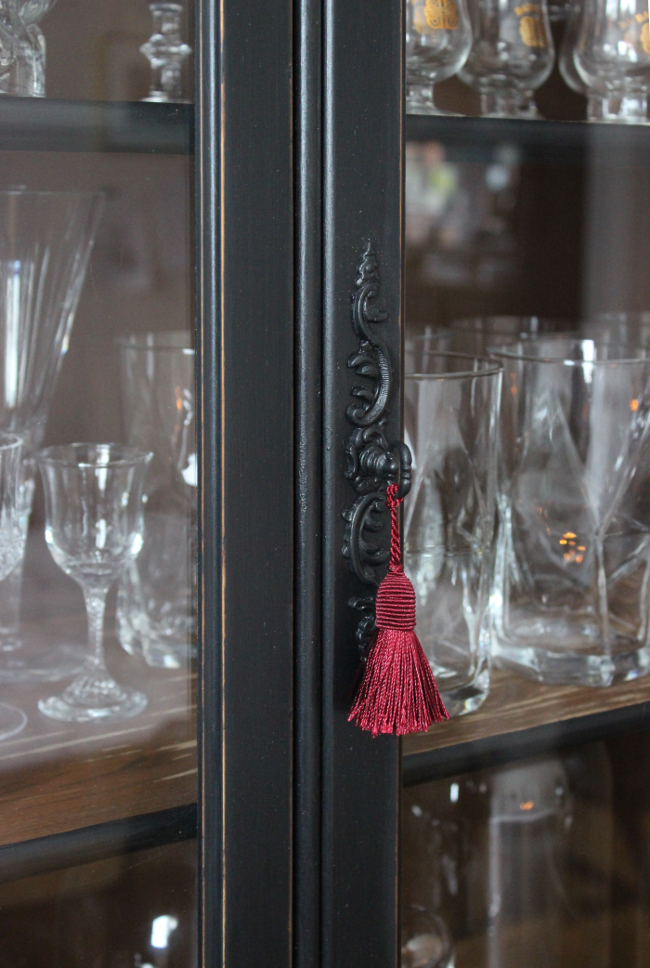
I had thought about replacing the hardware, but to be honest I liked the idea of the hardware taking a back seat. I really liked the shape of the existing hardware but it had seen better days and didn’t have a great finish, so I decided to paint over it all. I also never came to a decision about what to do with the inside of the hutch, so I left it untouched. I painted the edge of the shelves to make them stand out a bit more, but other than that, I did nothing. I kind of like leaving the original wood [or ‘wood’] finish inside the hutch. I think it warms it up a bit and makes it seem less harsh against all the black.

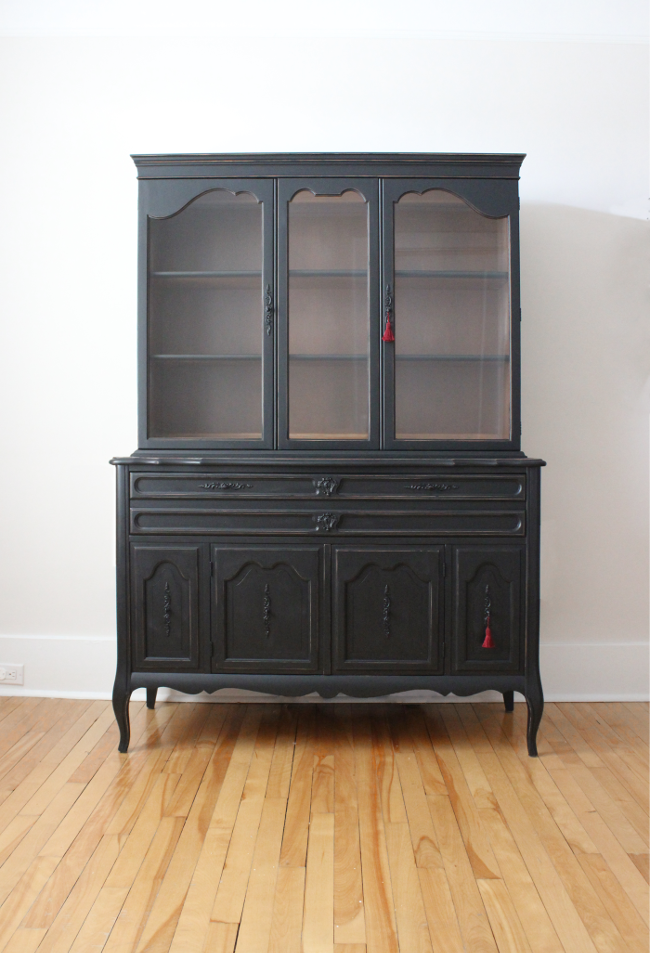
I really can’t wait to style our hutch properly and share it with the rest of the room for my One Room Challenge because our hutch looks so much better when you see it as part of the room. Not long now!

One Room Challenge Spring 2018 – Week Four!

As soon as I published last week’s One Room Challenge update, I got to work painting our dining room in CIL‘s shade of Kitten White. It was a colour that was exactly what I was looking for [and let’s not forget that absolutely excellent name], BUT, because the skirting boards, doors and window frames in our dining room were still painted yellow, they made the Kitten White walls look more like a shade of lilac. Which was unfortunately the opposite of the warm gray I was looking for. So, I was on a roller coaster of emotion and everyone in our home was invited.

But luckily, once I started painting the skirting boards white, the walls more closely resembled the warm greige I was looking for and really pulled the entire room together. I can’t explain how relieved I was. I know it’s just paint, but when you’re this far down the rabbit hole and it takes you three weeks to just decide on a colour, you want it to be right.

You can see from Cora’s bedroom door below just how yellow the walls [and skirting boards] were …

I also tried to update our dining room table this week. I painted the legs and covered the top of our dining room table with faux marble contact paper. But I’m not very happy with it. It’s not a reflection on the contact paper, but I just don’t think it works with the scale of our table in this space. The only other option I can think of is to stain the top with a dark stain, but I don’t know if that’s something I’ll do before the end of the ORC.

I did get two pieces of very good news this week! Firstly, the behemoth antique mirror I’ve been coveting since October last year will be arriving on the weekend. And, at long last, our belongings will be arriving in the coming weeks from Ireland! There are so many pieces I’ve been hoping to include in my ORC but had no idea when we would receive them. Like our love dove lamp. And our burgundy curtains. And my crow globe! And about 90 other things. It will be like Christmas morning.

To check out all the other Guest Participants and how they also did this week, you can check out the full list here!

Week OneWeek TwoWeek ThreeWeek Four – Week Five – Week Six

One Room Challenge Spring 2018 – Week Three!

After I published last weeks One Room Challenge update, Handyman Dave came over to take down the monstrosity of track lighting in our dining room and MacGyvered our secondhand Kijiji chandelier in place. Our dining room chandelier is a lot bigger than our living room chandelier and is heavy even without all the acrylic crystals. I can attest to how heavy it is because I had the embarrassing task of [trying to] hold the chandelier in my outstretched, feeble blogger arms while Handyman Dave wired it into place.

Do you want to know my favourite part of this chandelier? Its $10 price tag. It’s exactly the kind of warm and fuzzy feelings I get from hunting down really good secondhand deals.

On Sunday I got the worst part of my One Room Challenge over and done with; painting the ceiling. There are few things I hate more than painting ceilings; painting radiators would be one of them and people who don’t cover their mouths when they cough or sneeze is another. I got out my tiny stepladder and in one afternoon I managed to paint three coats of white paint over the existing orange ceiling.

Painting a ceiling is a lot like being pregnant; during the first coat you feel awful. Why did you get yourself into this situation? You’re dizzy and it takes you a while to acclimatize to what’s happening, but the second coat is much better. You feel confident. This isn’t so bad! I’m getting results! I feel great and this isn’t as hard as they said it’s going to be! Then it’s time for the inevitable third coat. You’re sore, irritable and you just want to get it over with. You want nothing more than to give up, but you know there’s only one way out of this situation and you’re left unable to walk properly once it’s all over. But the results are so worth it.

So yes, I am a total martyr for painting the ceiling and not giving up. The white ceiling immediately made the room feel better. I thought many times about why a person would paint a ceiling orange and I still cannot figure out for the life of me why [you can see our previously orange ceiling here].

But the most satisfying part of this week was finally deciding on a colour for the walls. I went three times to Home Depot to get five different CIL paint samples. I wanted to try each paint in every lighting scenario before deciding on one. Up high, down low, from the windows to the walls.

The moment I saw the name of it, Kitten White, I knew it was going to be the right shade of greige for us and luckily, it was perfect! It took a while for me to be fully convinved though as the walls in our dining room are currently yellow, so it made the Kitten White look almost lilac. So I tried painting it up by the [now] white ceiling for a neutral reference, and it looked purrfect. I also held lots of artwork [like our iBride trays I was crazy enough to pack in my suitcase when we emigrated] as well as gold accents and it looks B E A U T I F U L with everything.

It works perfectly with our Classic Burgundy feature wall which, let’s face it, is a colour that will be featured a lot in our apartment so it was important that whatever greige I chose worked with it.

I picked up 3.68L of Kitten White last night and I actually cannot wait to get painting. Also, the faux marble contact paper I ordered to recover the dining room table arrived yesterday so I’ll be updating that in the coming days. I’m also a few steps closer to painting our dining room hutch black, getting a second hutch for the other side of the room, our antique gold mirror should be here within the next few weeks and I’ll be heading to IKEA soon to try out some dining chairs. It’s slowly starting to come together, but I can’t help but panic a bit ZOMG I ONLY HAVE THREE MORE WEEKS / three weeks? That’s tons of time! I am a glass case of emotion.

p.s. Check out all the Guest Participants’ Week Three ORC updates here! There are some amazing transformations happening right now.

Week One – Week Two – Week Three – Week Four – Week Five – Week Six