One Room Challenge Spring 2020 – Week Five

With all that has happened in America [and Canada, and around the world] this past week, the usual weekly link-up for the One Room Challenge won’t be happening this week out of respect of the Black Lives Matter movement. I’ll be sharing my Week Five progress quietly here on my blog, but I won’t be sharing anything on social media as it would feel flippant.

We’re also starting the conversation about race and colour with Cora. I’ll be honest that we’ve never consciously brought it up with her before, but after much reading this week I’m realizing that is not the right way to go about it. In my innocence, the colour of someones skin is not a factor for me [not in a I don’t see colour way], but again I’m realizing talking about it with Cora is a much bigger deal. I’m researching and educating myself as a white person as how to best bring this conversation into our home to make our three-year-old understand what’s happening in the world in a way that is appropriate for her right now.

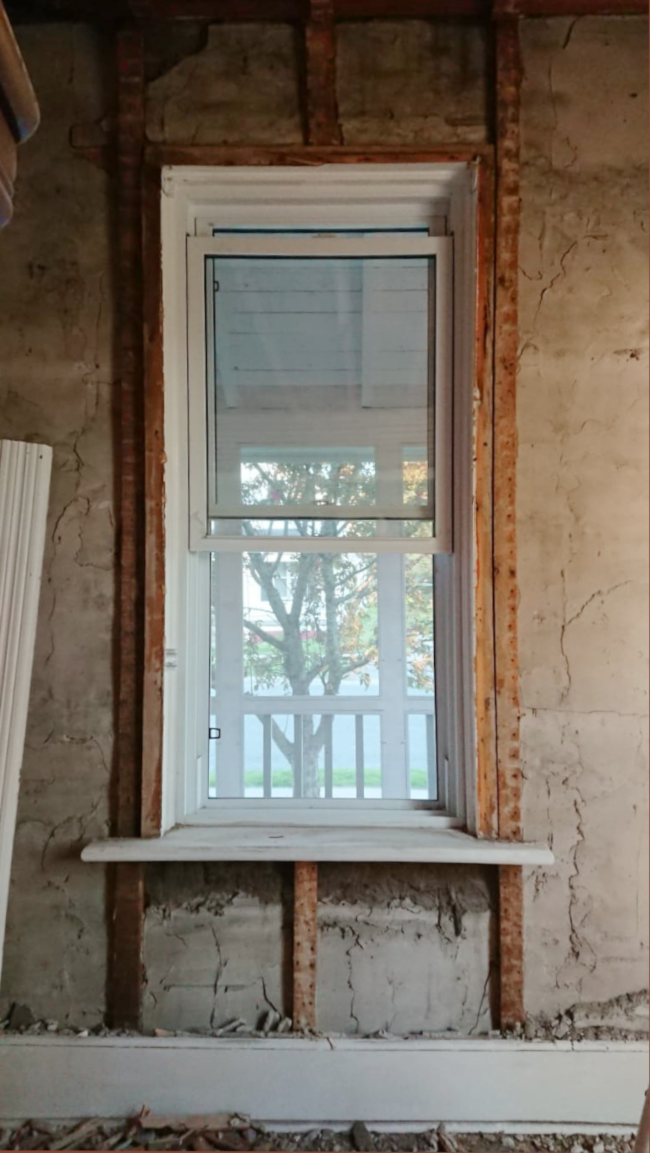
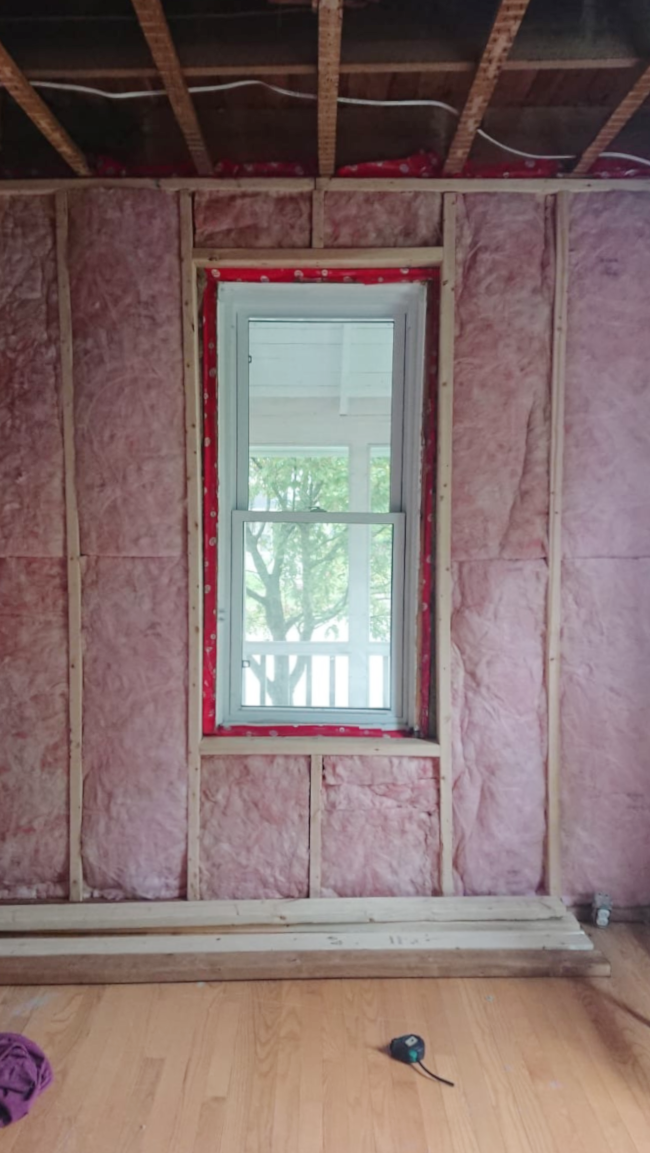
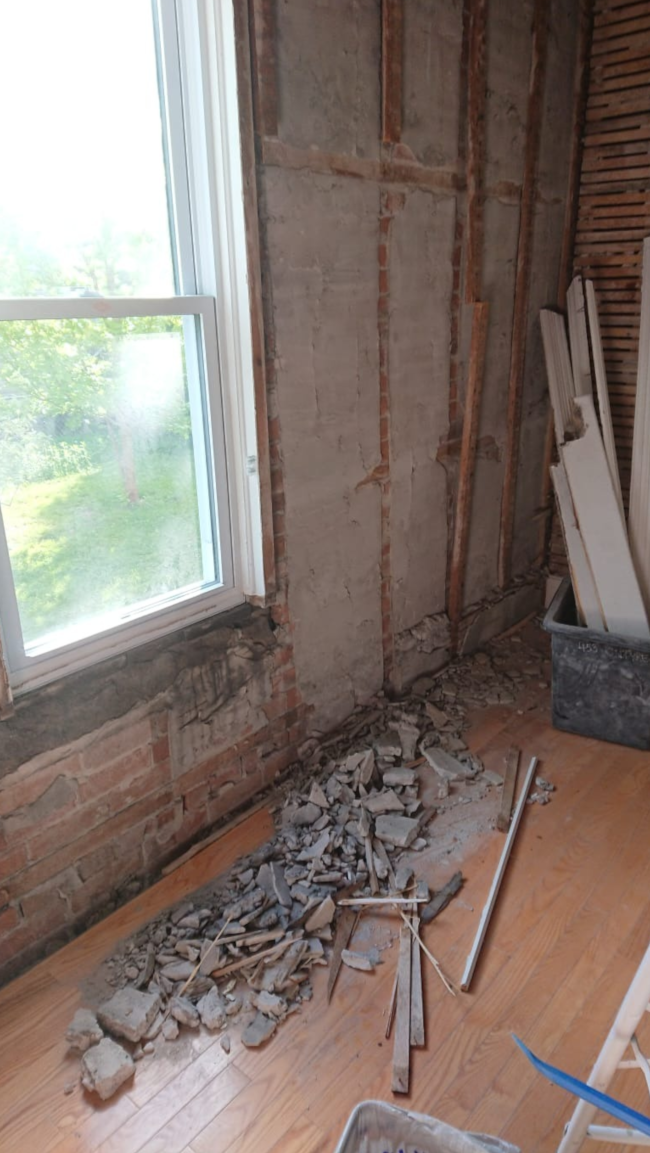
Regarding this weeks progress with my ORC, above is where I left off last week, right as I was realizing I’d have to pull everything down and start over again. Why? Because …

  • The wood slats on the walls weren’t deep enough to sufficiently house insulation nor strong enough to hold drywall
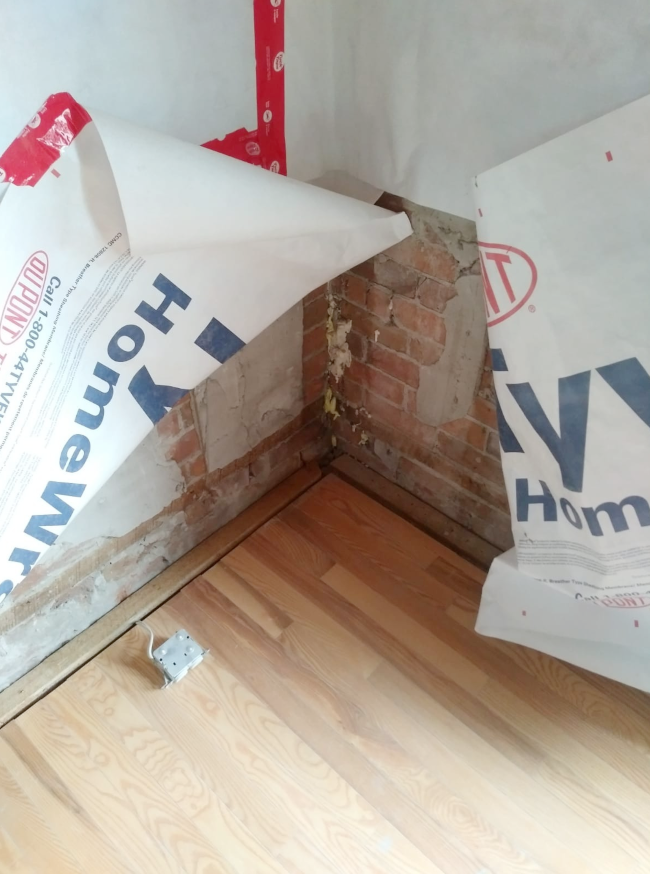
  • There needed to be another layer between the brick and the insulation. Despite my best efforts to Google “should I put stuff on brick before I insulate my super old, wonkey house?” didn’t advise I need to put a Tyvek breathable barrier up first, as advised by Dad DIYer

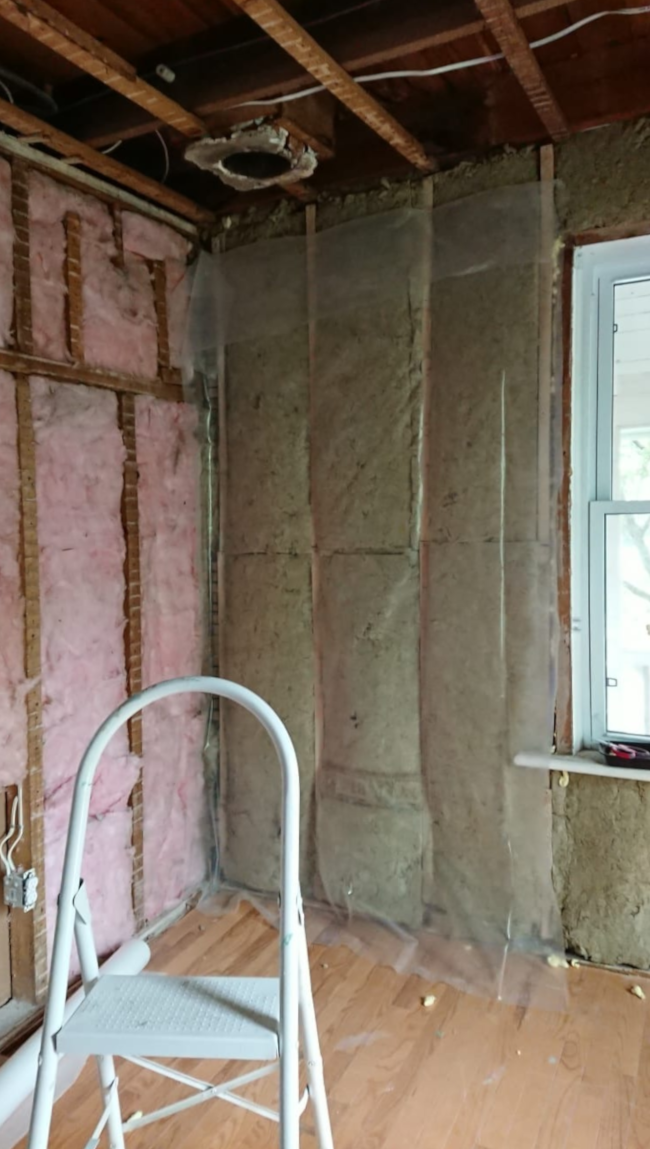
So down everything came [as seen below] and I started over again. I wasn’t upset about having to start over as I prefer to do things the right way, even if it means taking longer. But I was mentally exhausted as just to get to this point took a lot of work.

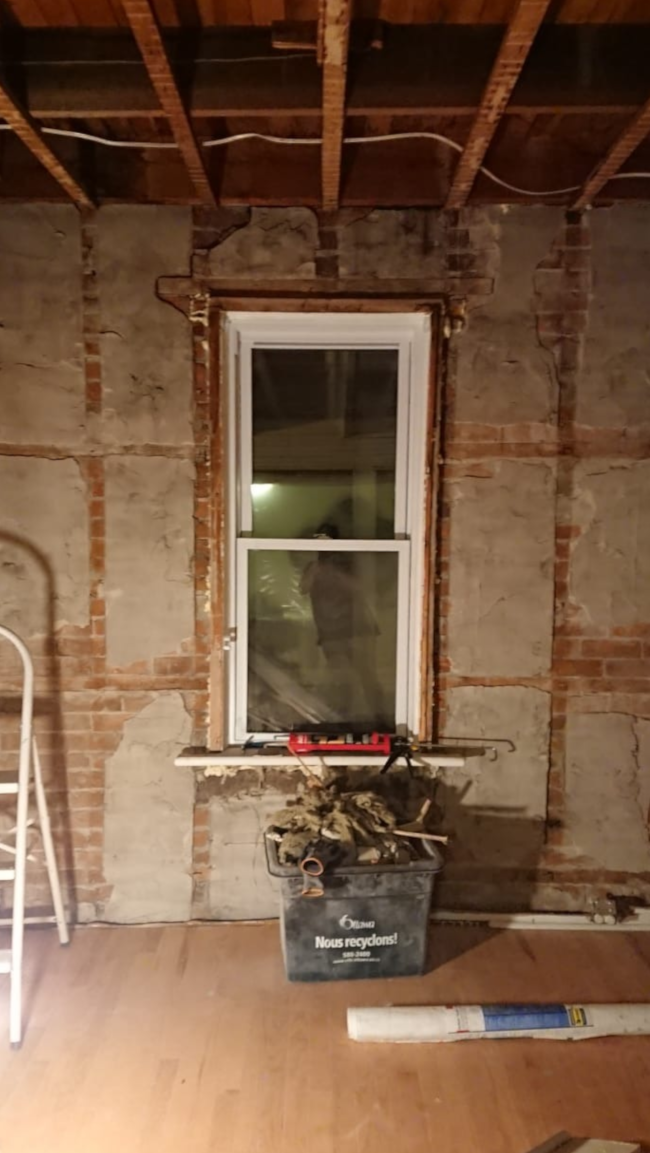
There was a surprisingly large amount of work between then and where I am now. First of all, I had to rip the wooden supports off the wall. It was easy on the front wall, but the side wall proved tricky as the slats extended all the way up to the first floor. My reciprocating saw came in handy and with a dose of PMS last weekend, I blasted the supports off the wall.

Next I had to deal with what I now refer to as The Trench; the wooden floors you see are new [about 7 years old], and whoever put in the wood floors placed them ontop of the old wooden floors and butted them up against the original skirting boards. So when I removed the skirting boards [using brute force, rage, a giant crowbar and a reciprocating saw], there was a 4-inch gap around the room which was about 2 inches deep. It was all filled with solid plaster, so that had to all be dug out and despite wearing hardy gloves, I still have plaster under my nails.

Once the plaster and old skirting boards were cleared out, I reused the old wooden slats that were on the exterior walls and placed them in The Trench to level out the floor ahead of creating a stud wall for the exterior walls.

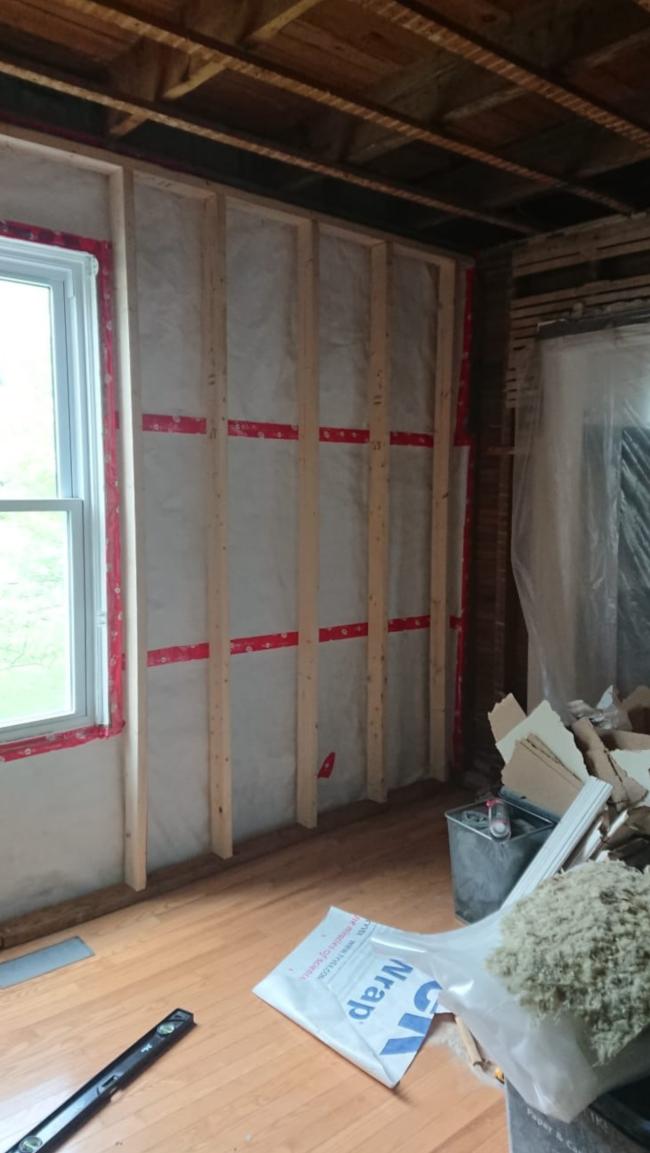
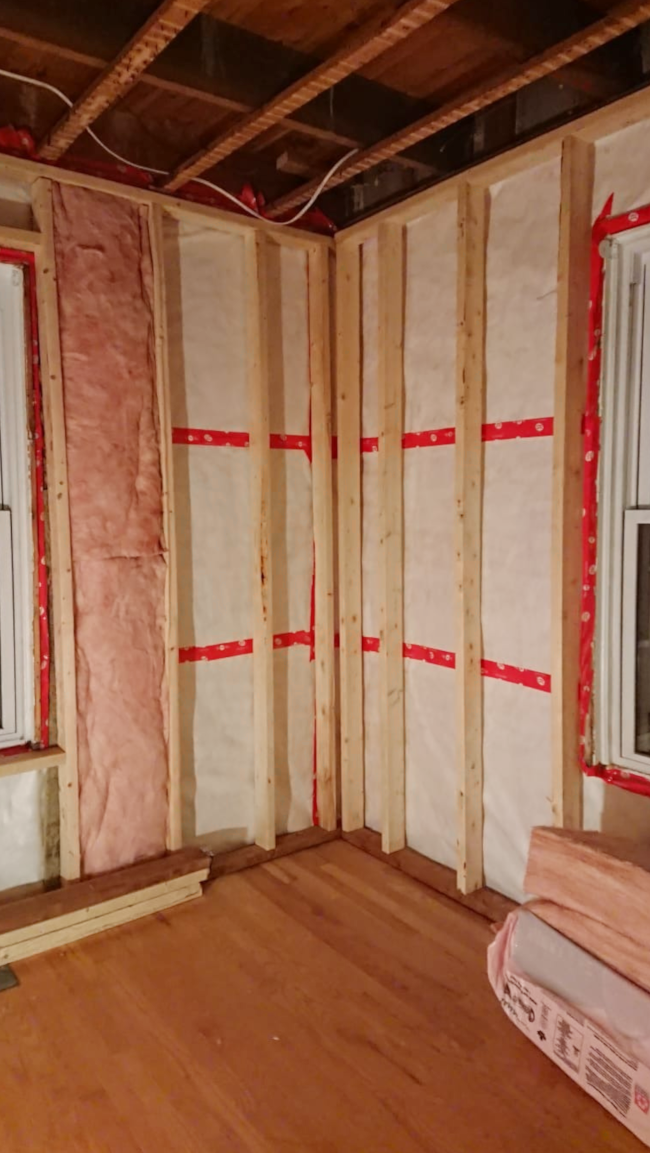
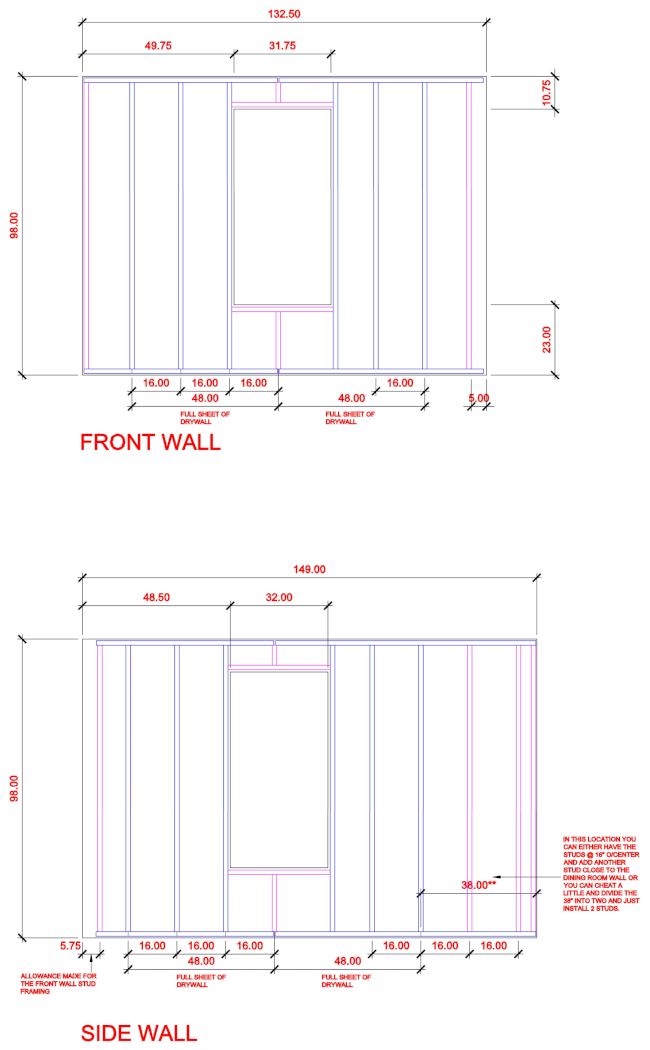
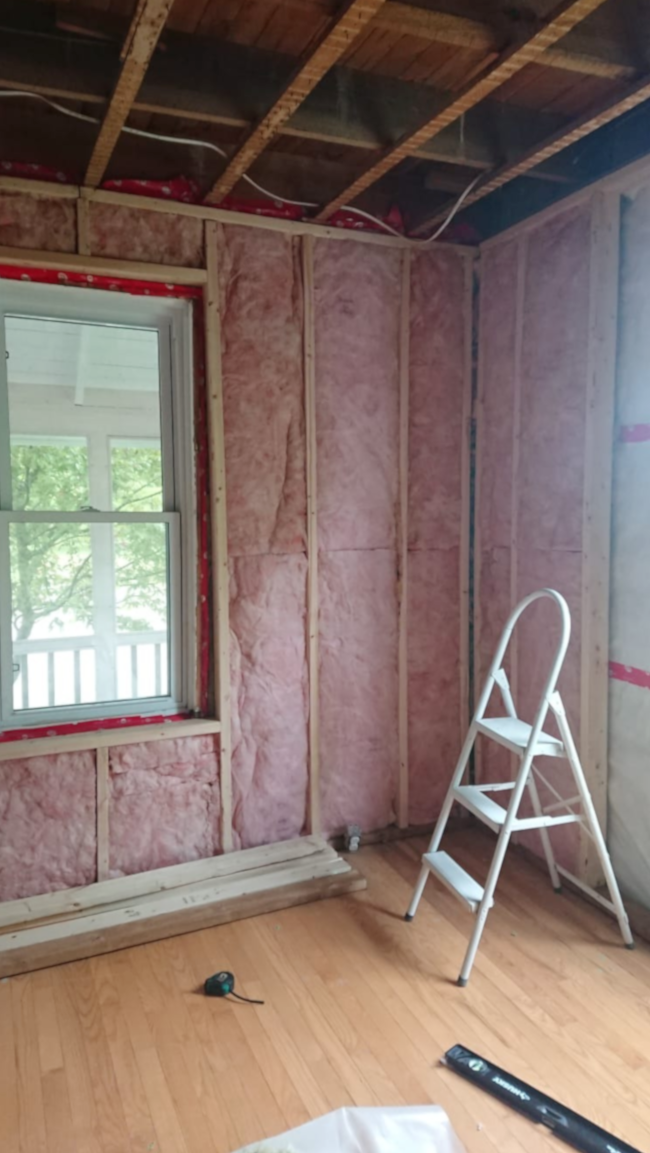
I applied the Tyvek using construction adhesive in three bands across the two exterior walls and used red Tuck Tape to help secure the seams. Over two nights I made the stud walls for both exterior walls and anchored them in place. I had done all the measuring and rough sketches for the design of the stud wall, which Dad DIYer perfected for how best to place the drywall in a way that wouldn’t have even occurred to me #InfantDIYer.

After finalizing the second stud wall last night [I’m thanking my habit of getting Cora used to loud noises when she was a baby as she slept through my excessive hammering and sawing], I had some energy left so I added one behemoth pack of insulation to the room before calling it a night.

Your eyes are not deceiving you. That window is crooked AF. The stud framing accentuates it.

It kind of looks like I’ve done nothing, but I’ve gotten so much done this past week. I’m quite proud of myself, if I’m allowed to be that honest. I’m especially proud that I didn’t fail miserably with constructing the stud walls and put them in place all by myself. Just me. MEEEEEEE! I feel I can actually claim the title of Interior DIYer now. I’ve been waiting so long to be able to work on projects like this.

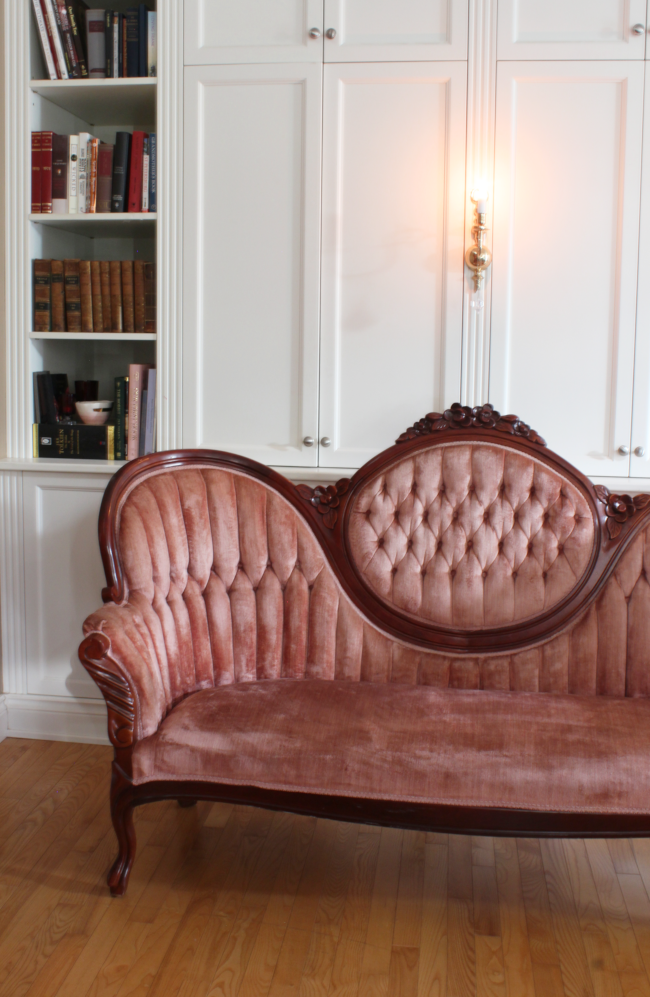
My Week Five feeling summarized into one photo:

Week One – Week Two – Week Three – Week Four – Week Five
Week SixWeek SevenWeek Eight

One Room Challenge Spring 2020 – Week Four!

It’s week four of my One Room Challenge and this week has strange feelings. It’s a feeling that starts off with look how much I’ve done! that quickly melts into holy shit, I’m half way through and I don’t even have drywall up yet, and then a ton of anxiety rises up inside of me when I realized I’ve gone one step forward and need to take two steps back. I’ll share what I got done this week, both good and bad …

I built up the courage to take off the window trim on the front wall of our front room. I found it easiest to remove the top corners first, followed by everything else. I also worked on removing the skirting board, but whoever installed the new wood floors butted the floors up against the skirting board [instead of taking off the skirting boards, putting down the flooring and then replacing the skirting boards], so the original skirting splintered and shattered as I tried to pry it off. There were many words uttered.

Last Sunday we hired a U-Haul trailer and collected some pieces for the front room. The most amazing piece being the secondhand tufted Victorian-style couch that I found on Kijiji. It. Is. Amazing:

We got a lot collected on Sunday including drywall, insulation, vapour barrier, tools and a few other essential ingredients. They all went into the back of our rented U-Haul – including the couch – and off we went.

I then built up the existing studs with leftover wood, insulated and tacked up the vapour barrier before realizing I need to rip it all off and start over again; the studs I magic-ed together won’t be secure enough so I’m going to build a new 2×4 frame to sit inside two exterior walls insulate and drywall. I had a sneaking feeling a few days ago that I’d need to start over … One step forward, two steps back, but at least I’ll be doing it properly?

Don’t bother getting me a glass. I’ll drink straight from the bottle, thank you very much.

Week One – Week Two – Week Three – Week FourWeek Five
Week SixWeek SevenWeek Eight

Secondhand tufted Victorian-style couch

I feel there’s no point adding text to this blog post because this couch is perfect.

The end.

Not wanting to miss out on an opportunity to preach about sourcing pieces secondhand for my One Room Challenge, I will continue!

I’ve been on the lookout for a statement couch on Kijiji for at least 8 weeks for our front room makeover. I wanted an over-the-top yet comfortable couch. I had a general idea of the perfect shaped couch in mind [as seen in my mock-up shared on Week One, and never did I think I’d actually get the exact shape I wanted!], but while I was looking, I was really flexible; something that’s vital when shopping secondhand. Here are the guidelines for what I was looking for in a couch:

  • Have an unusual shape, yet be comfortable enough to curl up and could read a book on
  • Ideally, be velvet
  • Have an element of drama [see: unusual shape]
  • The colour would ideally be cream / gray / pink or burgundy, but I was also open to possibly painting the couch or reupholstering it in the long run, so I wasn’t too narrowly focused on the colour or pattern
  • Be affordable [some people need their heads checked and a dose of reality. $2,000 for a 40+ year-old couch is not a good deal]
  • The couch actually be available / not be ghosted by the seller

A combination of all of the above makes for a bit of an arduous journey, BUT BE PATIENT. IT WILL PAY OFF IN THE END. Trust me. I’ve been buying secondhand for years now and you have to be patient. That’s why I started looking for a couch well ahead of the ORC beginning. It takes time, sometimes months, but that’s all part of the hunt and makes the final find that much sweeter.

I had this couch saved for a long time but it took me weeks to contact the seller because it was outside of our budget [and I didn’t want to come across as insulting by lowballing the price]. It was advertised at $600 and after a few messages we agreed on $400 for the couch. My budget was $300 [which in fairness, was a number I randomly chose], but this was definitely one of those situations where if I didn’t get this couch, it would haunt me forever, so I was flexible. And I’m so glad I was because LOOK AT MY GORGEOUS NEW VAMPIRIC COUCH.

Check out My Top Tips for Buying Secondhand Items Online blog post, which details the four techniques I use to win at secondhanding. One of these ‘techniques’ got $200 off the final price of our couch [though, it’s not really a technique so much as just being a human person]. Check it out!

Click through to four top tips for sourcing secondhand pieces online! #Secondhand #Thrifted