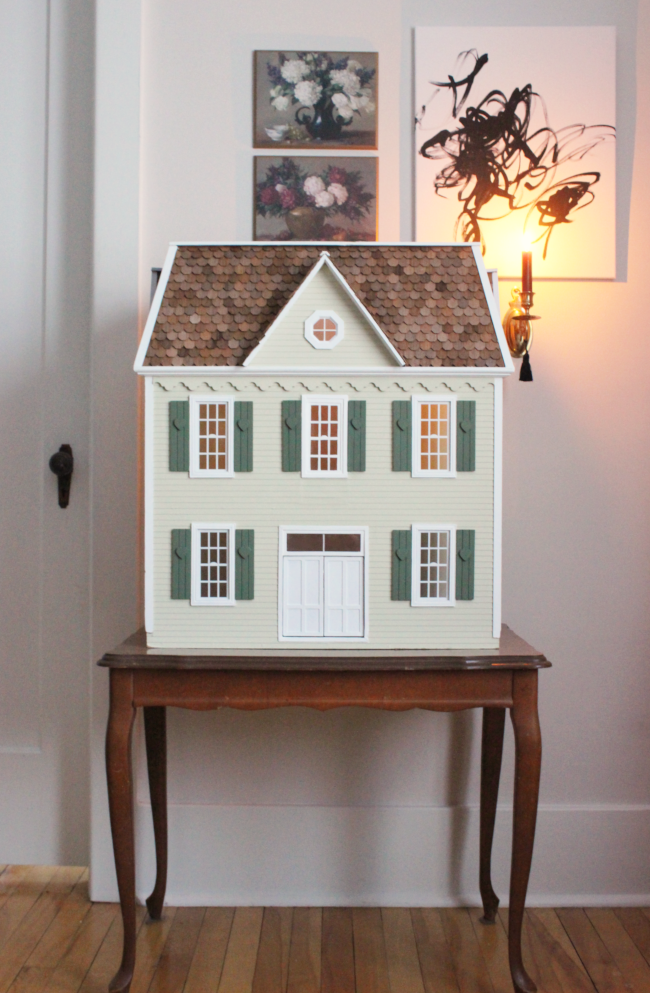
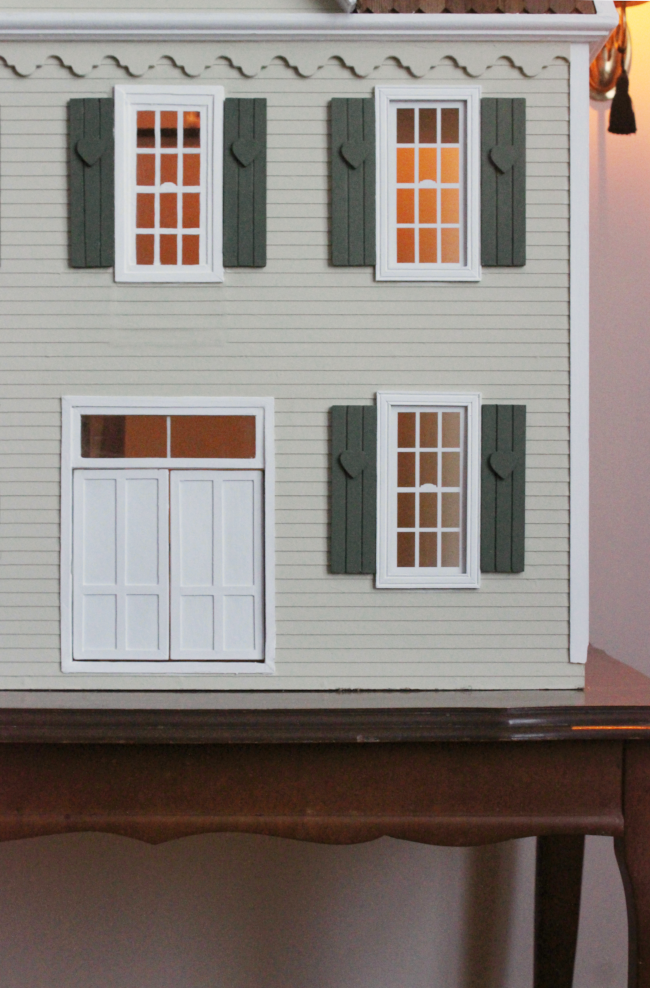
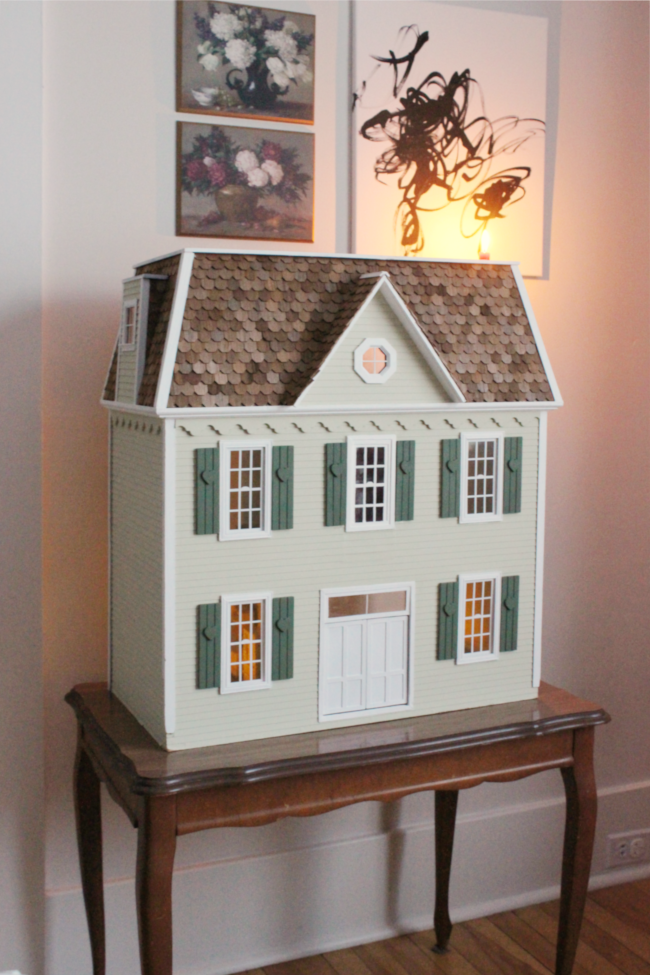
After many late nights hunched over tiny pieces of cardboard, glue and paint, the exterior of Cora’s [now called “Lower Town Dollhouse” because I do love consistency] is finished! It was fiddly and intricate and involved a lot more planning than I anticipated, but I absolutely loved updating this dollhouse ahead of Christmas. It was immediately worth it as soon as Cora saw it on Christmas morning.
Here’s a reminder of what the outside of Cora’s dollhouse looked like when I first bought it [secondhand on Kijiji for $45] …
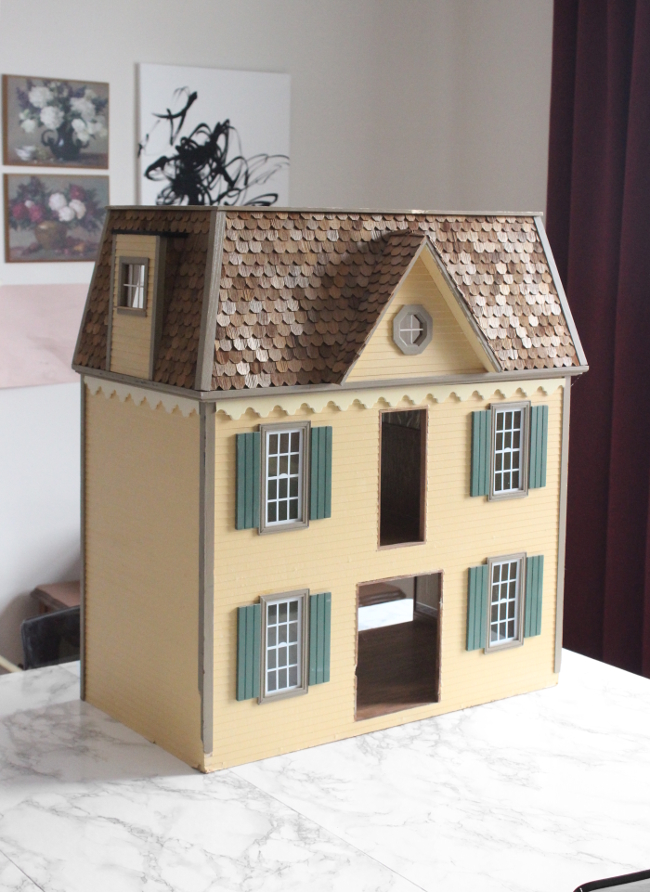
It was in good condition, but at the same time it had no front doors and was missing possibly a door [?] on the second floor. Or a window? Or a porch? Or a portal into another dimension? I don’t know the purpose of it or what it was, but while I thought about what to do with that gap, I decided on some colours for the outside of the dollhouse.
I knew quite early on that I wanted to paint the outside of Cora’s dollhouse a shade of green. I mean, for a moment I did consider burgundy, but I wanted it to be light and fun and for her. While secretly also being for me, so I just made it my second-favourite colour instead of my favourite colour. See? Compromise.
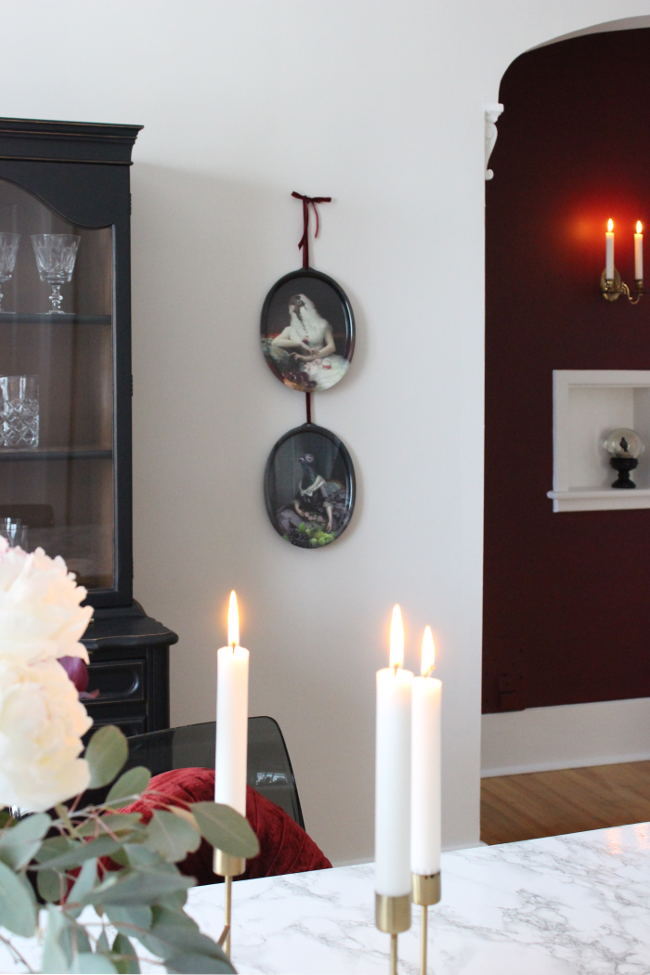
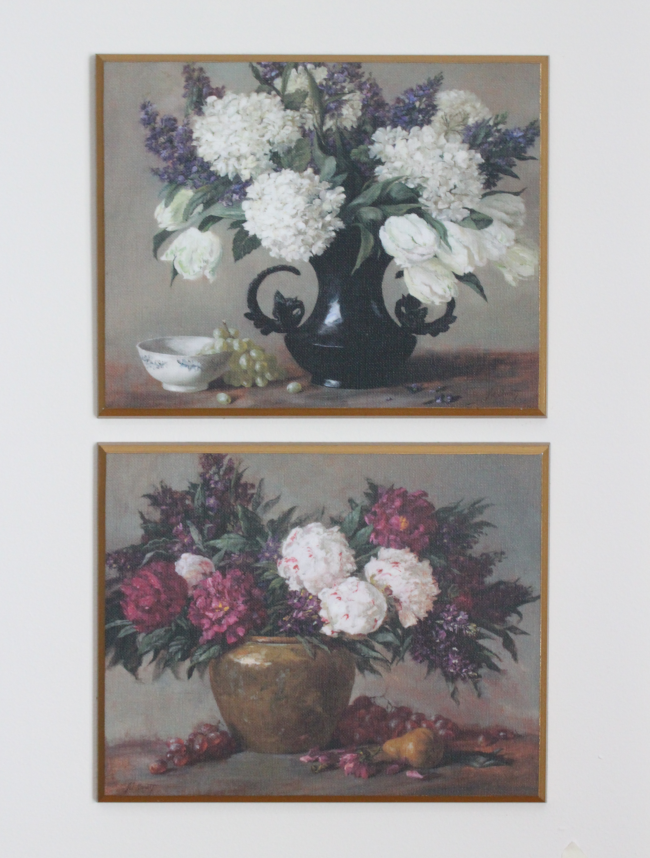
I really like natural, muted, mossy, historic, sagey greens and ended up taking inspiration from the two floral paintings [above] I thrifted for my One Room Challenge. I really liked the neutral background shades and so I matched that as best as I could.
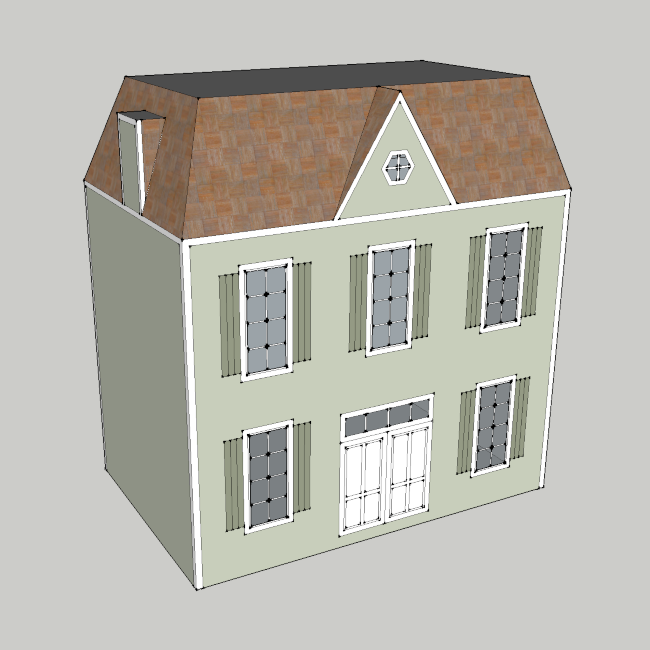
Before I commited to any paint, I did a mock-up on Google Sketch-Up to see what combination of colours would look best. I picked up some DecoArt’s Americana Decor Chalky Finish paint in ‘Revive’ green from Michael’s with an accented darker shade of ‘Light Avocado’ from DecoArt’s Americana Acrylic paint for the shutters. I decided white trim all around would be a perfect accent to top it all off.
I next decided to tackle the front doors. Or, lack of front doors.
It was a large opening so right away I wasn’t going to make just one door. It looked strange and a bit off-scale to have two tall, narrow doors so I decided to make two doors with a transom above them because hello my name is Alex and I’m a glutton for punishment and why take the easy route when you can make things four times harder for yourself?
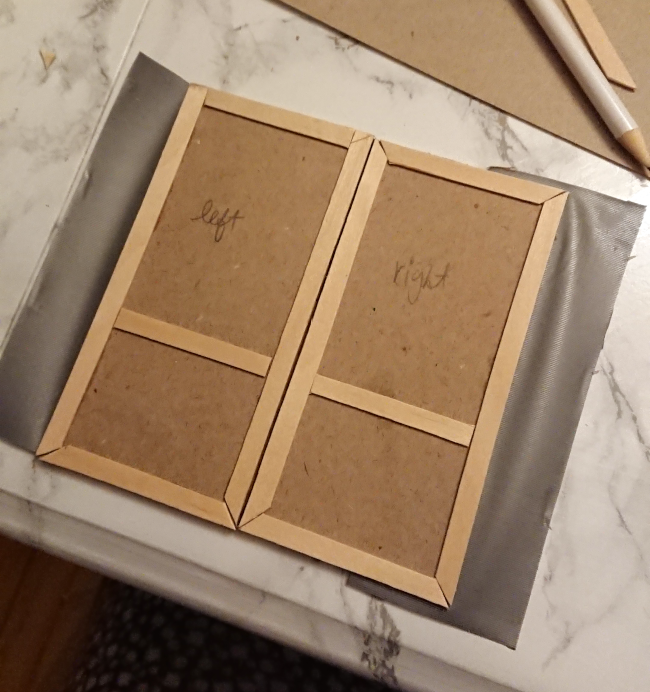
I made the doors using recycled cardboard, coffee stirrers, duct tape [as door hinges], glue, wood filler and white paint. I watched this YouTube video to get an idea of how to make dollhouse doors, but I didn’t follow it as I didn’t have a lot of the fancy materials at hand, so I made a simpler version. To give you a quick rundown of how I made the dollhouse doors, I …
- Cut two identical pieces of 1mm thick cardboard per door [so for two doors, four pieces of cardboard]
- Add a flap of duct tape to one piece of cardboard then glue two pieces of cardboard together
- Cut coffee stirrers with scissors and create a panelled door pattern on each side of the door [as seen above]
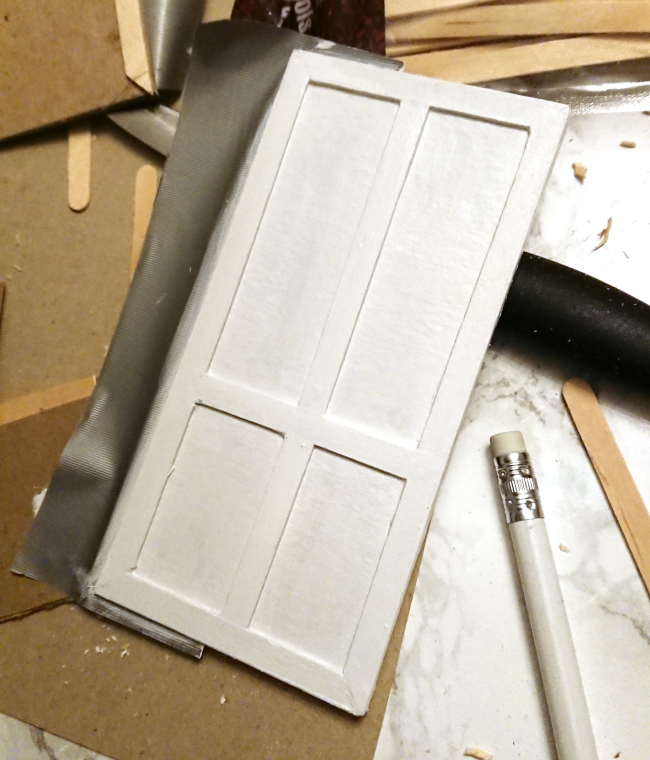
- Fill in any gaps in the wood with filler
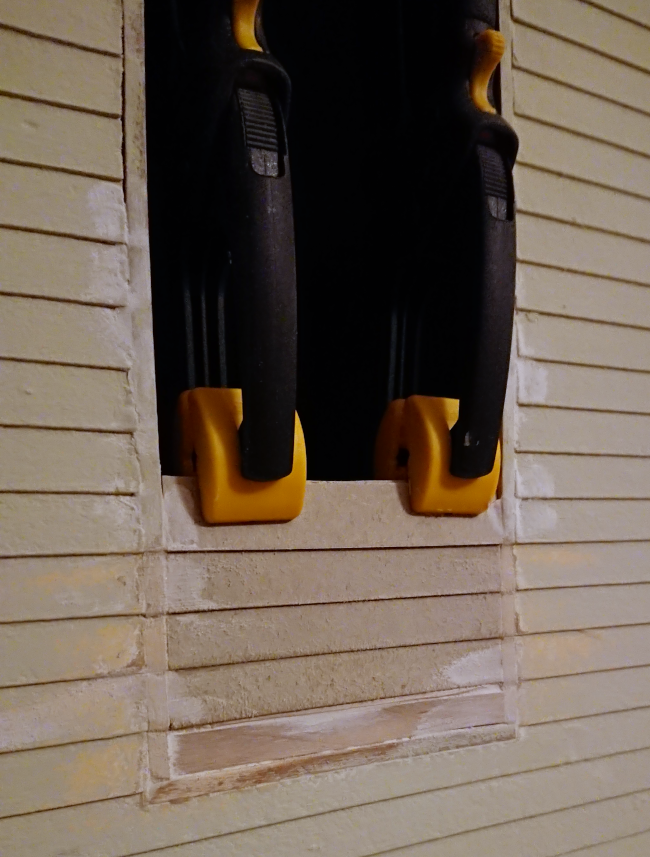
- Let the filler dry, then paint [as seen below]
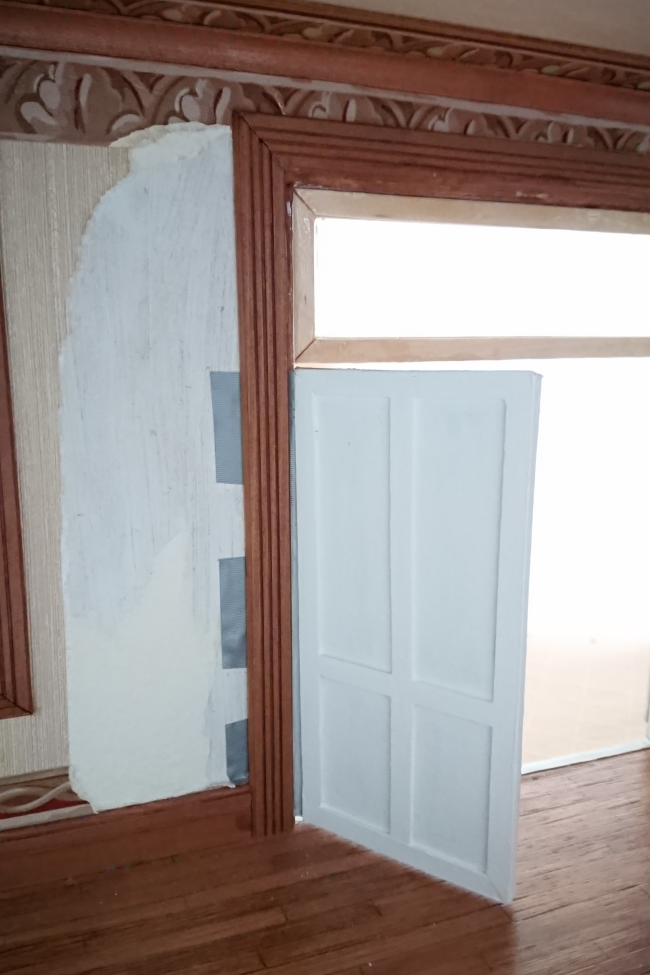
I used the last four minutes of this YouTube tutorial for how to install the doors. In short, I removed the trim from the inside of the dollhouse, glued the duct tape in place to the wall, then glued the trim back on. I was surprised at how perfectly functioning little set of doors they turned out to be! I did the same for the transom except used leftover plastic from a fruit punnet as the window pane.
Next, I started work on the other massive hole above the doors. I decided the best looking option would be to try and mimic one of the existing windows. Remember, I don’t like making things easy for myself. This is a recurring theme you will find throughout my blog. So why not make an intricate little window? No problem.
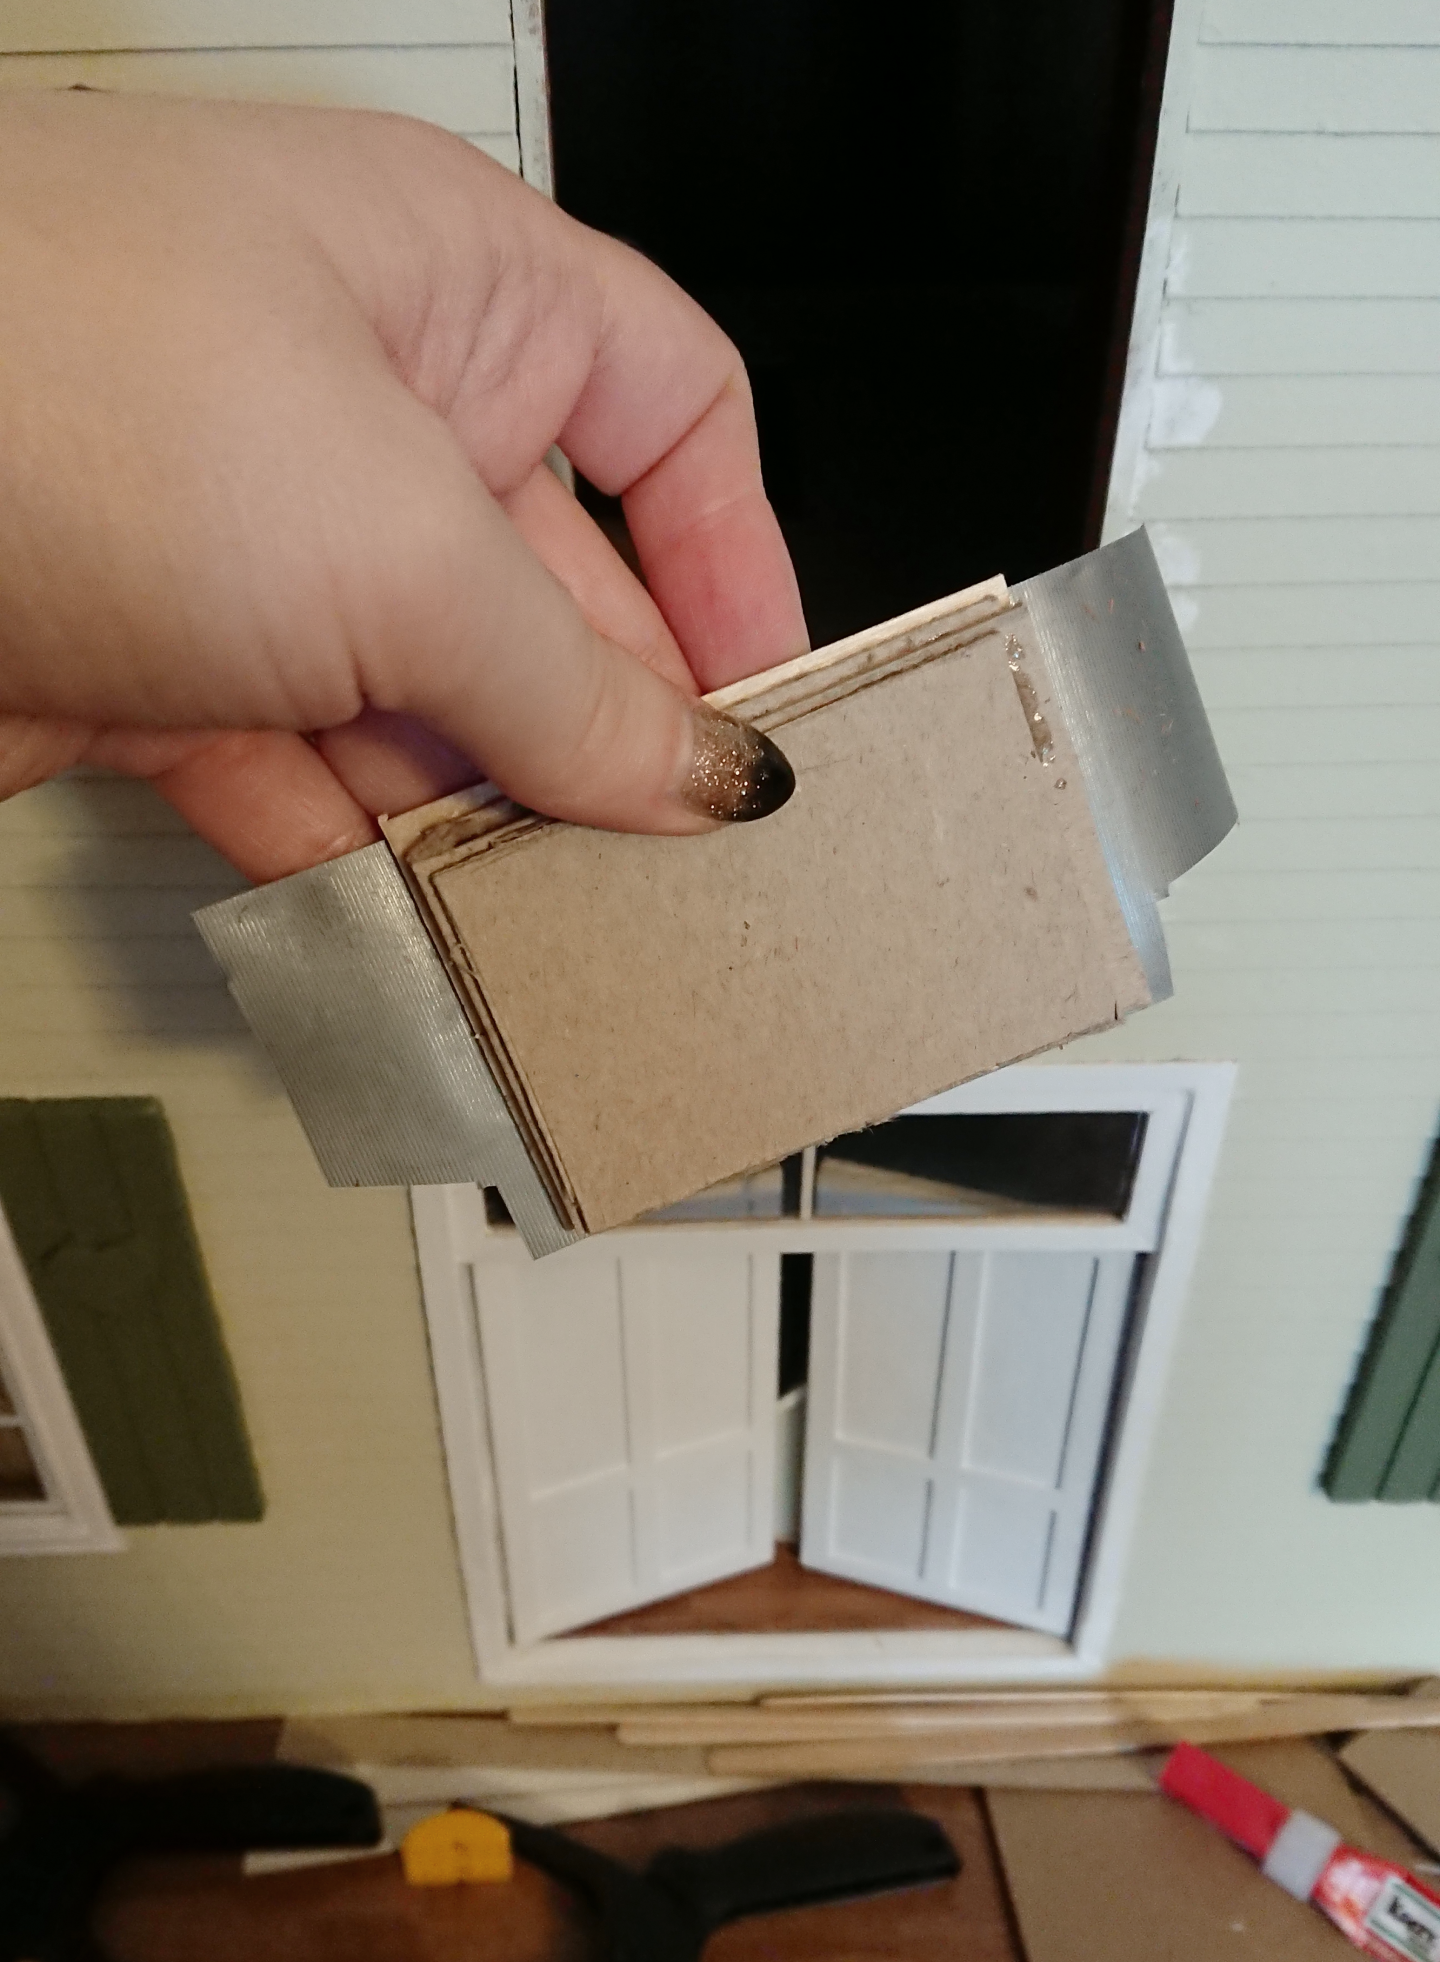
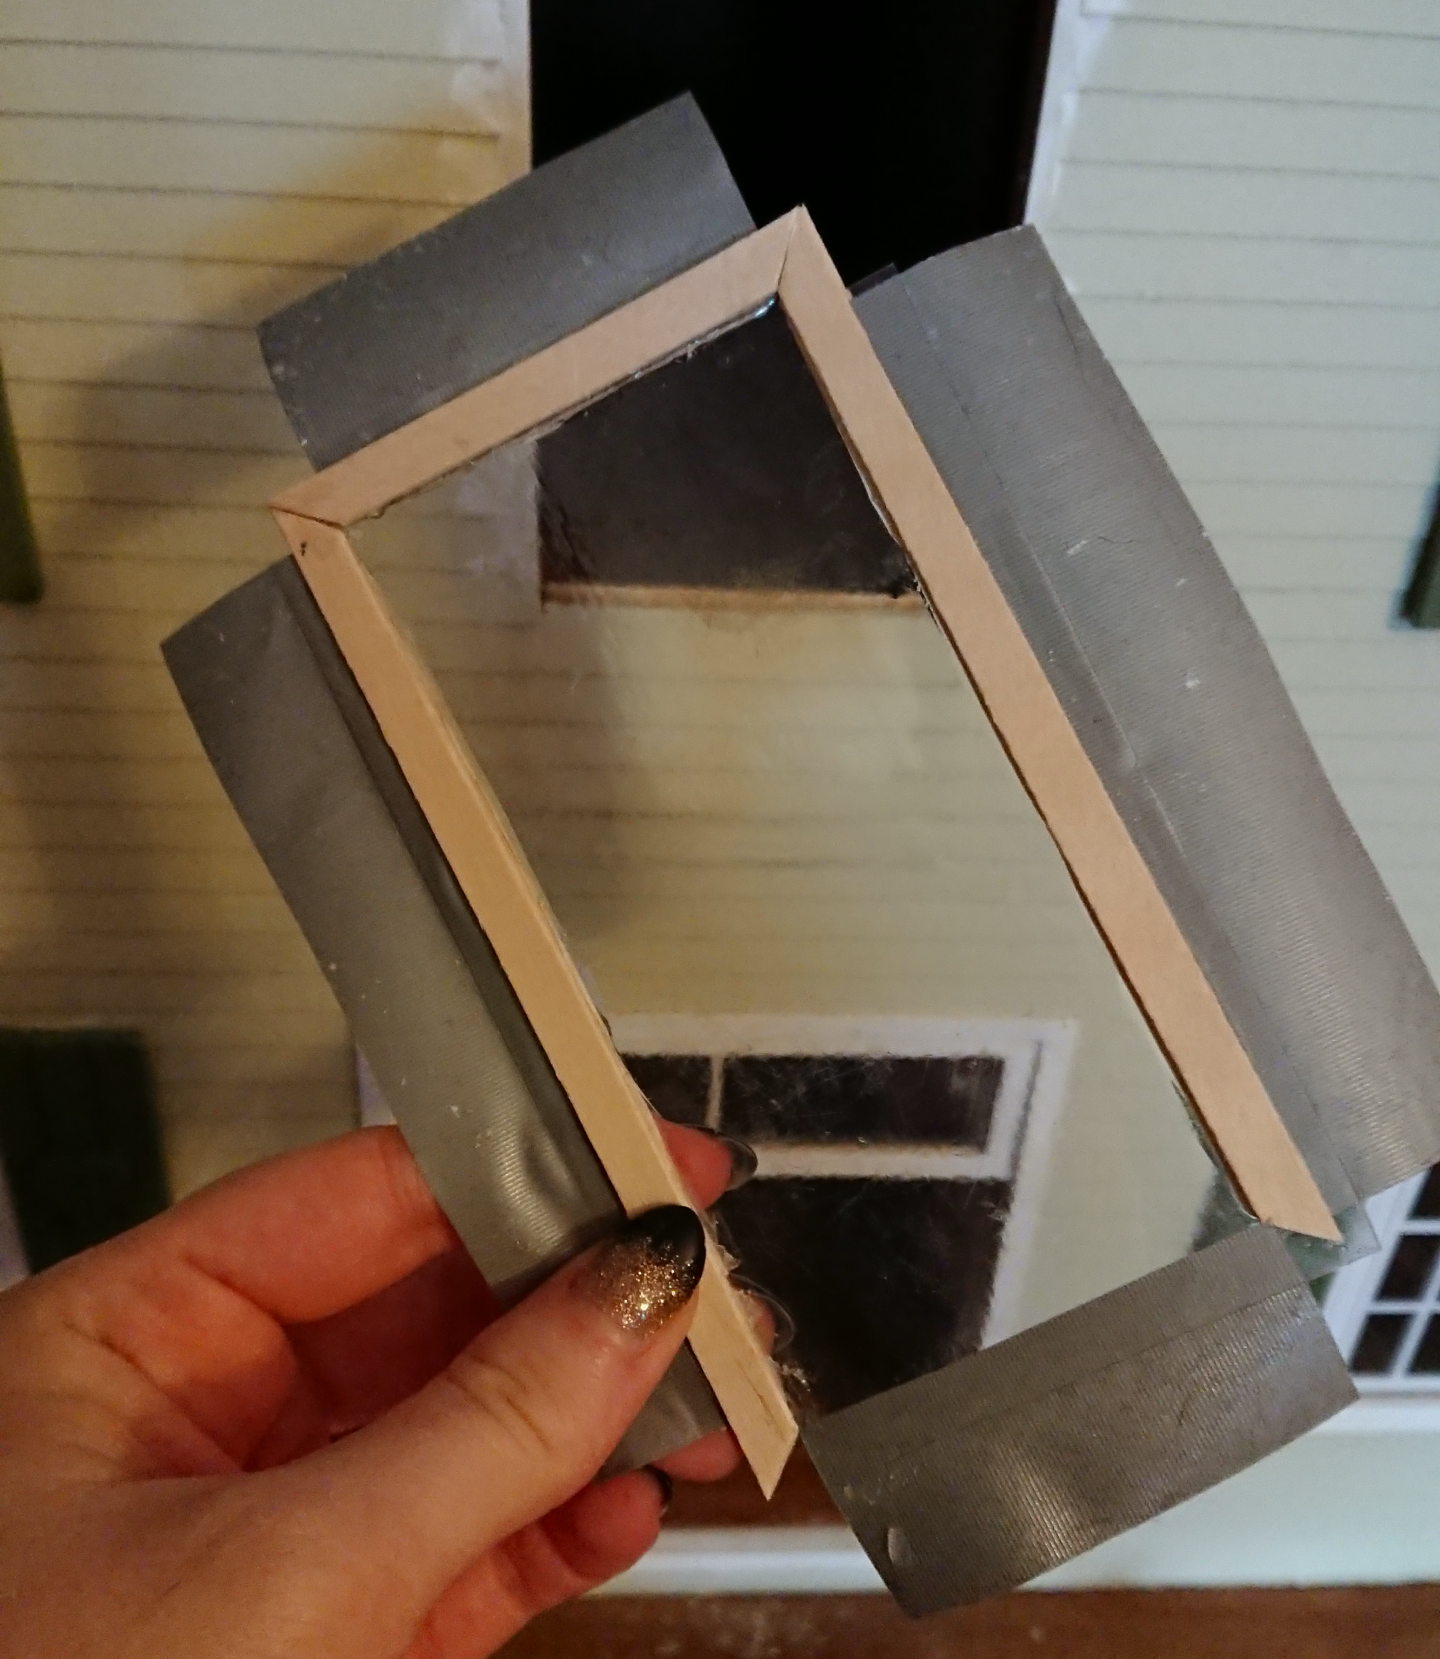
I first made a little wall to fill the bottom half of the gaping space [as the opening was much longer that the other windows]. I simply glued a few pieces of cardboard together and used duct tape to secure it to the inside wall of the dollhouse [as seen above], much like adding the doors.
I then cut strips of cardboard to mimic the existing siding, overlapped each piece and glued them in place against the little wall I had just created [as seen below]. It’s not perfect because I couldn’t cut away the existing wooden frame that was there, but I’m quite proud with how it turned out!
I then created the window in a very similar style to how I created the doors and the transom; it’s kind of tricky to explain, but maybe the picture below will help explain the piece of recycled plastic, with duct tape on all sides, sandwiched together between coffee stirrers. I then attempted to paint the same window-pane pattern as the other windows onto the plastic. I took zero pictures of that process because it was so tedious and I just wanted to get it over with.
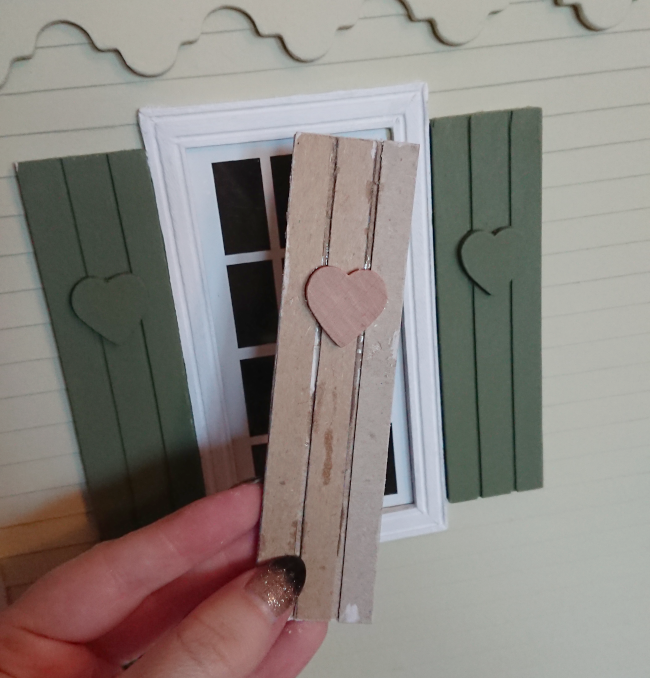
Once the painted window was glued in place, I created two shutters from cardboard [and wooden hearts that I added to all the shutters], painted them ‘Light Avocado’ green and glued them in place alongside the new faux window.
The only things I bought to update the exterior of the dollhouse was the green paint, some Krazy Glue and a pack of coffee stirrers. Everything else was salvaged from either cardboard or plastic that was in our recycling bin.
While I would have liked for the entire of the dollhouse to have been ready for Christmas morning, it took me so long to update the outside that I was realistic and left the inside as it was. I knew Cora wouldn’t understand that the inside was unfinished and I also figured she might like to see the inside being updated as well as have an input for what things should look like.
I loved every minute of updating the exterior of our Lower Town Dollhouse. It is 100% quenching my need to renovate a real house. Except it’s giving me unrealistic expectations as there’s no dodgy wiring or plumbing and I can paint the entire house in a few hours. But it’s letting me make tiny versions of real things; something I will always love.