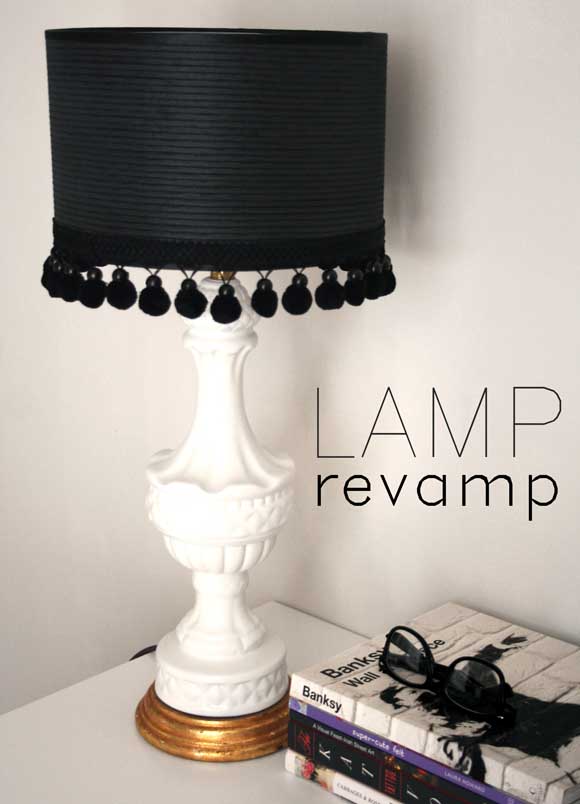
Ah, Friday. You are here at last, which means I can share my DIY Friday! This weeks DIY is a lamp revamp to {hopefully} convert those of you who may be a bit paint shy when it comes to DIY. Don’t be scared. I got your back.
As I hinted earlier this week, I sorted myself out with a small work space in our living room. I immediately started
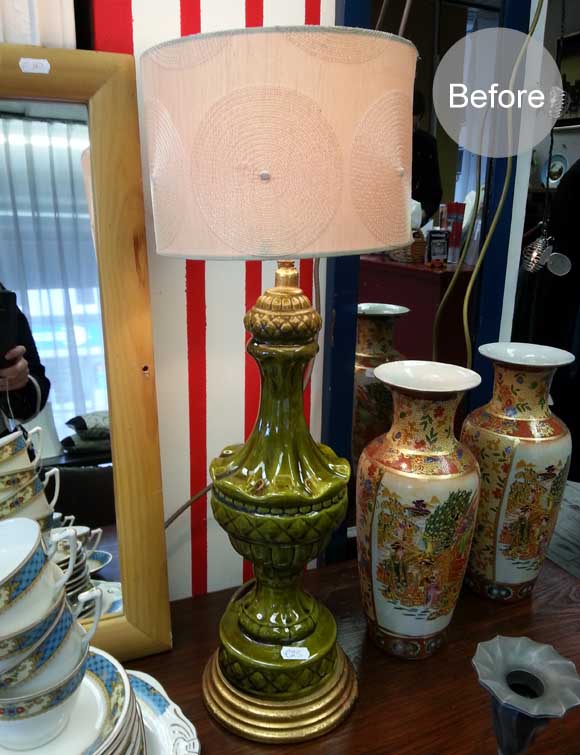
day dreaming about decorating my new desk space, and one of the key pieces on my list was a statement lamp. I preferred the idea of DIYing one, so I took to the streets of Dublin and below is what I found. Behold, the ‘before’ picture. Take it all in …
I spotted this green giant in
Age Action for €25. I immediately knew it would be perfect. Once I got home I was a bit uncertain with what I wanted to do with the lamp. I knew I wanted a black lamp shade, and that’s about it. So I took to Photoshop to design my lamp revamp without tearing my hair out and having to go back and repaint anything copious amounts of times {I know
Maria will appreciate this level of design planning!}.
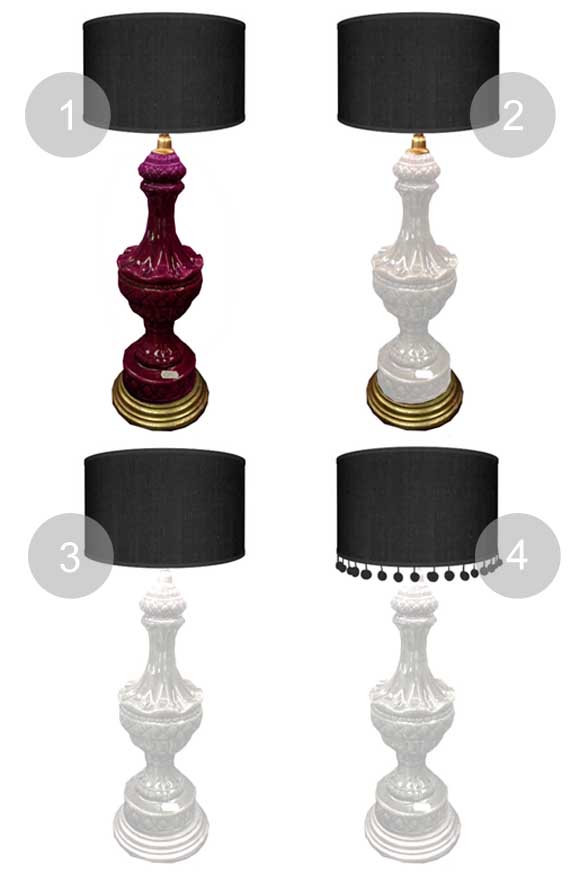
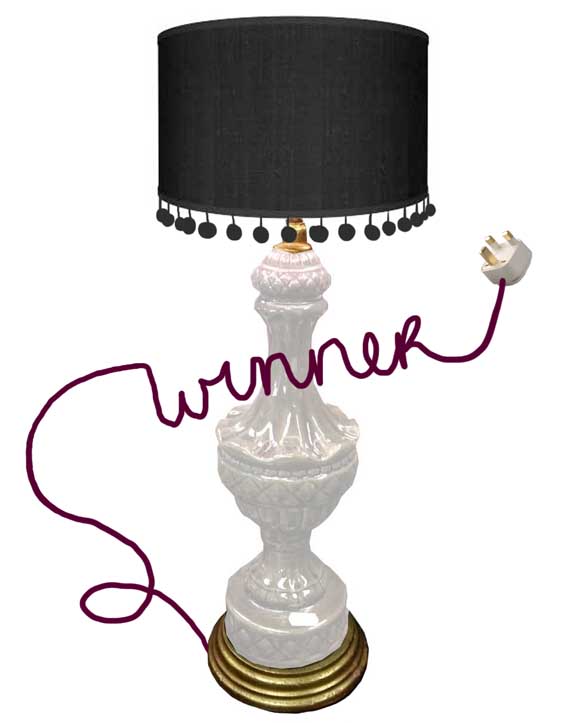
I edited the above image and here are the options I came up with …
1 – My usual favourite ‘Winegum’ spray paint popped into mind, but I thought slight overkill. I spray everything with that colour, and I also wanted something a bit more uplifting / less dark for my desk.
2 – This time with white. Better. I liked the idea of keeping the original gold base and keeping the gold fixture at the top. But it was still a bit blah …
3 – All white for the sake of my Photoshopping spree. A bit too boring for me though if I’m honest.
4 – I then focused on the lampshade and added a bit of sass. I like where this is going.
I then combined my two favourite mash ups {2 and 4} and thought to hell with it. Why not add my favourite winegum hue? There was no better place to use it than to cover up the current Exorcist-pea-green-soup cord. And here is what I came up with …
Yeah. I got a bit carried away with Photoshop on the cord there. That’s what happens when you’re stuck at home sick for a couple of days.
I was very happy with my result and got to work. I taped off the gold base, the gold light fixture at the top, as well as the plug at the base of the cord. I used masking tape and tin foil to cover all the important bits.
I gave the lamp two coats of ‘Sh. White’, and the cord one coat of my favourite ‘Winegum’ hue {both
Montana brand spray paint}. While that was drying, I tackled the lamp shade. I had picked up a black lampshade from
Dunnes Stores for €8 and while I was housebound, I e-mailed husband some ‘man instructions’ and sent him to
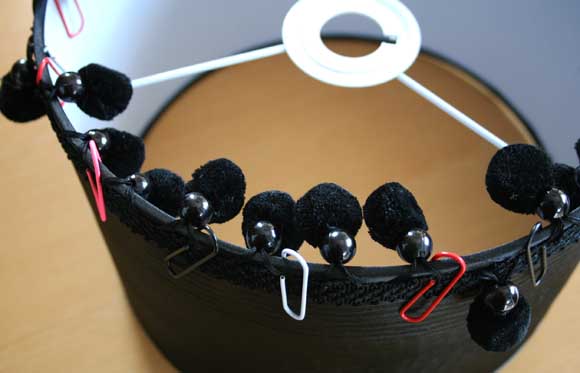
Hickeys to pick up one meter of black bauble trim {he did so well}. I used extra strong adhesive to fix the bauble trim to the bottom of the lamp shade {pictured drying upside down} and used paper clips to make sure it stayed in place. I let both the lampshade and lamp base dry overnight.
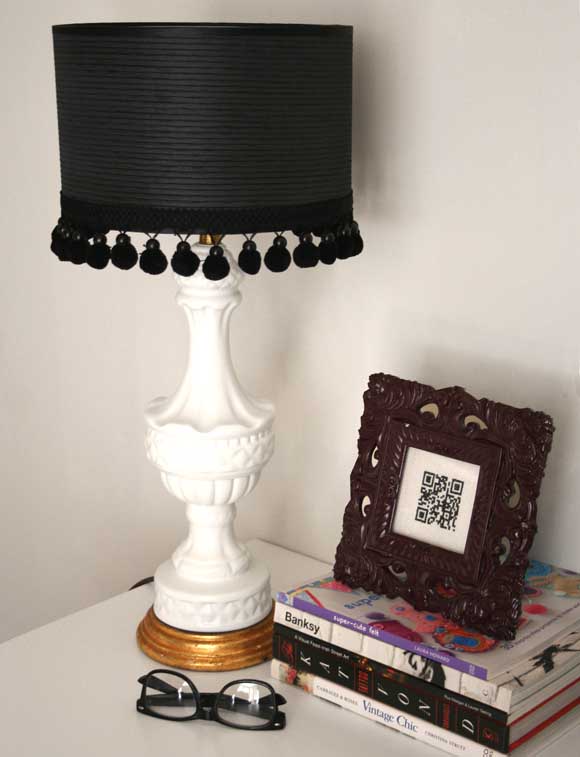
Then all I did after that was assemble it. I’m quite proud with how it turned out! If you keep an open mind it just goes to show what can be done on the cheap. You don’t need an unlimited budget or a mountain of supplies. If this makes you tick, I would strongly suggest visiting Pat’s totes amaze blog –
In My Wheele House, which is full of fab furniture DIY’s that will have you running to your nearest antique or junk shop.
Early next week I’ll be sharing my new little office space so keep your eyes peeled! And with that I’ll leave you with some of my favourite Dublin graffiti, which is quite apt for today’s post. An oldie but a goody. Happy Friday, homies! xx A