Tips for painting doors and skirting boards

I agree, while today’s blog post is not the most riveting of posts, I was asked by a couple of people if I would share some of the tips and tricks I gathered while repainting all of the doors and skirting boards in our apartment. As I did have more than a handful of lessons I learned along the way, I thought hey, I might be able to help someone else who’s daunted by the idea of repainting doors and skirting boards.

To give a recap, the doors and skirting boards throughout our apartment were painted in high gloss paint 15+ years ago when our block was built. Needless to say, the paint did not take to the idea of aging well. Worse than Meg Ryan and Madonna in fact. The high gloss paint aged to an eye watering ‘chicken fat’ yellow throughout our entire apartment [I’ll be doing a complete hallway reveal soon so you can witness all it’s original yellowedness].

I had enough one day and approached our landlord about repainting the aged paint. He agreed [YUS!] and I started in October by repainting the worst effected room; the bathroom. I started tackling the rest of our apartment after Christmas and as of this morning, I have only two doors left. Here’s what I learned along the way …

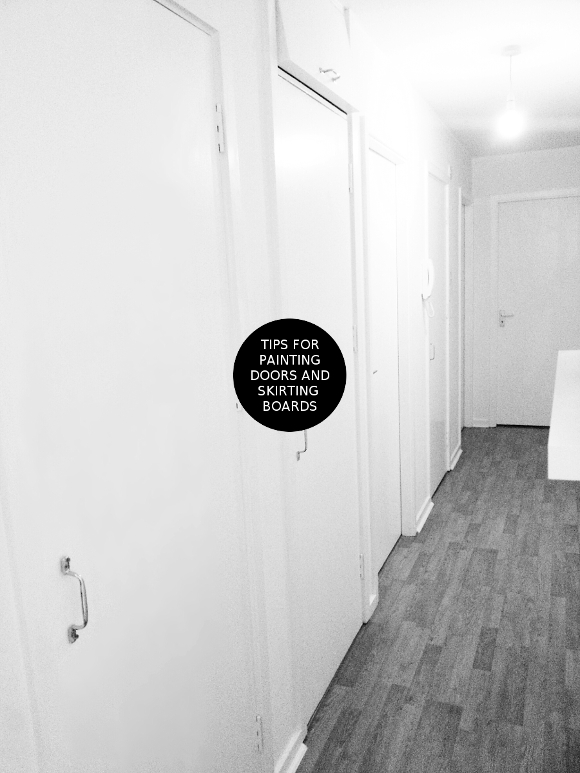
– Paint one door or one room of skirting boards at a time. Otherwise you’ll crash and burn and never finish the job.
– Remove the hardware [aka, door handle, escutcheon etc]. Do not attempt to paint around them. It will look really, really bad and be really obvious.
– Sand the doors / skirting boards with medium grade sandpaper then wipe them down with a rag very lightly dipped in turpentine.
– Store the turpentine rag in an old plastic lunch box [tightly sealed] as you’ll need it again for the next door.
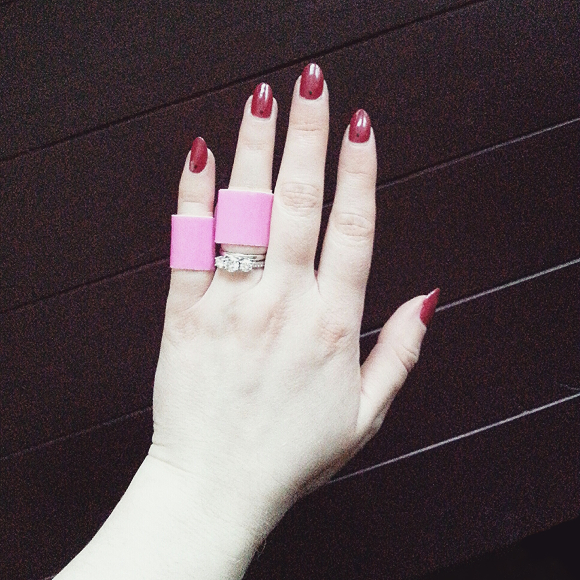
– Be careful while sanding. I accidentally sanded my knuckles off a couple days before I had to be a hand model. Don’t do that. It’s really painful if you plan on bending your fingers at all during the following week.

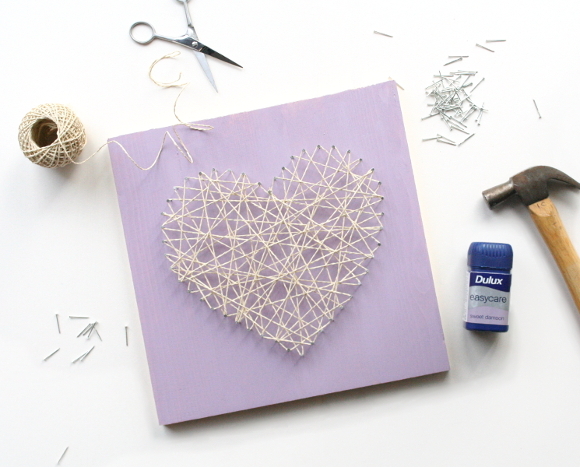
– I used 2 cans of Dulux’s Stay White with Aquawash Satinwood paint to repaint all the skirting boards and doors in our apartment. It’s water based and I wildly prefer water based paint.
– I added a little bit of water to the paint so it was less thick. This will only work with water based paint.
– I used a wide brush for painting the doors and a thin brush for the skirting boards.
– Don’t overload your brush with paint. Thin coats win.
– When applying the first coat, start from the top. Remember, thin coats. Otherwise gravity will point out your cakey flaws and drips will form.
– Allow the first coat of paint to dry for at least 5 hours. Preferably leave it for the day.
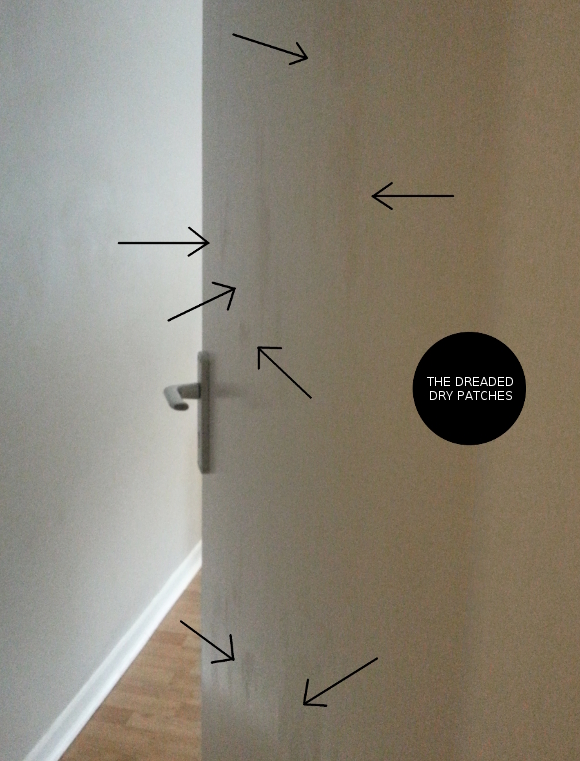
– When adding your second / final coat of paint, ADD IT QUICKLY AND EVENLY. I cannot stress how important this is. You MUST add the paint EVENLY in one uniform go otherwise the paint will dry unevenly and you’ll be left with dry patches and you’ll have to start over. If you do end up with dry patches, it’s okay. It happened to 3 of the 9 doors I painted until I realised what I was doing wrong, then started painting them quicker and evenly. Once I did this, the doors were perfect. If you have mistakes[see below], just wait and start a fresh coat the next day. Remember it’s better to do it right then leave it half-assed.

– Got paint on your wood floor? Don’t worry, so did I. I used a palette and scraped it off once it was dry and swept it away. Easy peasy.
– To save having to wash your paint brushes each time, simply wrap your brushes in clingfilm and leave in the cupboard and unwrap for when you paint the next door / skirting board. I stored mine for up to 2 weeks.
– Painting the skirting boards was MUCH easier. I still sanded and wiped them with turps, but I didn’t have to wait as long between coats of paint. I actually found it quite relaxing and the most rewarding as I think discoloured skirting boards are much like a guy in a suit wearing wildly innapproriate shoes; it’s fine until you look all the way down and once you catch that tiny detail, your eyes want to fall out.

I’m not an expert at painting doors and skirting boards, but I learned a lot while painting the 9 doors, front and back, throughout our apartment. I did learn some tricks and how to recover gracefully from the mistakes I made, so I hope the above was at the very least helpful to those of you looking to update a door or two and now know what to look out for.

Happy Friday, homies and I hope you enjoy your long weekend this weekend, laden with chocolate xx A

DIY drip feature wall

Ever since I installed the drip wall for the Localise Youth Room at Sophia House, I’ve wanted to incorporate a drip feature into our apartment. And as is typical around here, a year+ went by. 

For husband’s birthday in January of this year, I got him a guitar hook thingy to display his Stratocaster. There it perched on our living room wall between the hall door and the kitchen all lovely for a couple of months, but I had wanted to add a little something else to the wall to make it pop. And that’s when I had my lightbulb moment.

The guitar is in fact centred, but because it hangs about 5 inches away from the wall, it looks off-centre in some pictures. And it’s driving me a little bit insane. Especially in the first picture. The drip feature is centred! Please believe me!

What you’ll need … 
– paint, either wall paint or guache DO NOT USE GUACHE PAINT. See my revised post here about why you should use appropriate wall paint.
– water [I added about a tablespoon of water to every 100ml of paint, then shook it up]
– drop cloth to protect your floor, just in case
– a bottle with a resealable nozzle lid 

The most important item you’ll need [other than paint] is a bottle with a resealable nozzle lid, like the one above. You could use an empty washing-up liquid bottle, sports drink, water bottle or kids drink, as I did here. The reason the nozzle is so important is because it allows you to get right up to the wall to squish out the paint without spilling paint everywhere, and it also gives you control over the speed in which the paint is applied. It doesn’t seem like rocket science, but this technique took a lot of brain storming back when I made the multi-coloured wall

I used black guache paint for our wall. I originally was thinking of using one of my favourite red berry hues, but then I was all like, “hold up. You can’t do that. You can’t have red paint dripping down the wall. It’s going to look like the walls are bleeding. No one will ever want to visit your apartment or trust you with sharp objects ever again.” So I decided to skip my signature colour for this project. 

And here’s how to do it – first you’re going to need to decide where you want your drips to start. I wanted the drips to start appearing half way down the wall / behind the body of the hanging guitar. Holding the bottle carefully, start glooping the paint in spots on the wall. This is very much less is more until you get a feel for how runny the paint is. Remember – you can always add more paint; it’s not so easy to take it back.

TIP: do some practice drips higher on your wall first, like you’ll see I did below. It’ll get covered in paint, so you won’t see it. 

When you’re happy with the amount of drips you have, your wall will more than likely look like the below; a bit ghetto. This is okay. Take a paint brush, and using the excess gloops of paint on the wall, start painting in a panel above the drips to collect it to the ceiling. I ended up adding a few more drips along the sides closer to the ceiling to make it look more random.

Your drips are going to look rank until they dry. You just have to accept this. But trust me, they’ll dry perfectly. It took around 18-20 hours for the paint to completely dry. 

I was quite happy with how it turned out, but I wanted to see husbands reaction [who, for the record, had no notion of my drippy plan]. He came home from work, walked around the living room a bit telling me about his day and all of a sudden he WOAH-ed when he saw it and sang its praise. He’s mentioned a good few times about how much he likes it since, so mission accomplished I’d say. 
Oh, and for anyone curious about removing it, I don’t see it being any more difficult than painting over a chalkboard wall; sand it in places then 3 coats of paint should do the trick.

But more importantly, if you can see past the fact that I did our drip wall in black, I can easily see a drip feature being done in a buttercup yellow or dainty pink for a kids room, or a strong navy blue for a quirky impact in a bathroom. And may I suggest adding ‘redrum’ to your doors if you’re going to go down the red route. 
Happy dripping! 

Mother’s Day string art

A couple of weeks ago Woodie’s set me the challenge to create a project for Mother’s Day that was quick, easy, would make a statement and also consisted of supplies found in Woodie’s branches nationwide. Challenge accepted.

A project I had filed neatly away in my brain for such an occasion was a, dare I say old school, string art tutorial. It was perfect as it required only a handful of supplies, all of which could be picked up from your lcoal Woodie’s. And even better, it’s a simple tutorial so you don’t need to be a DIY expert to make it [remember, nothing tugs on heart strings quite like imperfection].

Onto the good stuff! Here are the items from Woodie’s I used for the string art …
– a piece of wood shelf board [800 x 300 x 16mm], cut to a square
– a pack of 20mm masonry nails
– Dulux tester pot in whatever colour you like*
*I originally planned on painting this project in a shade of turquoise, but as we were going to be working with a green screen during filming in parts, green or blue was a no-no. So purple it was! 

Items you’ll also need …
– a saw to cut the wood shelf
– a hammer
– scissors
– a pencil and a piece of paper to draw your template
– tape to hold the template in place
– a paint brush

Now I’ma show you how to make it in 6 seconds. Ready? Prepare your retinas for my stop motion video debut … 

I think JP Prewitt would be proud.

I worked alongside a truly cool and down to earth team at Agtel on this Vine for Woodie’s. It took us just over 3 hours [plus 2 hours prep] to put this little gem together. It was my first stop motion video experience so it was very surreal and exhilarating to see the video come together one frame at a time. I was exhausted by the time I got home, but so excited to see the finished piece. Hats off to Agtel. You guys are magic. 

I showed my parents the Vine as soon as it went live and it turns out my dad used to make and sell string art! Albeit incredibly more complex pieces. I’m assuming before my time because I don’t remember seeing my dad make any. I do remember a couple of pieces over the years, but unless you’re told “that was made by dad!“, you just don’t know. My future children better brace themselves. They about to get schooled.

So there you have it! I hope you enjoy our little video, and to all the mothers out there – both human and fur baby variety – happy Mother’s Day this weekend xx

p.s. I’m now on Vine! I haven’t a clue how to use it, so we’ll see how much I use it. So far I’ve done the equivalent of retweeting.