My DIYs – how have they held up?

I was surveying our apartment last week sprawled out on the couch when I had the idea to do an update on some of the DIYs I’ve done and show how they’ve held up over time. For the most part, they’ve all stood the test of time! Hurrah! But for a small few, they haven’t aged as well as I would have liked. 
Since I’m big on keeping it real, I wanted to do a little update to show you exactly how things have worked out. Because let’s face it, not everything goes according to plan #CestLaVie …

DECEPTIVE DUST COVERS GRADE: A+

Considering I made my first round of deceptive dust covers close to 4 years ago, they’ve held up almost perfectly with the exception of the occasional label corner needing to be re-glued. I could not have imagined this project would have held up so well considering it’s just construction paper. A+ in [or on] my books.

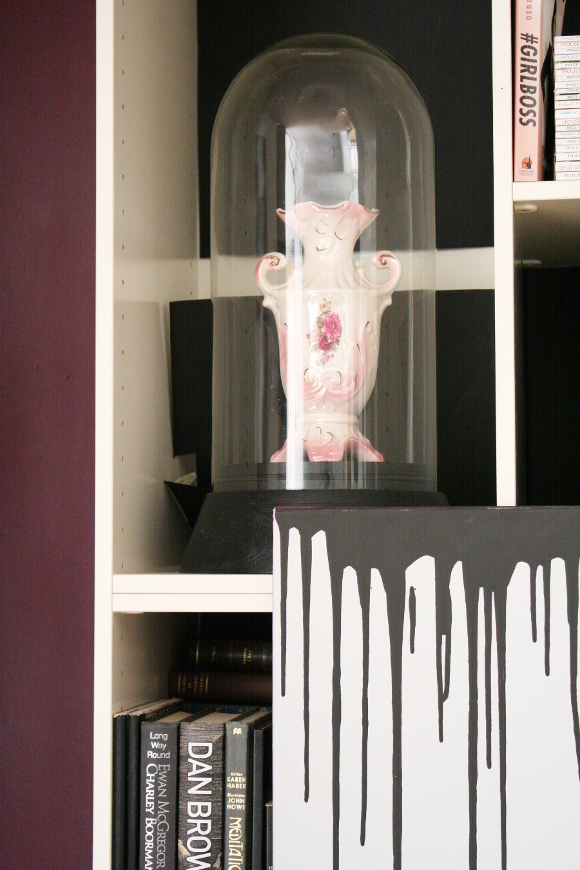
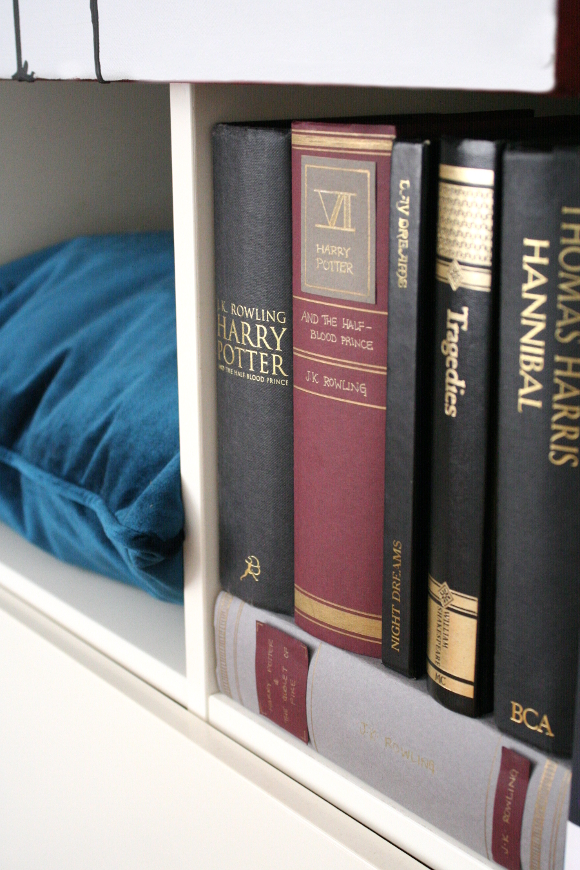
BOLDER SHELVES ON A BUDGET GRADE: B

Since installing black construction paper to the back of our landlords shelves in April of last year, they’ve held up relatively well. On the odd occasion, one section of paper will fall down. But as it only takes about 20 seconds to fix them, I won’t mark them down too much as for the most part, I still find them a great design solution as a renter and more importantly, so easily reversible. 

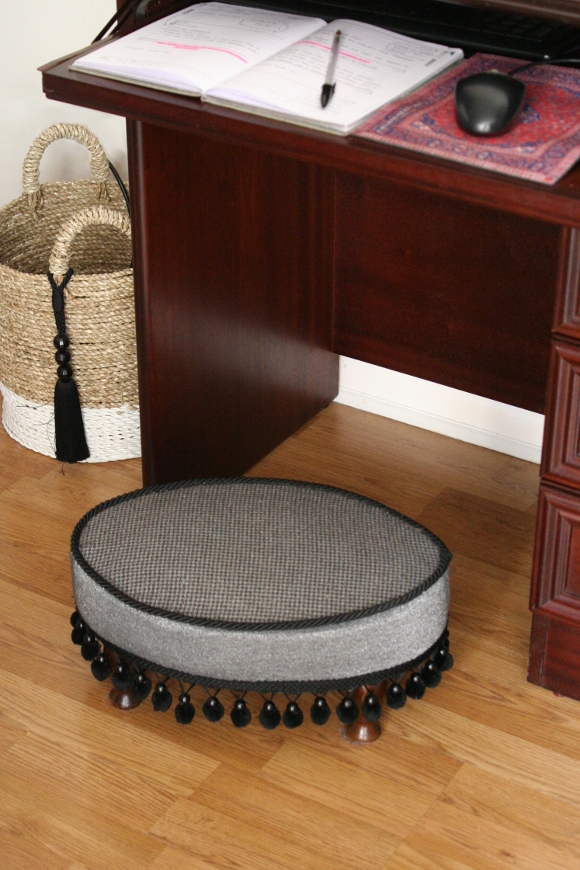
REUPHOLSTERED FOOTSTOOL GRADE: A+

As someone who suffers from dangling legs because I’m kinda short syndrome, this little foot stool is something I use every single day. And since reupholstering it 2 years ago, it’s still in near perfect condition. Not bad since it gets stood on on a daily basis.  

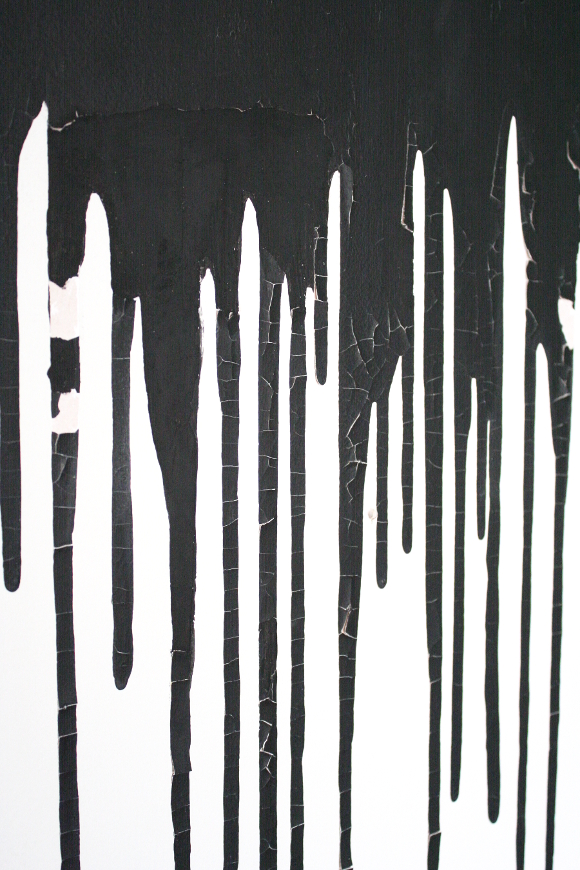
DRIP FEATURE WALL GRADE: F- BURN IT TO THE GROUND AND START OVER

Oh lawd have mercy. This project is what prompted me to write this blog post. At first, the drip wall was perfect. It was such an accent in our living room. About a week later I noticed one of the main drips had cracked and split. Simple enough of a fix, I’ll just repaint that section, and I’ll touch-up a couple more drips while I’m at it. NOPE. Queue domino effect and soon the cracks were out of control. I think for the most part this had to do with me using [cheeeeap] left over guache paint in stead of going out and buying a sample pot of wall-appropriate black paint. I’ll definitely be doing this project again, but with appropriate paint. I have well and truly learned that lesson. 

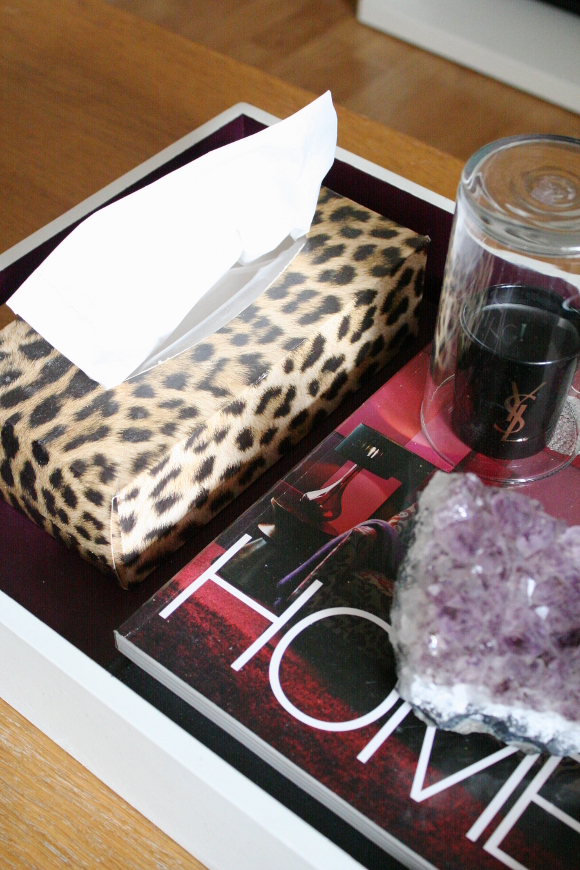
REFILLABLE TISSUE BOX GRADE: A+

Our little refillable tissue box is an absolute trooper. It a massively complex DIY, if you can even call it that, but it has held up remarkably over the years [and tears]. It has a few scuffs here and there, but nothing a Sharpie can’t remedy. 

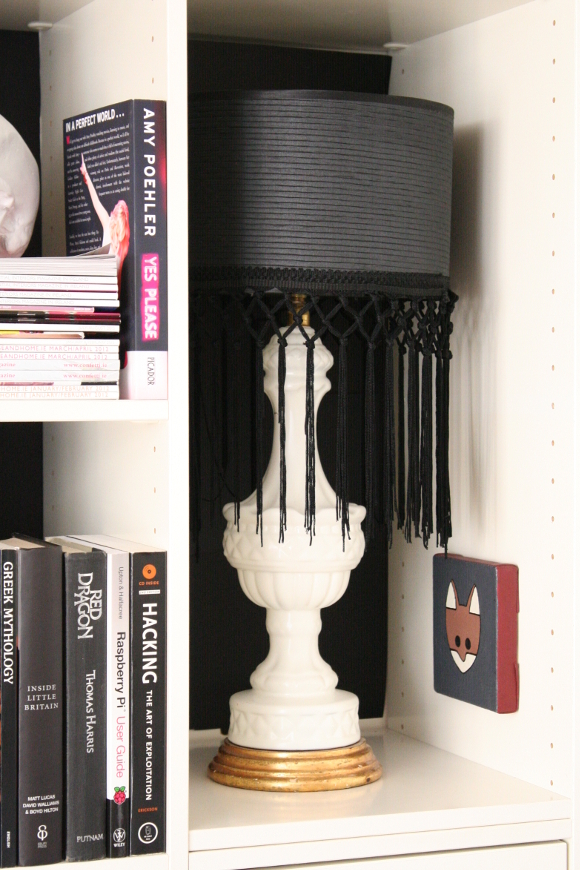
LAMP REVAMP GRADE: A+
TASSLE LAMP SHADE GRADE: C
When I first revamped my charity shop lamp, it was perfect! And it still is. It hasn’t aged at all and is still in perfect condition. Then, the following year I added tassles to the lamp shade. That in itself  has worked out great, with one exception – Juniper. I found out the hard way that our soon-to-be-11-year-old cat Juniper was sneaking up onto our desk and EATING THE TASSLES, which is incredibly bad for cats as anything string-like they eat can get tied in knots in their little guts and the idea of that makes me want to cry. So for the sake of Juniper, that’s why I moved the lamp up onto our shelves. I am much more tassle-aware now. 

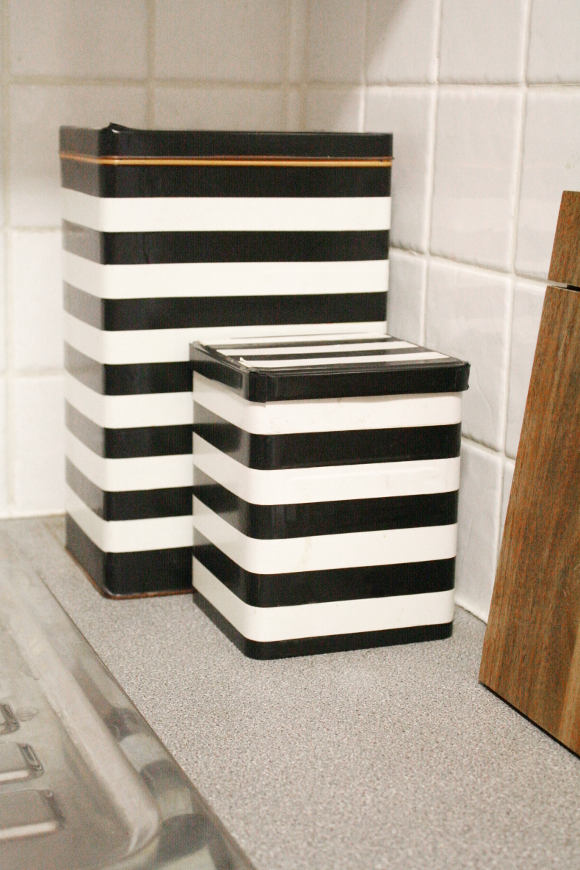
ELECTRICAL TAPE STORAGE GRADE: A+

One of my very first hardware store / budget hacks is still a raging success; covering ugly stuff in electrical tape. As electrical tape is quite heavy duty, any of the pieces I’ve used it on have stayed the exact same. Even our cat food containers, as seen above; we’ve used them twice a day for the past 2 years and they’re still in perfect condition. That’s a total win in my books. 

DIY Friday – painted outdoor rug

As and from yesterday and just in time for summer*, my latest DIY project for Woodie’s has gone live – how to DIY your own outdoor painted rug! Perfect for making the most out of your al fresco dining this year that’ll also bring a little bit of indoors out. It’s a very easy tutorial and you can choose whatever rug colours and pattern you like – I kept it simple as a black and white rug to show how even the most basic design can have a huge impact. Not to mention it’s a perfect little project to encourage you to make the most out of your backyard. 

Check out all the details and the full tutorial for the painted outdoor rug here

Happy Friday, homies, and cheers to the weekend.

*Hey, will someone please tell Ireland it’s now June and I shouldn’t still be needing my electric blanket every night. Thanks. 

Hallway tour + update

I’ve been in the process of overhaul updating our apartment. The biggest task to date was updating our hallway, and for the most part, it’s finished! Yay! But there are minor aspects of our hallway that are very much unfinished [light fixtures, artwork etc]. It’s still a work in progress, but the bones of the work are done.

I’ve never shared detailed pictures of our hallway before because it was a hot, embarrassing mess of high gloss yellow paint for 4 years. Over the past few months I’ve sanded and repainted [95% of] the skirting boards and doors in our apartment, with the biggest impact being in our hallway. It’s definitely been a labour of love; slowly updating each door, room and detail at a time. 
To start the tour, our hallway is a reversed ‘L’ shape with our front door located at the heel of the ‘L’. Here’s how it used to look and what I did to bring it up to date … 

In the picture above, I had already painted the front door so you can’t see the glory that was how reflective and yellowed high gloss it was, but trust me, it was awful. 

We were gifted some tattered collapsible paper lantern fixtures in the hallway from the previous tenants. I’m guilty of leaving those up until very recently. The combination of the warm hued bulbs and the lanterns yellowed the hallway even more. At the moment, I’d rather bare bulbs until I find something better. 

The transom window over the living room door had privacy paper stuck to both sides of it, rendering its purpose to provide natural light to the hallway almost completely obsolete. I got sick of it and removed it. The hallway side came off easily enough, but the living room side was a lot more work. It was brittle and was impossible to peel off so I marched to the fridge, grabbed the mayonnaise, brushed a healthy layer onto the window and left it for about a week. It was gross, but the high oil content in the mayonnaise softened the paper and I was able to peel it off. Lady-rage has its benefits. 

As you can see on the right side of the photo above, I still have one door left to paint – the kitchen door. We’ve actually never used this door as there’s another entrance to the kitchen from the living room. In fact, I have shelves against the door as our kitchen is teeny and we need the extra space. I’ll need to take the shelves down to repaint the door, so that will need to wait for a rainy day. And trust me when I say this door was the least yellow of the doors. 

My efforts to de-IKEA our place has been pointless as of late, especially since I discovered IKEA’s new eketanga frames. And planera glasses while I’m at it. I just can’t not. I hung up two frames over the storage heater in the hallway and I’m quite happy with how well this little nook looks. 

Oh I do like our front door before and after. It makes me feel all warm and fuzzy inside and makes all the hours of sanding worth it. I took all the hardware off of each door in our apartment while repainting it and gave it a good clean. And when a simple clean wasn’t enough, I had to sandpaper the old paint off. 
The Pendleton Cowichan [aka, The Dude’s] Cardigan I painted a couple of years ago is still going strong. It has also found home in an IKEA eketanga frame. It rests on the small floating shelf in our hallway, which is home to our change jar, a couple of trays for sunglasses and I thought it only too appropriate to use a tumbler glass to store our keys, taking pride of place within reach of The Dude’s cardigan.  

I took these before pictures in March of 2014, so it only took me a year to get my act together and tackle the hallway. C’est la vie. Here you can see just how delightfully glossy the hallway was. It was like having your very own distorted hall of mirrors, except on 9 doors. It was a bit overwhelming to say the least. 

I am completely and utterly guilty of conforming to what I like to call ‘landlord walls‘; hanging your pictures on your landlords existing hooks in stead of starting over. Our hallway looked like the above for about 4 years. I really wasn’t pleased with it, but it was better than nothing, right? Actually, no, it wasn’t. Nothing would be a lot better. 

It was a sad attempt at a gallery wall. When I repainted the hallway I stripped everything back so I could start over. I’d prefer to have 2 or 3 bigger pieces of art along the main wall to make it feel less cluttered. I’m just really indecicive these days as to what to hang. I quickly added a few things for our visiting guests, but have since taken them down.

I swapped the existing bulbs to IKEA’s opal globe ledare bulbs to add a neutral and less-yellow light to the hallway. I am however really stuck with what light fixtures to use. I tried tumbler shades, but I’m thinking wire shades spray painted in Montana ‘winegum’ would be more punchy while not too restrictive on light. 

A final little cheeky and unexpected update I made to our hallway was painting the haggard wood behind each strike plate. While the hardware was removed, being cleaned, and the door frame repainted, I decided hey, you know what would look neat? If I painted that butchered bit of wood! So I did. I originally was going to paint the strike plate innards red, but I thought that might look a bit morbid; like it was the guts of the door frame or something. So black it was.

It’s not a change that people stop and notice, but I think it really streamlines the doorways and makes them seem a little more modern, personal and less ‘rental’. It cost me next to nothing to do as I used a small tube of black acrylic paint I’ve had laying around for years.

Well I hope that little tour wasn’t too tedious for you! Once I have some form of shades for the hall lights and a bit of artwork up, I’ll share some proper finished hallway pictures. But for the moment, albeit the changes are small, our hallway feels more mature and dare I say sophisticated! If you’ve cracked the code on good [and affordable] hallway lighting, I’d love to hear more. Or artwork! I am clueless. 

In case you missed it – you can read my tips for painting doors and skirting boards here!