Kitchen update – the bones

First up, thank you to everyone who let off steam along with me both online and off in regards to my rental rant last week. I’ve chosen to use my rental rage for good, and so this past weekend I channeled all said rage into bringing our rental kitchen into the 2000’s. It started so innocently on Saturday morning while Robert was asleep. “I’ll just reoganise the cutlery drawer … ” and as I gained momentum, much like Juggernaut, I was unstoppable. I whitened, sanded, scrubbed, stripped and painted our kitchen top to bottom in one day. I’ve got to say, even though I only painted everything white, it has made a world of difference. 
There are bare boned before and afters together below, but if you’d like, you can see a full room tour of what our kitchen looked like before here. Also, please note that our kitchen does not get any natural light, so my photos aren’t as wonderful as I’d like them to be. Yay, florescent lighting …

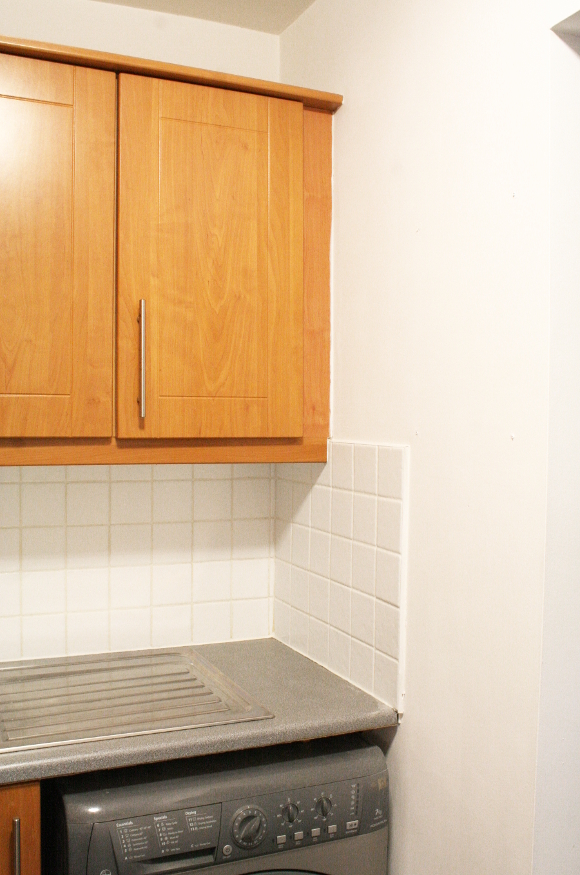
I started by taking everything off the walls and counter so I was starting with a blank canvas. I then tackled the more finicky task of bleaching the grout along the black splash. I normally clean it with an eco-friendly cleaner, but that never corrected the previous years of neglect [from the previous tenants]. I don’t use bleach unless I have to, so I figured this time wouldn’t hurt and I really had to go in with chemical warfare. I used thick bleach and a toothbrush and scrubbed all the grouting. I washed it off after 30 minutes, but I didn’t see the total effects until about an hour later. The grout came up beautifully. 

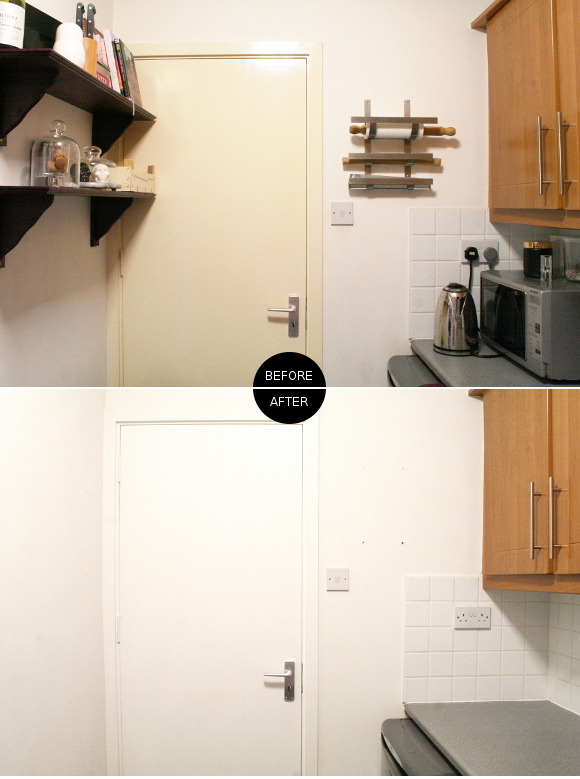
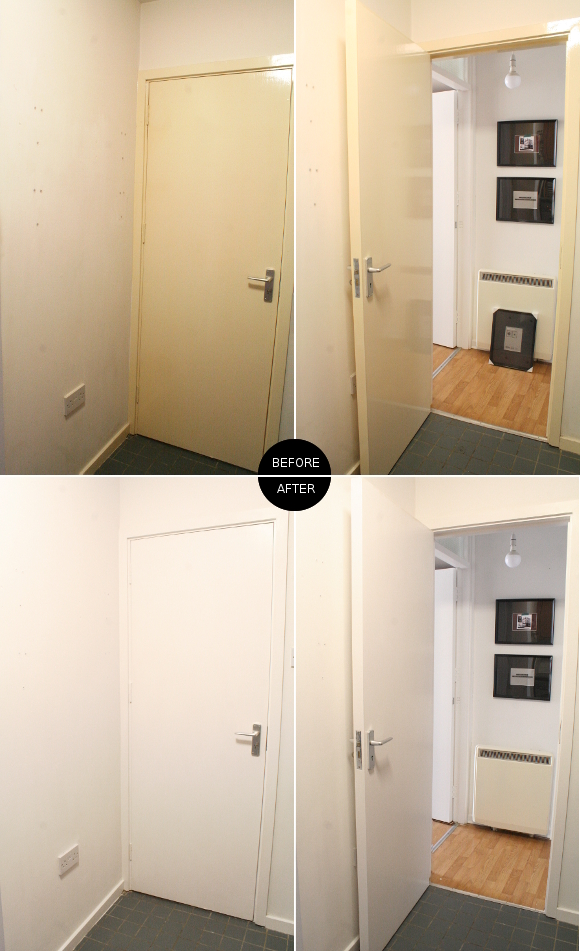
The kitchen hadn’t been painted during our time living here. I had white paint leftover from tackling the hallway a couple of months ago, so I got to work and repainted the walls next. That didn’t take long as there isn’t much bare walls. I recharged, then tackled the one thing I had been avoiding for months; the last door. I sanded the kitchen door, frame and skirting boards and painted them WHITE

Can we just have a moment of silence please, in honour of me sanding and painting the FINAL DOOR AND SKIRTING BOARDS IN OUR APARTMENT

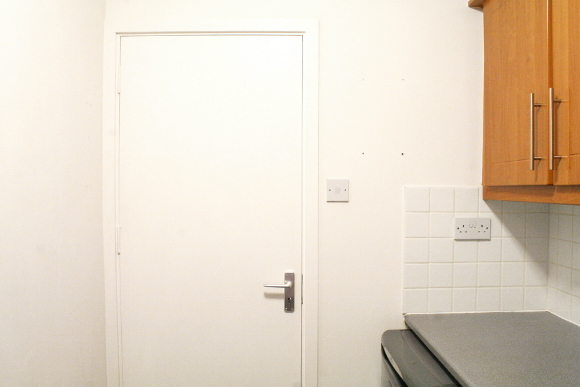
I had to take the shelves down in order to open the door and properly paint both sides of it. The shelves will be going back up as we need them for extra storage. It’s a teeny kitchen. I cannot tell you how much I love our kitchen now that it’s not accented with that hot mess of high gloss yellow door.

But stay tuned because on Wednesday I’ll be sharing the fun bit [I think so at least] – the accessorising. I can’t wait to get in there and take a fresh look at our kitchen and reorganise it. Sometimes you just have to start from the beginning again. I picked up some extra goodies over the weekend that I cannot wait to add [and use!]. Woop! 

Kitchen update – beforemiddleafter

Always a good idea – embossed labels

I use our Dymo embossed label writer on so many things. Not just for organisational things [for which I use it a. lot.], but I love to use it for its retro-yummy-black-and-white-prettifying of things. I think embossed labels are not only timeless but super neat, a little bit sciency and official looking [such technical terms], fun and informative, won’t go out of style any time soon and immediately take otherwise blaze things to the next level.

One of the first things I added an embossed label to was the jar of sand in our living room that we scooped from the Sahara Desert 5 years ago when we visited an abandoned Star Wars set. Which, by the way, the desert in June is kinda hot. FYI. It was an epic Tunisian adventure nonetheless; exciting, terrifying, haunting, surreal landscape and for the most part if you wanted to stay sane you had to ignore the constant undercurrent of sexism and double standards. But that’s a story for another day. 

After I initially blogged my emergency rescue kit for our spare bedroom, it wasn’t until a couple of months later that it dawned on me to upgrade the box and slap a lush embossed label on it. It instantly looks well lusher. Also – the spare bedroom is getting another update which I’m hoping to share soon, so keep your eyes peeled!
Another set of boxes I prettified with labels were our holiday memory boxes. In fact, I made some bespoke embossed labels for that project that I’m hoping to use again. The holiday boxes have since moved from our bedroom into the hall cupboard. I tried to photograph them in their new home but the photos turned out terrible. Some hall cupboards just weren’t made to be photographed. 

Way back when I DIYed the Death Star globe for husband’s birthday, I punched out “I love you to the Death Star and back” and stuck it to the envelope for his birthday card. Little did he know it hinted towards the present I had made him that still takes pride of place on our living room shelves. I framed the envelope and it now hangs in our newly updated hallway.

I’ve used these labels in more areas throughout our apartment, but the above are the most interesting [aka, least boring] uses. I have loads more projects I’d like to tackle with my Dymo label writer but alas, it’s broken. It’s fixable, it’s just I need to actually sit down and figure out how to fix it. Welp.

So, are you a label-holic like myself? Do you have a penchant for punching out sayings? If so, you are among friends! 

#Shedspiration

Last week I accepted my third project / challenge with Woodie’s. And it was a good one. It was all about creating #Shedspiration.

THE BRIEF – transform a typical garden shed into a haven for gardening and tool accessories, with organisation and storage being the primary focus. Challenge accepted, twirling with arms wide open in a field full of tulips. Styling a small space for optimal storage? Relax, I got this one, guys.

First, I chose a colour for the shed to be painted. I went with Cuprinol’s warm yet neutral ‘Pale Jasmine’, and the interior walls got one coat of paint. I then defined the three work areas – a mini gardening area for re-potting and the likes, a hardware station to draft up DIY ideas, and a small area to chillax over a cup of tea and a cheeky biscuit [or three] while surveying all of your hard work. 

Using large storage crates as a base, I created the foundations for the two work stations and added large wooden shelves as the worktops. [I should state that for the hardware side, this station is NOT suitable for using large power tools on. This station is suitable for storing tools, drawing up plans and for working on smaller projects. A proper work bench is necessary for using power tools, but you guys know that already. I just have to put it out there]. 
I used the walls to my advantage and hung up as much as I could, including a shelf over the hardware station for the smaller and more used tools and hardware accessories. 

I kept the palette very neutral [yet snuck in two hits of my favourite berry hue] when styling and adding character to the shed, and I stayed away from using specific brands as much as possible, to keep it all neutral and middle of the road and open minded. Every item you see in the shed is available in Woodie’s, so if you see something you like, head to your local branch! 

I had particular fun with the signs – Laura had suggested a few cheeky and inspirational phrases, so I ran with the idea and designed some bespoke super simple Woodie’s-style posters to place in the shed. My favourite being “IN CASE OF ZOMBIES. OR YARD WORK.” perched among the garden tools. 

A huge thank you to all the staff in Woodie’s Blanchardstown for letting me make a nest in your shed for an entire day, and for all your help / not judging me too much with my questions and statements [“Don’t worry, I’m not stealing this … Is that shed sealed and/or moisture proof? … I’m just bringing all this stuff into the garden section … How many trolleys do you have in this branch? … Could you reach that for me? I’m vertically challenged” etc.] 

I had possibly way. too. much. fun creating and styling this shed. I really felt like the Emily Henderson of sheds by the end of it. 

Check out my other projects with Woodie’s – Valentine’s day trayMother’s Day string art