
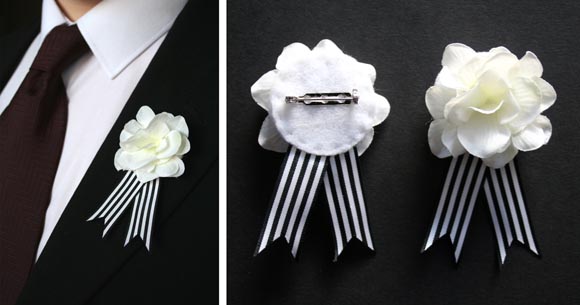
From day one, I knew I would make the boutonnieres for our wedding. I wasn’t 100% on what they would look like, but I knew they would have an element of stripes. Little ideas came and went, until I came up with this simple idea. An ever-so-slight take on war medals, since my man and said groomsmen are of the combat Playstation era.
I have to thank Laura ‘Lupin’ Howard as I used her Felt Butterfly Brooch tutorial as an assembly guide for our boutonnieres. Thank you, Laura. You sew crafty.
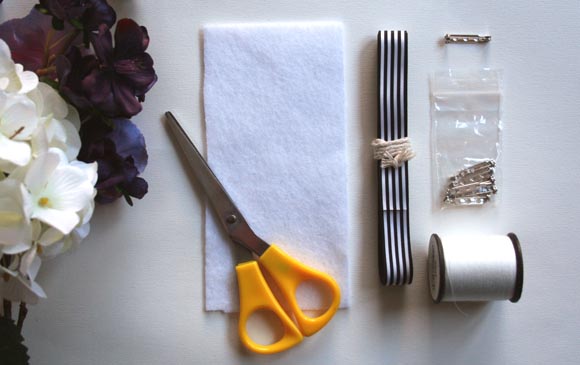
What you’ll need : faux flowers, felt in a colour of your choice, scissors, ribbon, 3 hole brooch pin, thread to match your felt, and a cutting template {I used the thread bobbin as a circular template}.
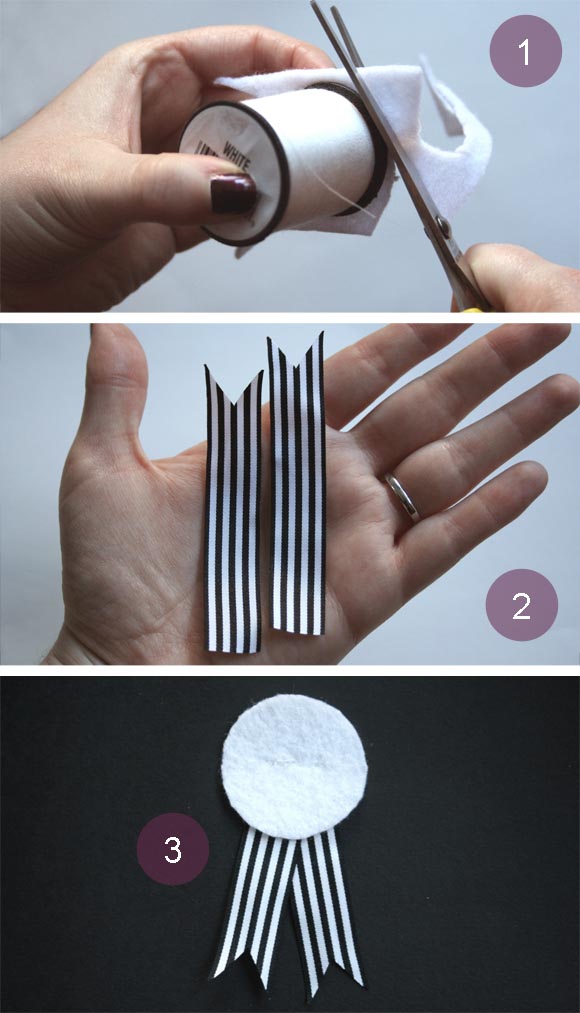
Step 1 : using your template, cut out two felt circles. They don’t have to be perfect since they’ll be covered. Step 2 : cut two lengths of ribbon roughly 6cm long {length of your finger}. Fold the end in half and cut at a sassy angle to spruce them up. Step 3 : overlap the ribbons a little, and sew them onto the ‘back’ of one of the felt circles. About 6 stitches will keep the ribbons in place. Trim off any excess ribbon.
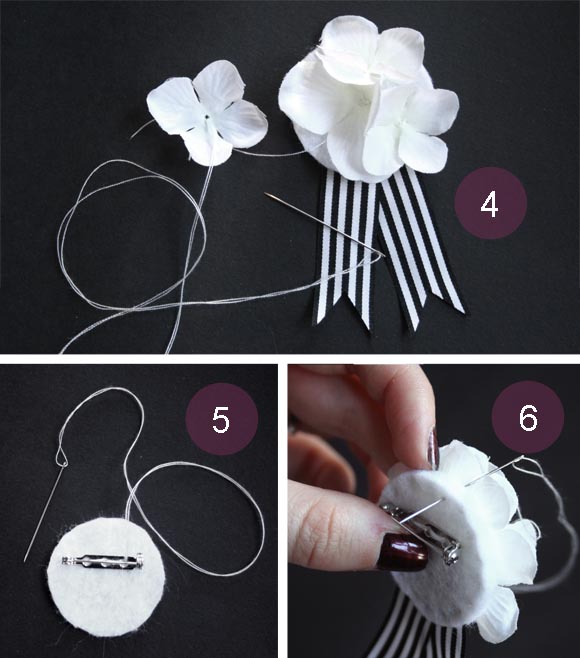
Step 4 : on the ‘front’ of that same circle, sew between 6 and 8 faux flower petals using a similar colour thread. Don’t be too precise with the spacing otherwise it looks stuffy. Step 5 : with your second circle, sew the brooch pin in place using a double thickness of thread. I sewed mine above center, so the top of the boutonniere won’t droop or fall forward when eventually pinned on a lapel. Step 6 : sew the two circles together with matching thread around the circumference, and there you have it! Cuteness in under 20 minutes.
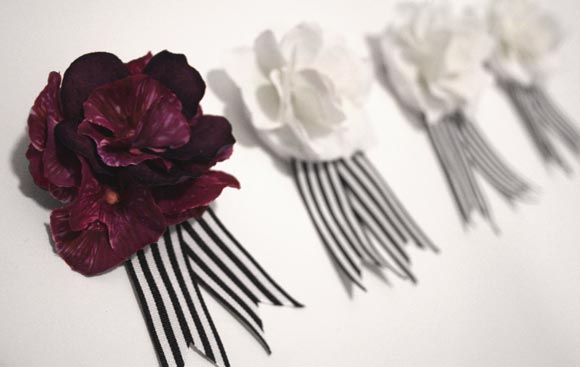
These delights cost me next to nothing since I had most of the supplies already. I ordered in the ribbon from Press Gang Supplies especially for our wedding details, and the brooch pins were picked up at the local craft store. I had some scrap felt from a previous project, and of course, I had faux hydrangeas balls-to-the-wall all over my apartment. Easy peasy. {Pictured below – the groomsmen boutonnieres along with fiance’s dark hydrangea boutonniere. I customized that little number with markers to get the colours just right and a little more realistic.}
I cannot express how much these little guys cheered me up. I haven’t had the time to make anything in the past three months, and without realizing, it was making me uber upset. I sat on the couch the other night and made all four of these delights in one go, and I felt so much better doing what I do best. Can’t wait to share more wedding craftiness.
What a cute idea! They look awesome.
Thanks Alex 🙂
Very cool – I'm impressed, they look fabulous!
Thanks for your comments recently… and the idea for having the flowers in my Waterlily Blanket go both directions, so they're on both sides of the blanket – I hadn't thought of that! I'll have a play when I (eventually!) come to sewing it all together and see how it looks!
Maria x
Oh excellent! Do make sure to post that delight once it's finished. The mix of colours is so lovely and those flowers kill me. So cute. I can't wait to crochet again! I heart autumn.
Looks Great!
I got married 2 years ago, and did everything myself as well.
It really adds a personal touch to your big day.
Thank you Pat! And I'd love to see what you DIYed for your wedding, if you ever feel inclined to share. Do it.
How beautiful boutonniere!! I loved these photos you have shared here. Well, I want colorful boutonniere for my wedding. I will be using a funky theme for my wedding decorations and for that my brother just booked one of prettiest DC wedding venues.