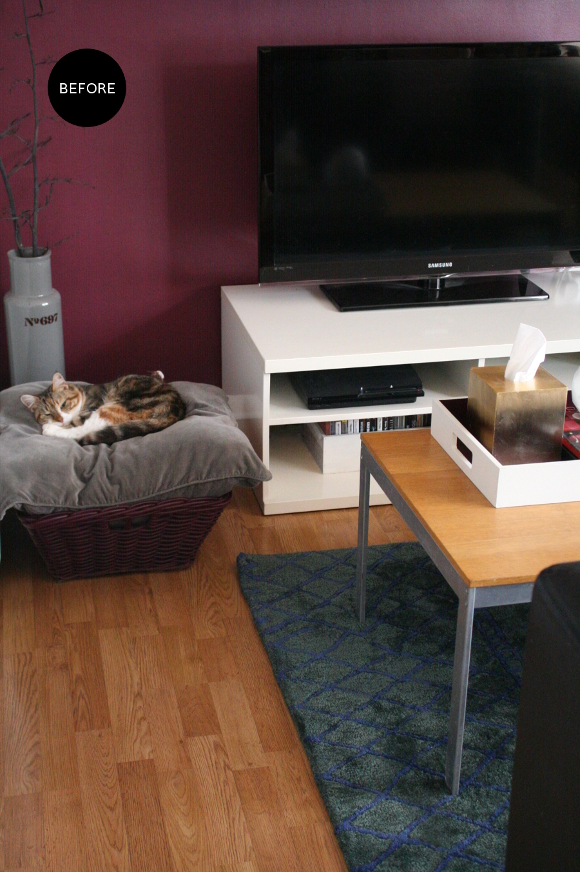
To backtrack a little, I had been thinking for a while about a renter-friendly way of updating our landlord’s coffee table. Importantly, in a way that could be undone easily in a matter of minutes. The wood on the table had a particularly awful orange undertone to it, not to mention hadn’t been looked after so it had aged rather disgracefully. I decided to cover the table top with contact paper to not only protect my eyes, but to also protect the table from being ruined further.
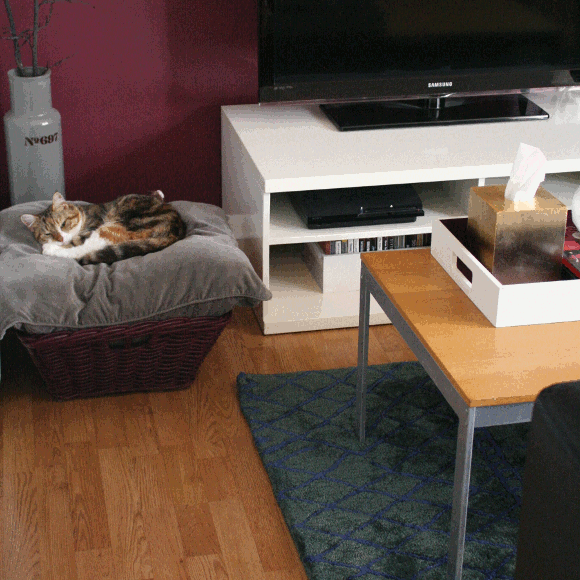
There were two other changes I wanted to make to this area [paint the cat basket and table tray] which I shared a couple weeks ago a peek in a
little gif mock-up …
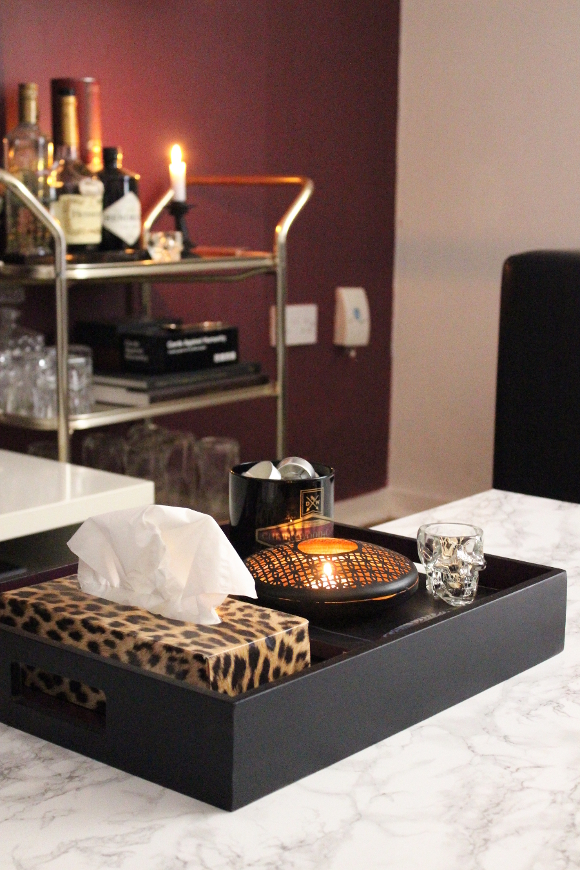
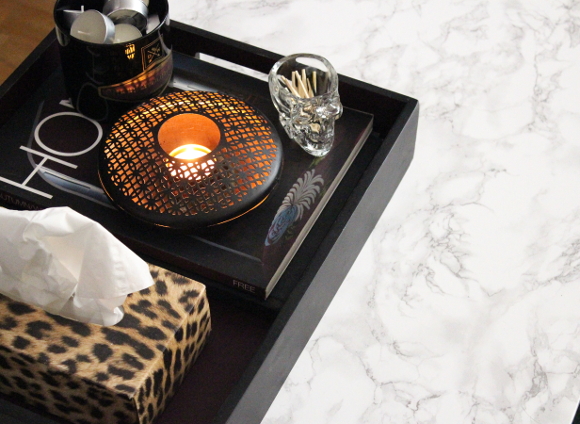
There was a resounding response to painting the cat basket black, faux-marbeling the coffee table and a majority of either painting the tray in either black or burgundy. I was the most unsure about the tray as I wanted it black and burgundy. Then it struck me – the inside was already burgundy, so I just sprayed the outside black. Boom. Thank you to everyone who shared their thoughts! It really did help. I am massively indecisive sometimes.
I painted the tray and cat basket, rushed out and got some marble contact paper from
Woodies. I bought one roll of
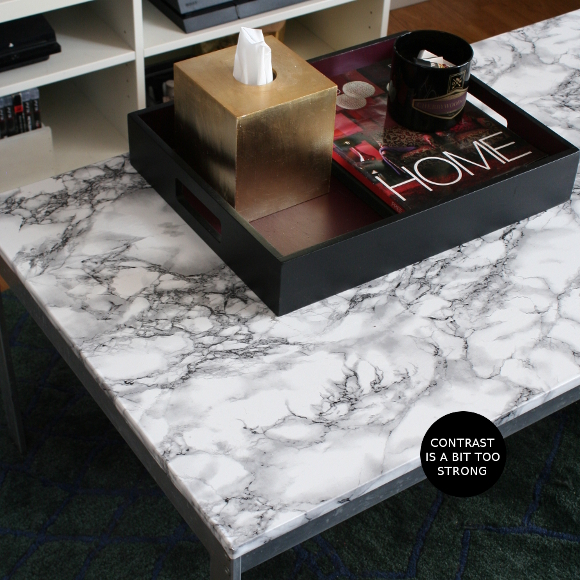
d-c-fix’s black and white marble contact paper and within 20 minutes, the table was covered. But I wasn’t happy.
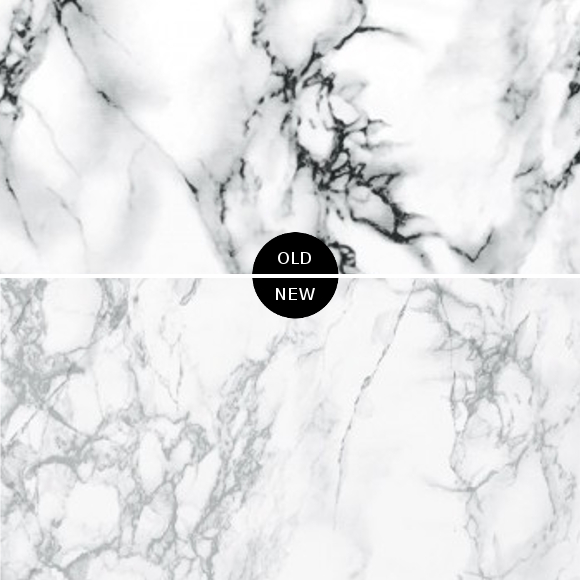
I really like the strong black and white marbling effect, but for some reason it wasn’t working in this situation. It was too strong in such a dark space. If our room was brighter it would work perfectly, but it kept catching my eye and in a bad way. It was fighting with our rug. It made the [ancient IKEA] TV unit look yellow. I didn’t like it. I went back to Woodie’s to see if they could order in a lighter shade of the marble paper [light grey veining vs. the darker black], but unfortunately they couldn’t. We checked
B&Q and alas, they had the exact role I wanted! We went home and I peeled off the darker marble contact paper that was already on the table …
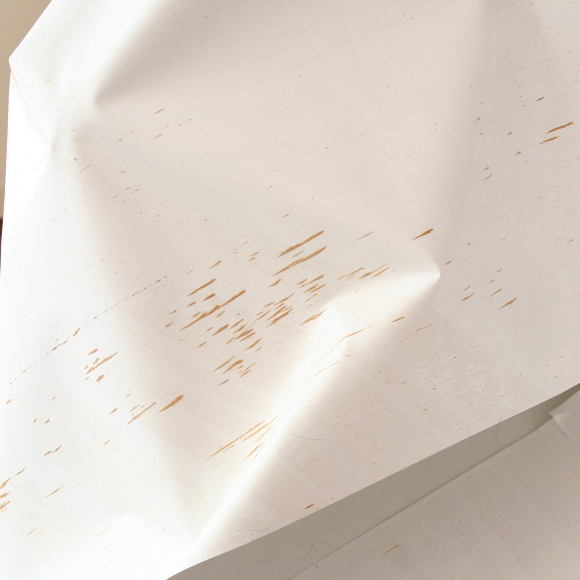
As you can see, some splinter-like pieces of wood from the coffee table peeled off with the contact paper. I panicked. Using a piece of fine sandpaper I lightly sanded the coffee table, wiped it clean and it was as good as before. PHEW. It was a damaged coffee table from the previous tenants to begin with, so I’d say that’s more so why the wood peeled off. It was incredibly minimal damage and totally fixable, so it’s not something I’m worried about, but for the sake of being transparent, I wanted to share this. I was hoping to reuse the darker contact paper to cover a couple of books, but thanks to the little flecks of wood, it was rendered very unsticky. Welp. It went in the recycling at the very least.
There was such a difference in the shades of the two contact papers [as seen below]. I waited for the coffee table to dry after I cleaned it, then got to work. Here’s how I applied it. For a second time …
What you’ll need …
– Contact paper in a colour of your choice
– A card to smooth any bubbles from under the paper as you apply it
– A pair of scissors to trim
– Something heavy to make sure the contact paper doesn’t scooch while you’re working [ie – a toolbox]
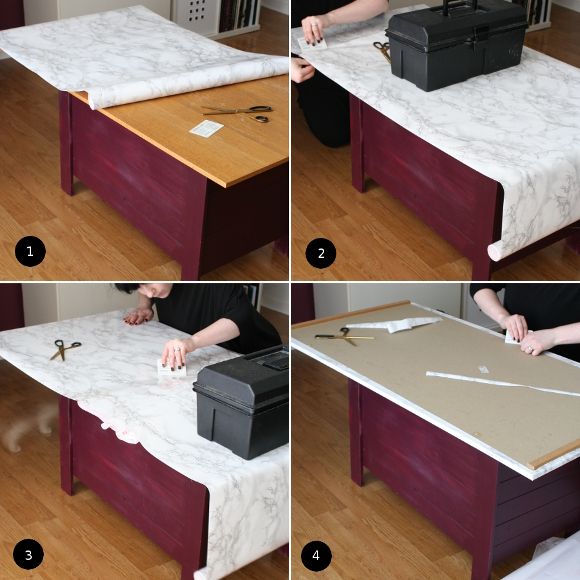
1. Remove the top of the coffee table and place it top-side-up onto something, like our storage box shown, so you can easily work on it.
2. Centre the contact paper onto the table top and if you’re working alone, place something heavy like on top so it wouldn’t move. Peel back the paper backing about 6 inches and stick a strip of the contact paper onto one end of the table, smoothing the bubbles out as you go.
3. Continue in this manner by peeling the paper backing from underneath bit by bit, smoothing with the card as you go. If you encounter a stubborn bubble, just peel back the contact paper a bit and reapply it. Do this until you reach the end of the table top and trim the roll leaving a couple of inches overhang.
4. When you’re happy all the bubbles are removed, flip the table top over and secure the edges underneath using your card again to ensure it sticks securely. Screw the table top back onto the legs of your table, et voila!
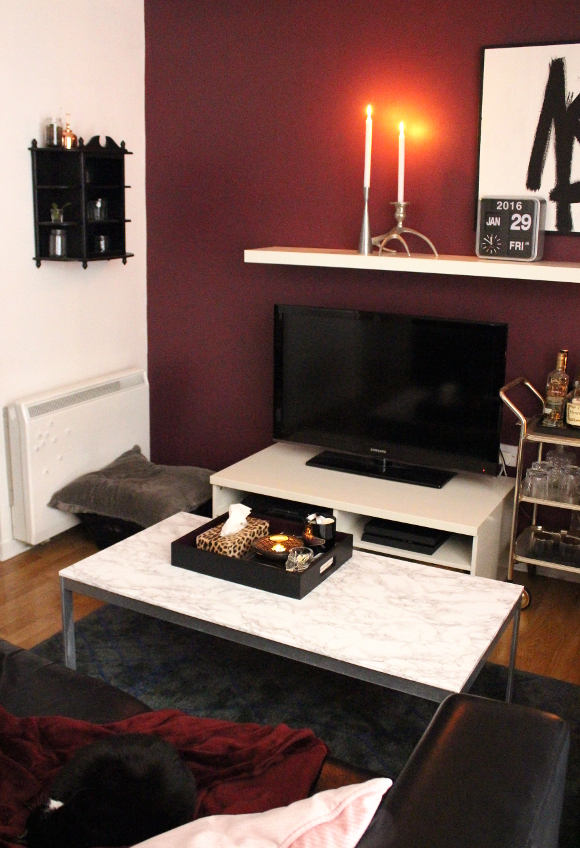
I’m actually overjoyed with how it turned out. It doesn’t make my eyes want to bleed anymore and the softer marble effect really brightens and adds to our living room and doesn’t fight with anything. This is one DIY I foresee happening over and over again. And our landlord will be none the wiser.