Updating a secondhand vase with paint

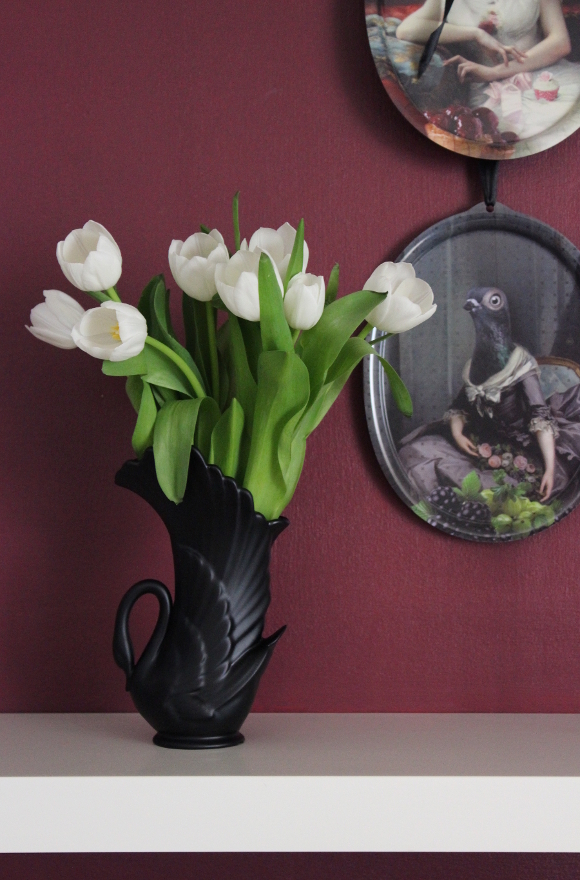
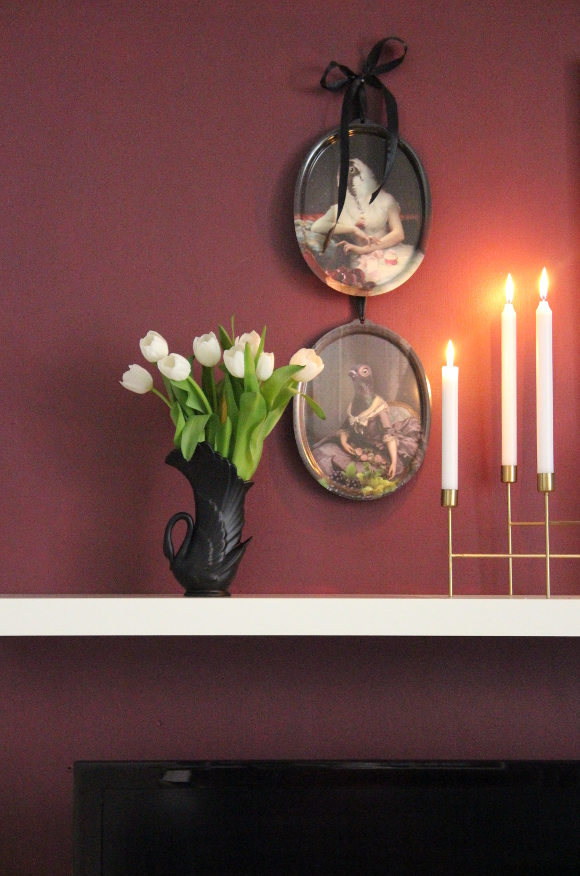
I’m not off to a great start with today’s post as I can’t find any ‘before’ photos despite having our swan vase for close to 6 years, it seems I’ve never taken a photo of it. I saw this swan vase in a charity shop years ago and bought it [probably for something like €5] because I’ve always liked swans and thought it had a really nice shape. Unfortunately, I only realised how aged and discoloured the vase was once I brought it home, but since I like swans so much, I kept it in our storage cupboard. For something like 6 years. 

Last weekend Robert bought me flowers and I went to our storage cupboard, picked up the swan vase, and as I was putting it back down as I’ve done so many times before, a thought popped into my head – what if I were to spray paint it black? Oh. Oh I like that idea.

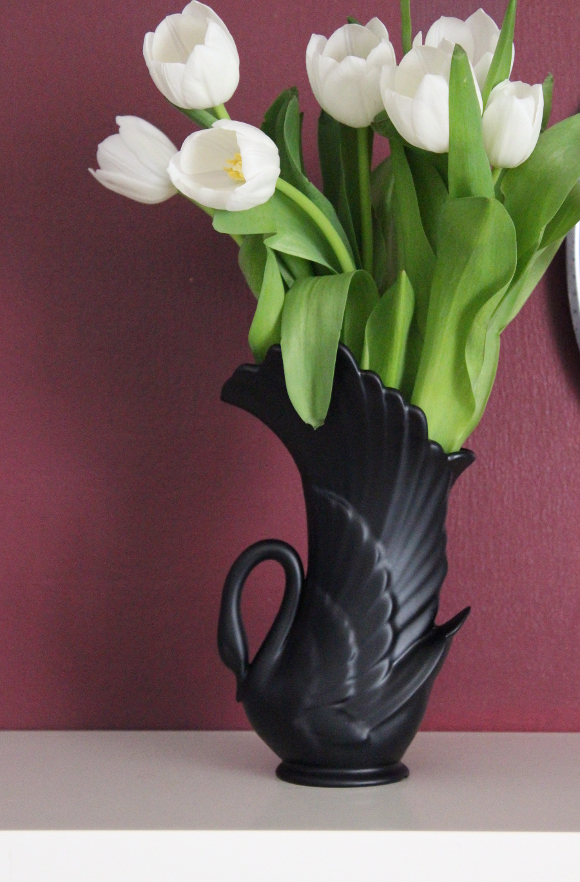
I went for my can of Rust-Oleum’s chalkboard paint [this is not an ad – I’ve had this can for almost as long as my swan vase and I’m a genuine Rust-Oleum fan], put a plastic bag over my hand, held the vase upside down, put my hand in the vase and carefully spray painted thin layers onto the vase. I didn’t use a primer as I the paint adhered really well to the vase, but depending on the piece you’re painting, you may need to use a primer. I let the vase dry for at least an hour before using it to be sure the paint was completely dry.

I don’t know why it took me so long to paint it. I’ve always loved that vase, but the colour gave me such a stink-face every time I reached for it that I’m just glad I thought to paint it. There are many people who may say I’ve destroyed an old or vintage vase by painting it, and I’m okay with that, but I’m using it for the first time since I bought it so that’s a good decision in my books. 

Our secondhand Stokke crib

When I was putting together ideas for the nursery, one of the main pieces we needed was a crib. Cora’s room is quite small and whatever crib we picked would be a big deal, so I wanted to make sure it was something we really loved before getting one. We went to a lot of stores and looked at a lot of cribs, but my gut feeling was to see if we could find a secondhand crib. I wrote about it more in my Nearly New Wood Challenge a couple of years ago; how for the most part I’m not too keen on buying brand new furniture, especially wood. 
I spent a few days looking through the cribs available on Adverts.ie and that’s when I spotted a secondhand Stokke Sleepi crib in walnut. It was so different to any other crib we had seen that it immediately gave me heart-eye emojis. Before I replied to the ad I looked up more information on the Stokke Sleepi crib and my doubts were drowned out pretty much by how incredible it is. 

A couple of text messages later and a thorough cleaning, Cora’s new [to us] crib was home. We didn’t use the mini crib as it didn’t fit in our equally small bedroom. I don’t know if we’ll end up using the bed until Cora is 10 [though it’s a nice idea to not have to buy her a bed for 10 years], but being able to use the end pieces of the cot as chairs? Game changer. “Look how much use we can get out of it!” Robert didn’t need too much convincing TBH. 

We paid €200 for our secondhand Stokke Sleepi crib which was €20 over our budget. I didn’t have a problem going over budget as I thought it was just too good to pass on. It came with newborn and toddler conversion kits which if bought new, including kits it would altogether cost us over €1,000. That’s not why we bought it though. It’s a gorgeous solid walnut bed [and it looks like Stokke no longer sell it in walnut] with simple lines and a killer shape. And even better, for my conscious at least; it didn’t cost the earth. 

To find out more, you can check out my Nearly New Challenge and Nearly New Wood Challenge

The Irish Independent, Weekend Magazine

Last Saturday’s Irish Independent Weekend Magazine featured a piece written by Emily Westbrooks all about how DIY needn’t be so daunting. And to prove just that it featured our coffee table contact paper makeover [along with the ever creative Linda of Make Do and DIY!].

I had every intention of sharing the piece on Saturday, but we spotted a man laying on the side of the road with a gash on his forehead on our way home [very long story short; we tended to him, called an ambulance and he was taken care of], so I completely forgot to share my mention that evening as we were a bit distracted, to say the least!
Thanks again Emily for the mention and for including our slightly-less-gaudy-rental-coffee-table thanks to a roll of contact paper and some elbow grease. And if you’re curious, you can see my full coffee table tutorial here