Cora’s cute and quirky nursery

I’m slowly learning that time is now very different. BC [Before Cora], it would take me say, 45 minutes to tidy the apartment and get myself ready before heading out the door. Now? Multiply that by 4 and you’re starting to get close. Between feeding, changing, predicting how much to bring with me, getting myself ready, getting Cora ready, feeding Cora again, dealing with explosive situations and then actually leaving the apartment, I’m glad I have very few scheduled things these days. One thing I have been hoping to do, you know, when I have a spare minute [😑], was to properly photograph the nursery. Though it’s not entirely finished, it’s been at this stage since the week before Cora was born. So yeah. Getting things done nowadays takes time. Even if it’s just taking photos. Baby steps?

Our spare bedroom is quite small and I didn’t want to leave anything to chance, so I did what I quite embarrassingly love doing – I measured everything and made a little mock-up of the room on Google SketchUp. Here’s the design I decided on a couple of months ago … 

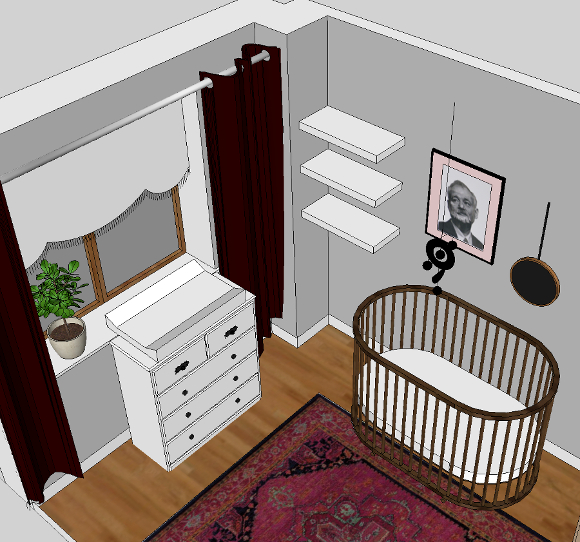
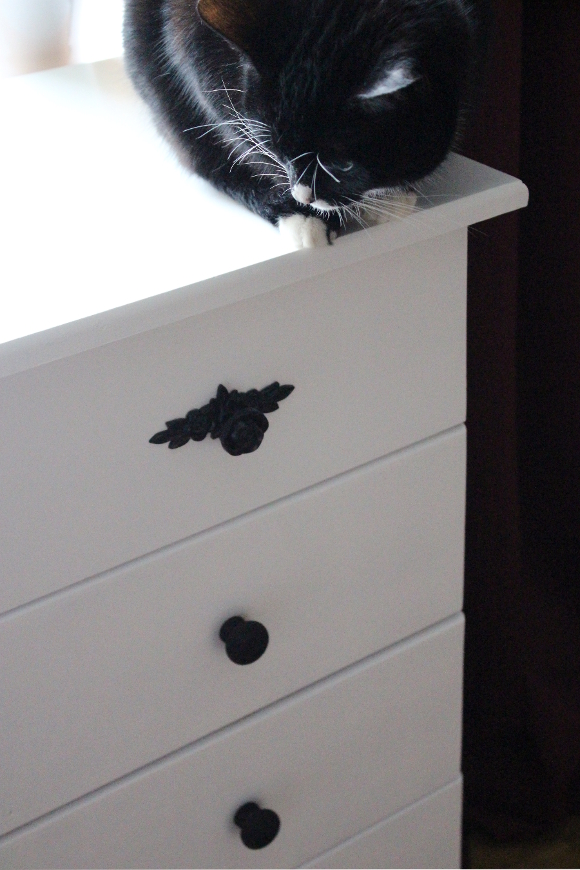
Before I bought anything or decided on a design detail, I did a mock-up of it in the space. I imported Pantone’s ‘Lunar Rock’ paint swatch before committing to it, drafted a combination of fancy and plain knobs for the nursery dresser before buying them, did up a rough placement of artwork and shelves before hanging them, decided whether or not a secondhand chair would fit [which, as you can see, none have just yet], what kind of rug would look the best, what would be the best placement for the crib – everything. Everything was decided on in SketchUp. I find SketchUp so helpful for making decisions digitally so you don’t have to make a disaster in real life. It was only today that I looked back at my plans and realised how close the room is to what I had hoped. I’m quite proud of that!

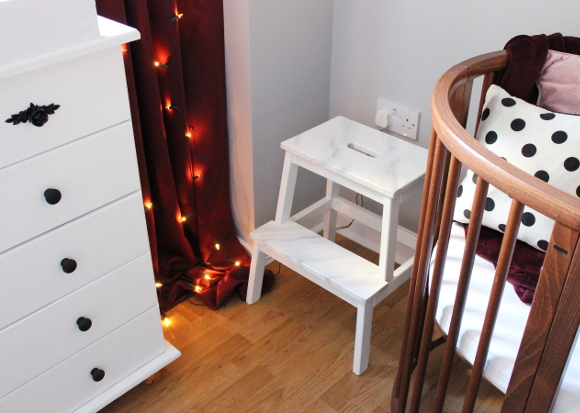
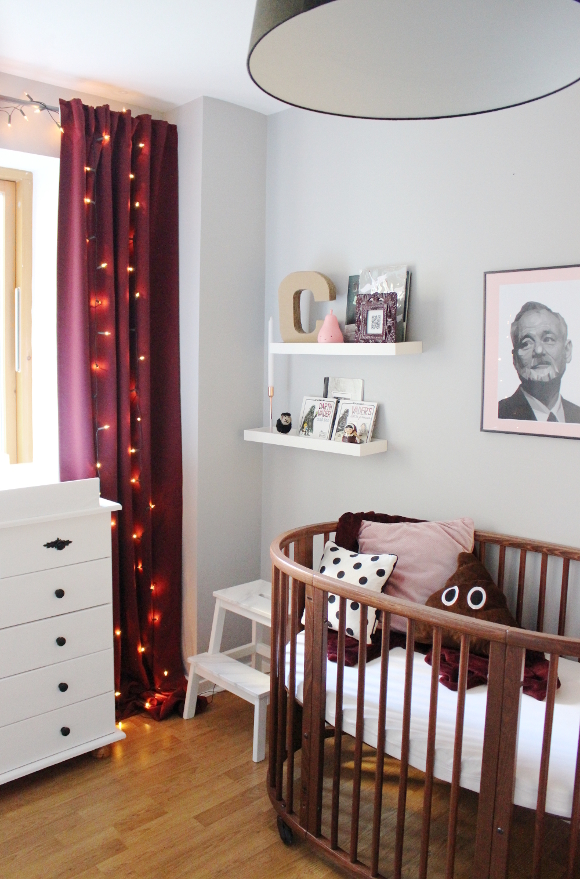
The room felt a bit stale when I was finished so I added a string of Christmas lights up and over the curtain rod to help make the room feel warmer and … funner. I really love Christmas lights and used to have them hanging up in my bedroom as a teenager throughout the year. When I first switched them on  in the nursery for Robert, he was so surprised by them and really impressed [thanks to the dark curtains, you can’t really see them when they’re off]. 

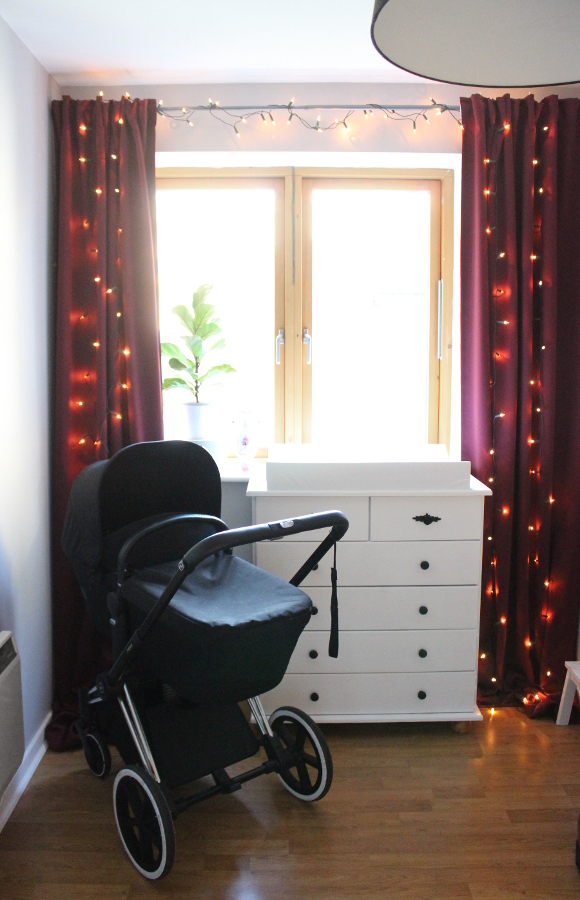
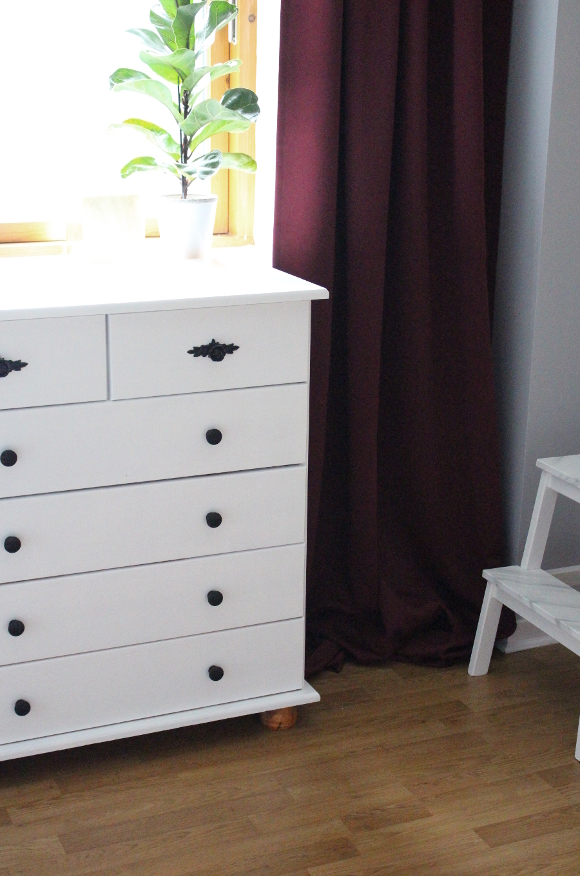
There are a few major pieces I have still yet to get. One being a proper bin [I’m currently putting dirty diapers into a plastic bag that hangs beautifully off one of the knobs on the dresser] and the other being a chair of sorts for the corner of the room. To give an idea of space, I put our buggy roughly where a chair would go, but I have yet to find a really great one secondhand to reupholster.
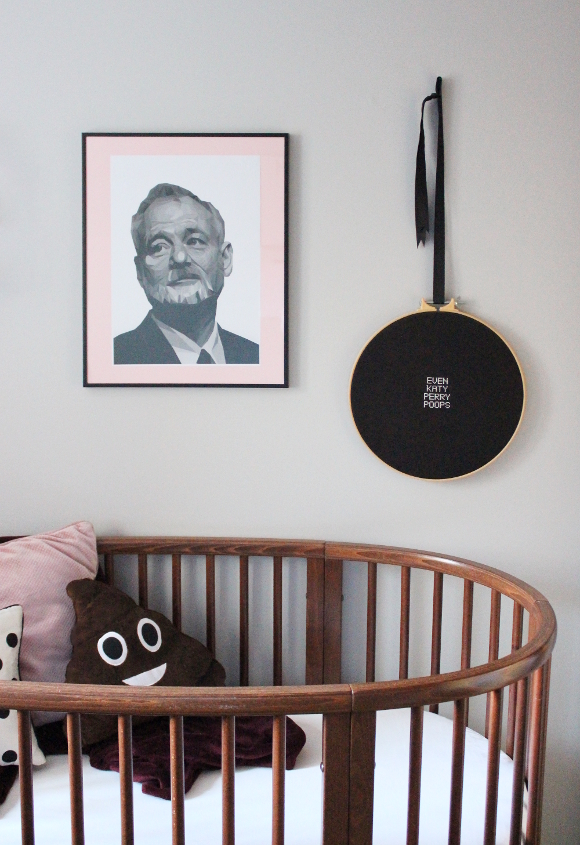
I also have a good few pieces of artwork to hang [like my baby prints by Bill & Coo.!] and some more fun pieces to perfectly place, but for the most part, this is Cora’s nursery. I feel like I say this in every blog post but if we owned our apartment, there would be so much more I’d do to the nursery. But we don’t. But I’m still so happy with our cute and quirky nursery. 

Nursery dresser makeover!

It  really feels like things are moving at a snails pace these days [myself included], but things are finally getting ticked off my to-do list. One of them being the nursery. Between appointments and classes and endless lists of what to do and get, there’s so much involved in getting ready for a baby. And once you get everything struck off your list, you start thinking of more things you should do. My lists are reproducing. Or sometimes you just want to lay the hell down and nothing gets done for a day or two. Do I sound complainy? I really don’t mean to, I’m just glad things are finally starting to fall in place!

Back when I first put some ideas together for transforming our spare bedroom into a nursery, I wanted to source as many secondhand items as possible. So when we were looking for a dresser / changing table, I took to Adverts.ie and found a perfect sized one for €45 …

It  was a standard dresser in relatively okay condition. I knew I’d be painting it as there were already a lot of different wood finishes in the room – walnut crib, faux pine floor, some other faux wood on the built-in wardrobes and then the chicken-fat orange wood around the windows, the combination of them all together just wasn’t working.  

Since our spare bedroom / nursery is a fairly dark room and the dresser would be going under the window [potentially blocking more light from the room], I didn’t want to go with anything too wild or dark on the dresser. When it came down to it, I wanted to keep it light and bright. I still had some leftover white Rustoleum paint from updating our bedside tables this time last year, so on went 5 even coats of plain white paint all over. I thought of doing a faux marble effect again, but quickly changed my mind as I didn’t want to overdo it.

As for the details on the dresser, I kept it relatively simple. I spent about 2 weeks looking for the perfect hardware for the drawers. I found these black rose knobs and backplates on Etsy [which I don’t think is a genuine Etsy seller and is probably a warehouse of sorts, but welp. I couldn’t find them elsewhere and I really wanted them so I got them]. I thought they were a perfect mix of whimsical, dainty and a little bit gothic. I decided to order just two knobs for the top drawers and went with very simple knobs for the rest of the dresser  as I didn’t want to overkill it [I found perfect budget-friendly untreated pine knobs in Woodie’s that I painted matt black]. 

Since getting my hands on Emma’s Tangled Hawkmoth wallpaper, I immediately knew I’d be lining the drawers of any future nursery dresser with it. Unfortunately we can’t hang wallpaper in our apartment [boo, renting], so into the drawers it went. It works so perfectly and I love seeing peeks of it underneath all the tiny baby clothes. I want to line ALL OF THE THINGS WITH IT NOW.

As for the feet of the dresser, I’ve not done anything just yet with them. I’ve left them unpainted as they were, which in a way kind of makes it look like the dresser is floating [I know, a stretch] but I’m hoping to either swap them for different feet or just take them off entirely. 

I should also say sorry for all the tightly cropped nursery pictures – it’s really to spare your eyeballs from seeing the madness that lurks to either side of the nursery. Soon, though. Soon it should be finished! Considering baby is now finished cooking and I’m 40 weeks [and 4 days], but I think [see: hope] later this week baby will make her debut. Fingers crossed – but not legs. Legs are anything but crossed 😉

Storage cupboard spruce up

If a good storage or organisational before and after blog post doesn’t float your boat, I totally understand you scrolling past this one because this is going to do nothing for you. It is however something I’ve gotten ridiculous levels of enjoyment from, so I really wanted to share it. As of yesterday I finished giving our hallway storage an upgrade and so felt inclined to share. It didn’t cost me anything extra to update our cupboards [as I used leftover paint and supplies I already had] – it just took some time and considered planning. And ridiculous levels of nesting hormones. 

We have a number of storage cupboards in the hallway of our rental. Over the past two months I’ve slowly updated our coat and immersion cupboards [we have a third cupboard, but I’m saving updating that for a rainy maternity day]. Yes, they’re storage cupboards and no one really cares what they look like on the inside, but I do. I do. And I know. I know the horror of what lies behind those doors every time I walked past them. Those cupboards caused my nesting hormones to be personified [or animalised?] as a wild bear trying to get out of a shirt and tie. It was time. I wanted pretty storage cupboards so I got down and made them happen.

COAT CUPBOARD
Early last year when I repainted the doors and skirting boards in our hallway, the only place I didn’t paint was the inside of cupboard doors [because they aren’t immediately seen]. De-yellowing and repainting the inside of the door and trim was at the top of my list. I then repainted the inside of the cupboard with leftover basic white paint, I tidied and donated some coats as well tackled the storage on the back of the door. At the time, everything was hanging from those three hooks on the back of the door – our bags, my bike bag, shopping bags, a bag of canvas bags and a plastic bag chute thingy. I decided to cut down and use the few hooks we had for things we use every day [umbrellas and bags]. We also added a medium sized freezer to the cupboard which will be perfect for lots of emergency / pre-made meals for over the next few months. And years. Until baby is 18, basically. 

p.s. See that Hudson’s Bay Company coat? I found it in our local charity shop for €5 last year [for those not familiar with HBC, their point (aka, stripe) blankets and coats are serious triple figures]. I’ve never worn it but I’m never, ever getting rid of it. Ever. Even if there’s a fire.

IMMERSION CUPBOARD 
The original puke-green [actual technical Pantone shade] of the immersion foam alongside the yellowed door and trim really appealed to my eyeballs. I Googled it and Google said it was fine to paint this type of hardened insulation foam, so I grabbed a tub of leftover grey paint and added two coats. I also repainted the door and surrounding trim white, the door hook grey, inside the cupboard basic white and finally got around to hanging everything up properly. Our plastic and canvas bag storage was demoted to the immersion door along with a bag of Dyson attachments. 

I know this is barely pretty enough to be blogging about, but there’s something my sick mind finds therapeutic about making a neglected storage area pretty, functional and as much a part of our home as the rest of it.