
Back in June of last year, in a renter-friendly attempt to update our kitchen, I added contact paper to a small section of our kitchen counter near our stove to test whether or not it would be a good idea to cover the rest of the kitchen counters. As you may have gathered from the title of this blog post, it worked out better than I had hoped, so a few weekends ago I committed to covering the rest of our counters! Cora, look after yourself. Mama has an idea and god help us all if it goes wrong.

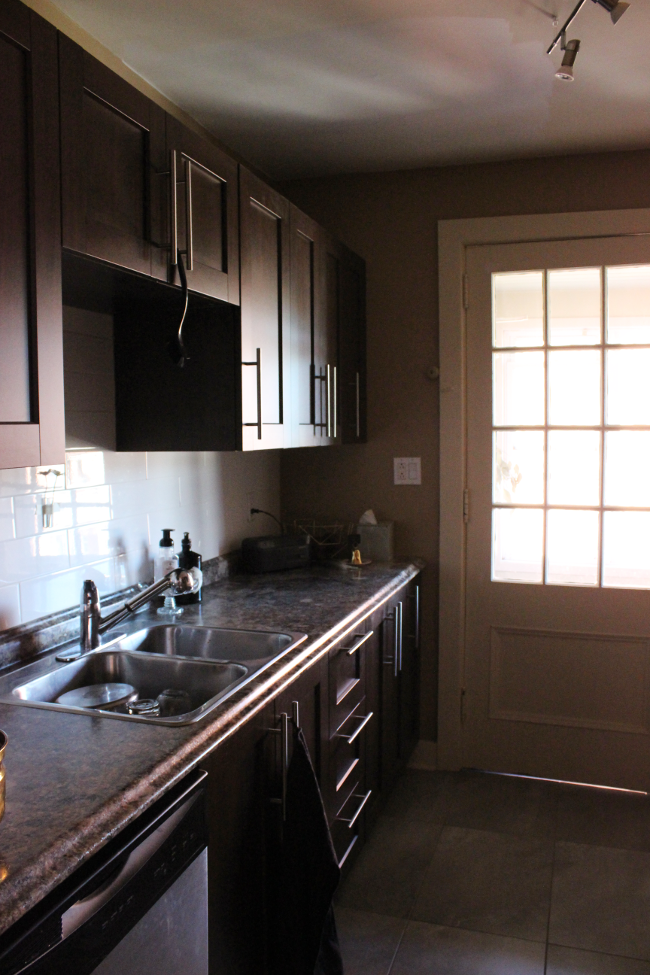
I want to start by saying I love and appreciate dark spaces, don’t get me wrong [hello, dark romantic luxe]. But our galley kitchen was a little too dark at the best of times for a task-oriented space like a kitchen. There are dark cabinets [which I love], brown walls, grey tiles on the floor and dark brown mottled counter tops. It has a lot of really good elements, but there was a touch too much brown for one room [sorry, brown lovers]. Also, when I’m handling things like knives and preparing food, I prefer to be able to see my extremities and exactly what I am rhythmically chopping into.
I had the idea from the day we moved into our apartment to update the counters in a very renter-friendly way by using marble contact paper. I got the idea years ago from Linda of Make Do and DIY from her ultimate “new kitchen counter” cheat where she temporarily updated their kitchen using paint, gold duct tape and contact paper until they saved up to redo their kitchen. And it was legitimate beautiful. It worked for Linda, so it would work for us.
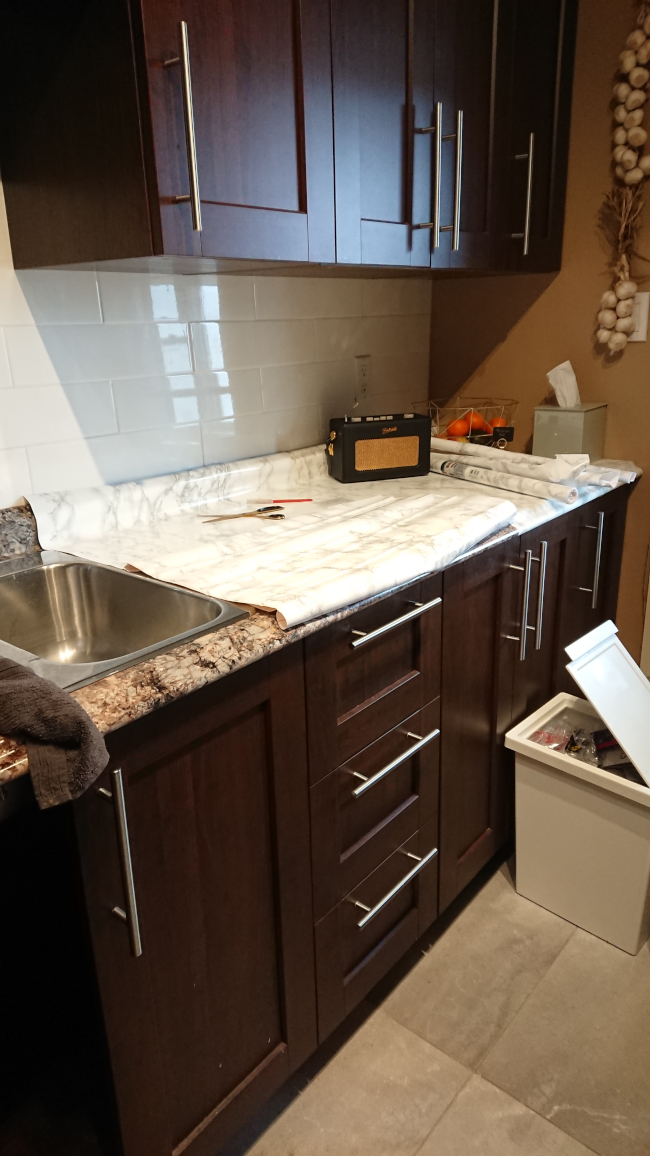
I started at the far end of our kitchen and using a card from my wallet, I peeled the back off the contact paper and slowly smoothed it across the counter [I wrote a detailed tutorial here on how to apply contact paper, should you be a bit nervous about applying it yourself. Contact paper is quite forgiving).
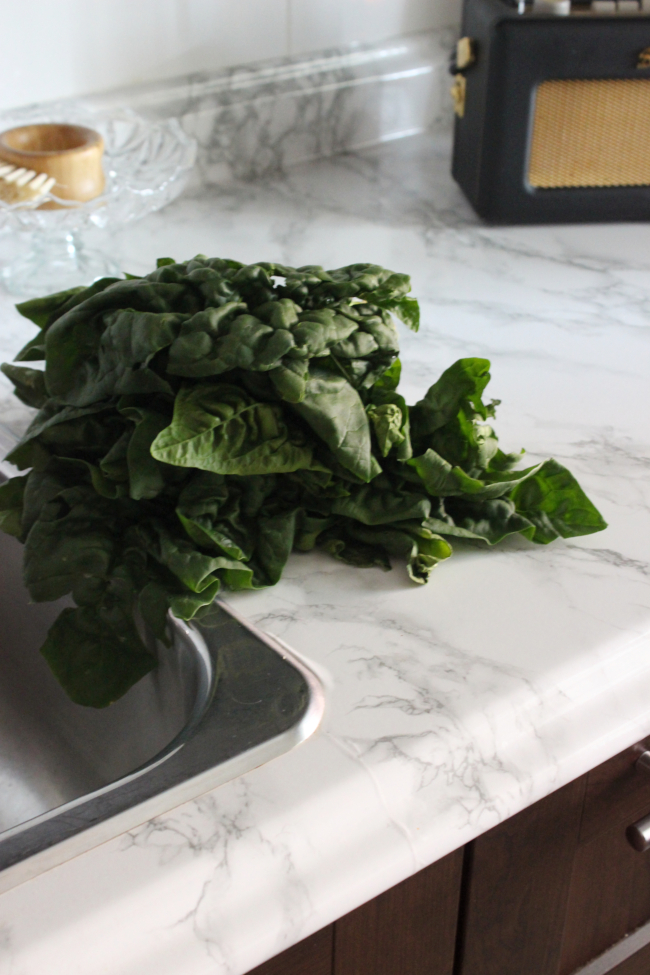
When it came to the sink, I wanted a really secure fit and didn’t want to simply cut the contact paper around the sink. I knew that in 6 months it would have crumbs and water and all sorts of things making it peel, so I loosened the sink fro, under the counter and asked Robert for help; Robert laid under the sink and carefully pushed the entire sink up to lift it about 3mm off the counter while I quickly used a card to smooth the small overhang of contact paper under the perimeter of the sink.
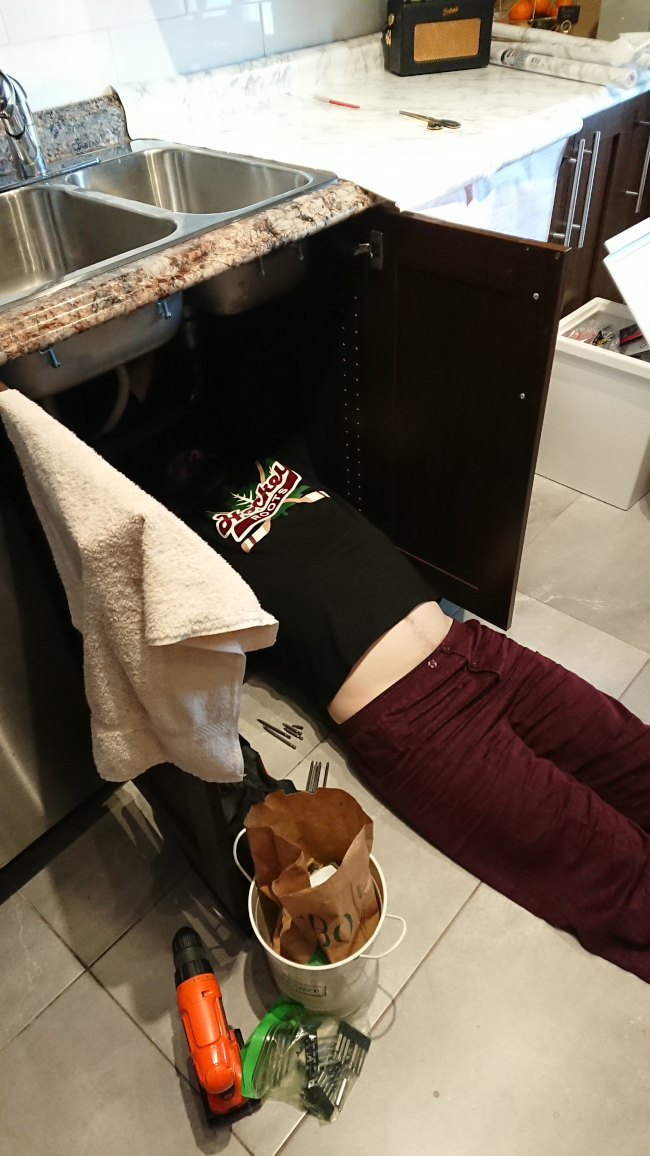
Despite how murdery this photo looks, I promise Robert is alive and safe.
I worked quickly and within 10 minutes, I had covered the awkward parts around the sink. I then tightened the joints under the sink and voila! The effort was 100% worth it.
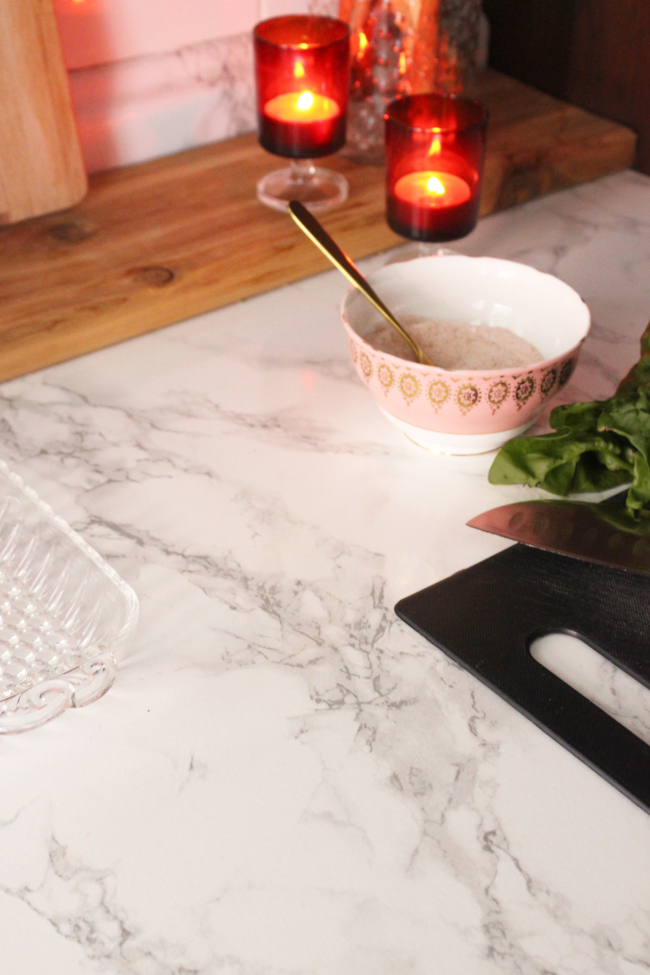
You can see one of the seams above and a tiny air bubble along the side of the sink. No, it is not an overwhelmingly perfect job. I will be the first to admit that. But I will be the first to admit I am someone who is bothered by imperfections and I honestly say the very small few bubbles that are on the counter don’t bother me because they’re not as noticeable as the one above.
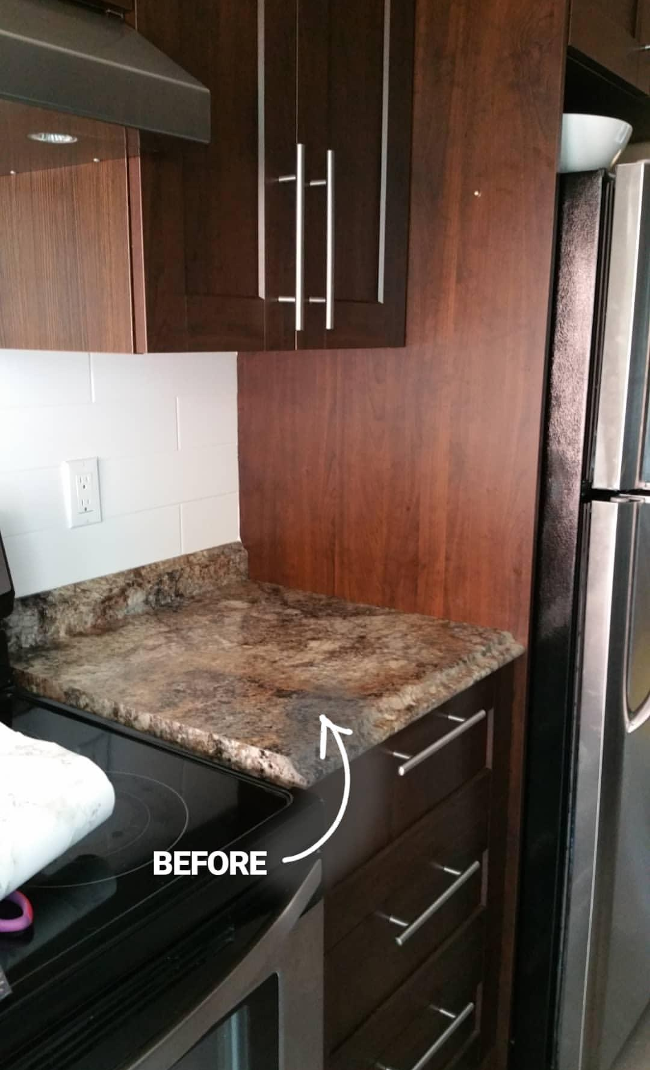
You can again see the original section I contact-papered above and below. This section of kitchen is the most used area and the place I wanted to test for at least 6 months before committing to covering all the counters. It has worked out so perfectly.
Occasionally, depending on what I’m cooking, things have stained the contact paper. Things like curry or tomato sauce. I at first freaked out, but surprisingly, after about a day or two of wiping counters [I don’t mean 48 hours of continual wiping … ], the stains completely dissappeared every time. So if you’re worried about stains in your kitchen, contact paper is very robust.
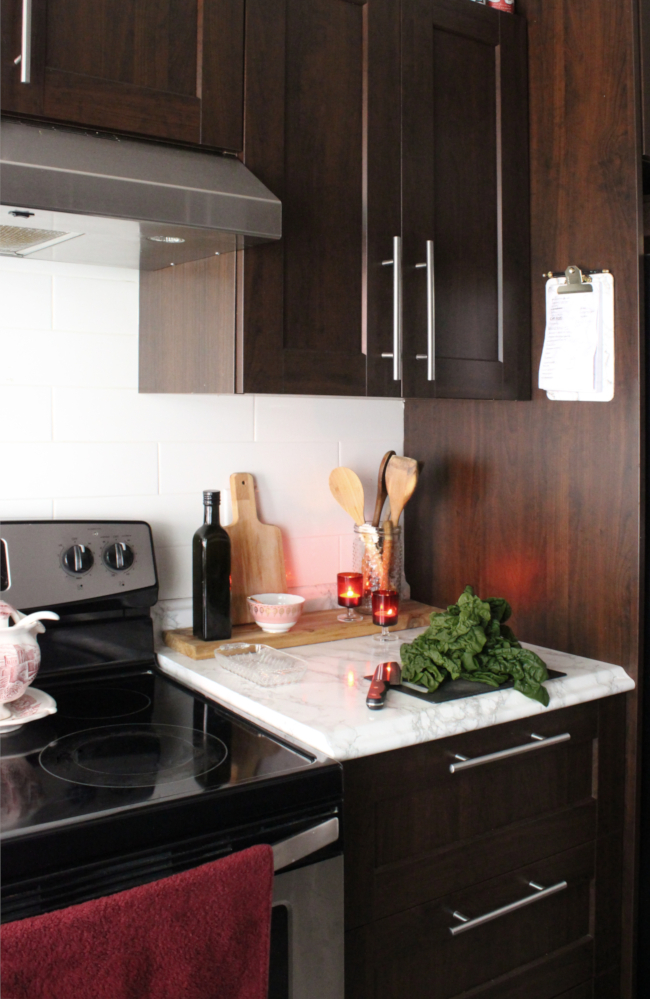
I am so happy with how our kitchen turned out and the best part is that when we move out of our apartment, I can undo it all in about 20 minutes. A perfect renter-friendly way to update any space, or if you’re like Linda, a great way to temporarily update your kitchen while you save to remodel it.
STATING THE OBVIOUS: contact paper is essentially plastic and is not resistant to high heat so should you decide to do the same, please use your judgement and do not place hot pots or pans directly on the contact paper because you will end up with what I can only imagine would be the after effects of when the Ghost Busters annihilated the Stay Puft Marshmallow Man. It’s not going to be pretty, but I know you’re smart and that you know better.
Other contact paper updates I’ve made:
– updating [and childproofing] our secondhand dining room table
– my agenda
– updated faux marble coffee table
– mini faux marble plinth
The difference that marble contact paper makes is amazing! So much lighter and brighter, and it makes everything around it look better too. That brown worktop was just too much brown. The cabinets look so much nicer offset against the white marble. A brilliant job, and I appreciate the sink lifting for a better finish. You just know it will last way longer tucked under like that. Great work!
And you made me LOL with “I prefer to be able to see my extremities and exactly what I am rhythmically chopping into.” 😀
Author
Thank you, McFarlane! I knew you’d appreciate the extra tuck details! With projects like this where I have the option to take the easy route vs. doing the more tedious but will last in the long run and makes more sense route, I weirdly prefer taking the extra time to make it look right. No one would be able to tell I unscrewed the sink and poor Robert had to help me install it around the sink, but they would definitely notice if I hadn’t. I guess the saying “buy cheap and you’ll buy twice” goes for DIY too. DIY cheap and you’ll DIY twice!
Admit it. Where did you hide the body?
Author
I didn’t hide it well enough, apparently!
I did it!
I finally tried the contact paper. Thanks for the tips!
Author
Yes, Pat, YASSS! I’m so glad it worked for you!
Was this a peel an stick wallpaper? I rent and want to do the countertop.
Author
No, I used Dc-fix self adhesive contact paper, which is a vinyl covering that is waterproof. I would not advise putting wallpaper on your countertops.