Kitchen update – reveal!

I’m actually quite excited to at long last share decent photos of our kitchen. For the 6 years we’ve been living here, I’ve rarely taken photos in our kitchen because, well, it was embarrassing. It was a classic case of trying to work around landlord [and builder] stuff and as much as I tried to make it pretty, it just didn’t work. To get you up to speed, you can check out what our kitchen looked like before, and then see the first round of changes I made to our rental kitchen. 

A few weeks ago Harvey Norman got in touch when they read my blog post about our kitchen and very generously offered to give a helping hand with adding some pizzazz to our kitchen. Um, woah. I had worked with Harvey Norman in the past when I was working on the Localise room at Sophia House, and to say they were a huge help is an understatement. They’re an incredibly down to earth group of people behind the name, and they have killer sales. Which is a giant plus. They’re a company I’ve been a fan of for a long time so I was incredibly excited when they got in contact to work with me directly. 

After all my work overhauling the kitchen last Saturday, I rewarded myself the next day by heading to Harvey Norman to accessorise our kitchen in style. And it was tough, I’m not going to lie. Because I wanted ALL OF THE THINGS … 

To the horror of poor husband, I spent almost 2 hours in Harvey Norman Blanchardstown last weekend. For our shelves, I couldn’t resist the sleek pepper mill [which we actually use for sea salt] and a mortar and pestle. Husband is a curry aficionado and has mentioned rather frequently, “hey, remember that mortar and pestle we had 5 years ago? That was nice. Before it smashed“, so Harvey Norman’s sleek porcelain and bamboo mortar and pestle was a must. 

I’m a big fan of mini versions of every day things, so when I spotted their mini shopping baskets, I had to get two. One of which is perfect for eggs. I also spied some mini espresso cups to support husbands caffeine interest. A perfect little black and white accent to our shelves.
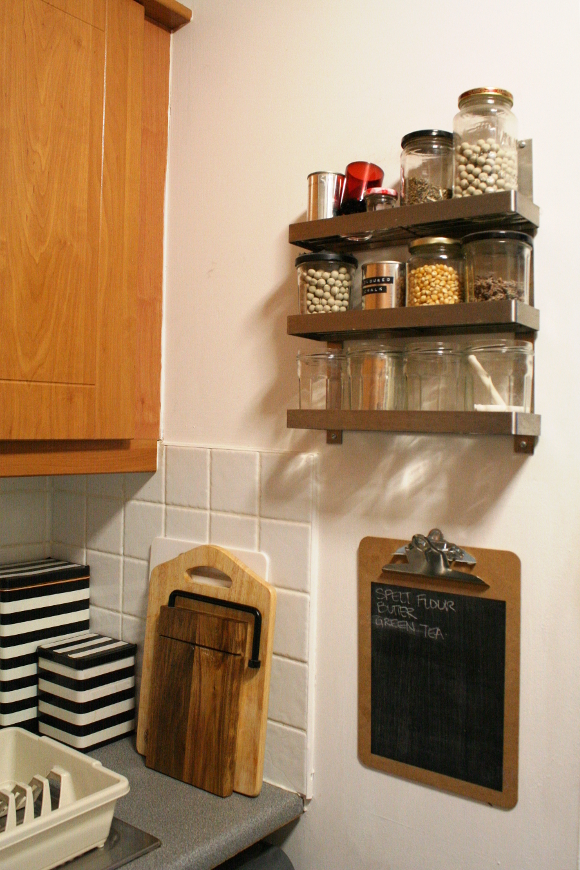
I didn’t make any drastic changes to the shelves in our kitchen, I just paid a little more attention to them as they had been lacking some for quite some time, thanks to the yellow door taking the spotlight … 

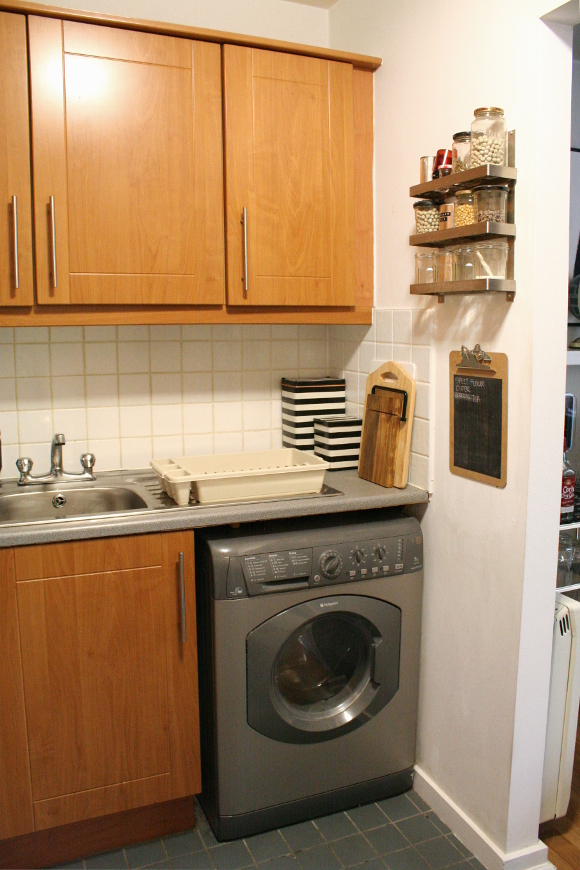
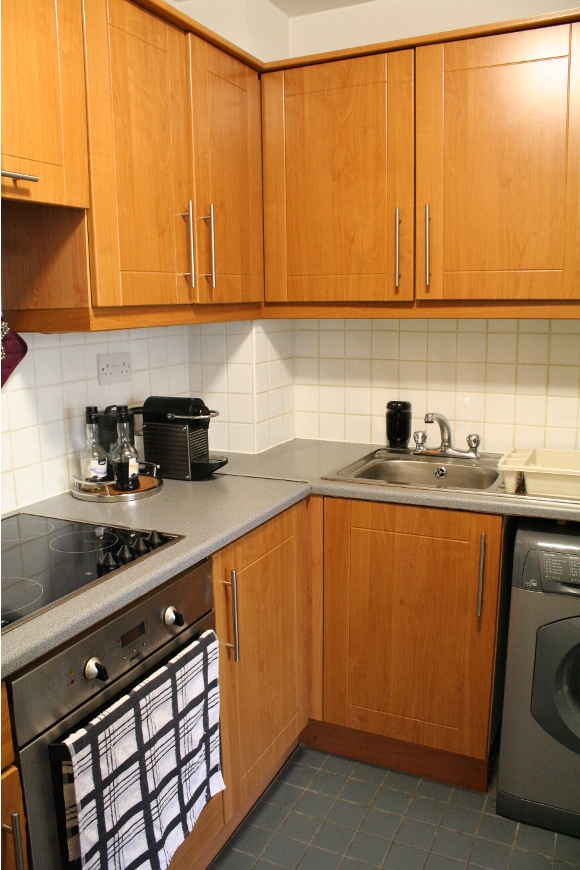
I think the biggest change I made to our kitchen was removing the microwave. Our kitchen is tiny therefore we have very limited counter space, so removing the microwave gave us SO much more room. We didn’t use the microwave much anyways, so we can simply use the stove or oven to heat whatever we need, old school style. 

In place of the microwave, I created a little hot beverage station for husband. I had had my eye on the DeLonghi Brilliante kettle in black, but it was out of stock when I was visiting Harvey Norman. But to be honest, our old kettle [not pictured] works fine. It’s just ugly as sin and I was over excited at the idea of having a really fancy kettle. I mean look, it’s so angular

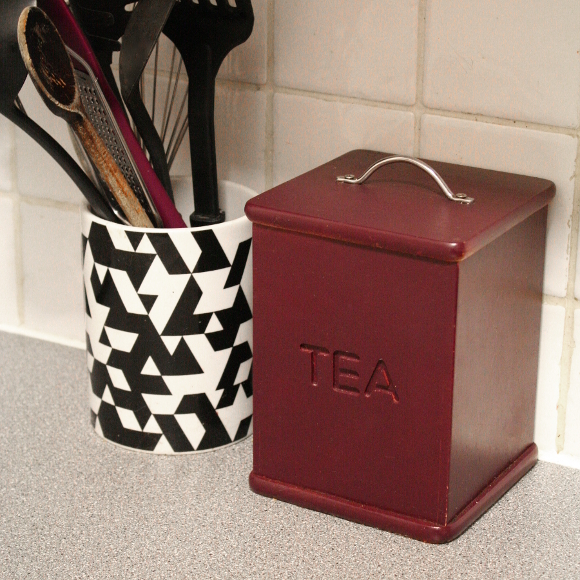
Both the tea and coffee boxes I found in charity shops over the years and spray painted in my favourite Montana winegum [the tea box was actually one of the centre pieces in our wedding]. I couldn’t resist picking up another mini shopping basket in Harvey Norman to perfectly keep all husband’s beverage accessories in line. 

Another change I made to the kitchen was that I removed the kitchen-roll-and-tin-foil thing that hung on the wall previously, as we only used it because it was there. To cover the wall studs in its place, I framed and hung one of my favourite food themed graffiti Instagrams. I think it looks much better, no? 

And on the far side of the kitchen, I simplified everything again. I got rid of our 8 year old chopping boards [ew] and replaced them with this bamboo and rubber board from Harvey Norman. It’s been a while since rubber got me this excited. When we’re preparing food, the chopping board doesn’t go all over the place like our previous boards did. It’s such a simple thing, but makes a huge difference with food preparation. 

I also couldn’t resist those giant BBQ matches I rather excitedly found in store. I bought 4 boxes of them, but immediately justified it because, well, look at them! I have more on display in the living room. I also picked up a bamboo bowl for the keys in our hallway and a giant vase that looks kind of like a bomb shell, for our bedroom. Both of which I’ll be sharing along with updates on our hallway and master bedroom. Speaking of which, that room is next to get the paint treatment. More #DIYDominoEffect!

Kitchen update – beforemiddleafter

Disclosure – Harvey Norman generously supplied kitchen accessorise free of charge for my mini kitchen makeover, but of course as always, all words and opinions are my own. I only work with companies I like and of course, think that you will like too! Thank you for supporting the companies that support The Interior DIYer.

Room tour – our kitchen, currently

Last month when I played host to two stellar bloggers, one thing that really struck me when Maria and Kimberly first walked into our apartment and saw it in real life was that they didn’t understand the layout and where some things were in relation to each other. No, I’m not accusing my guests of being slow, it’s entirely down to my lack of showing images of an entire room and where things are in relation to each other in our apartment. I tend to show just tiny snippets of what I’m blogging about at the time. I already know what our apartment looks like, but I need to remember that not everyone else does. I love seeing an entire room on other peoples blogs, so I’m going to hope you’re equally enthusiastic about seeing our kitchen today. 

I spend a lot of time in our kitchen. But I must confess, I’m a little bit embarrassed of it. I just haven’t paid enough attention to it in the past 2 years as I have the rest of the apartment. We don’t own our apartment; we’re just renters so there are things in our kitchen that our landlord added and we can’t do much about [remember, he furnished the entire place during a 6-hour visit to IKEA 10 years ago]. 

It’s also a case that the previous tenants didn’t take as good care of the apartment as they should have, so things like the grouting throughout our apartment is a hot mess. Both along on the backsplash but much more noticeably, the grouting on the kitchen floor. It’s so bad that nothing I’ve done to clean it has helped [and our bathroom too]. Nothing. Pure bleach and hot water and nothing. So, please don’t look down. 

The last and final door left in our apartment to be repainted is our kitchen door. The reason I haven’t gotten around to painting it is because there’s a set of shelves blocking the door and I need to take them down in order to paint it. We’ve never used the door [and neither did our landlord, he once mentioned] as it’s an unnecessary second door into the kitchen. Therefore, I opted to lock the door and hang shelves against it for more storage. This corner is really the only part of our kitchen that needs special attention. A new lick of paint and some styling attention should do the trick. Possibly a bit of artwork hung below too? 

Below is the other side of the kitchen door
, as seen from our living room facing the front door, to give you an idea of where the kitchen is in relation to our hallway … 

The rest of our kitchen is good, in rental terms. Everything works and we’ve learned to live with the limited amount of storage; not to mention the typical mini fridge as found in most Irish houses. They drive me insane. Way back when husband was ‘boyfriend’ and he lived with me and my family, we all shared a fridge this size. Five adult humans. That is not an acceptable size for a fridge. People take note. I can’t wait to grow up and have a grown up fridge.
While I’m ranting about appliances, I’m considering removing the microwave. It takes up a lot of counter-top real estate and I’m sure it’s much healthier to just reheat things on the stove. </rant>

So, of all the above, here is what needs to be DIYed to our kitchen to bring it up to scratch … 
– The grouting on the walls needs to be bleached [I don’t like using bleach, but it’s my only hope].
– Walls to be repainted white.
– Sand and repaint the door and skirting boards WHITE. 
– Remove the shelves in order to repaint the door, then rehang them.
– Spray paint coffee box [more details below].
– Possibly spray paint the recycling bin black [as seen in the corner under the shelves].

Aside from the DIY stuff, there are a couple of things I’ve had in mind that might make our kitchen that bit more homely. As it’s a rental, there isn’t much we necessarily need in there, but I’ve had my eye on a few things that would help spruce things up. You know, for the sake of finishing the kitchen … 

1. Helen James’ Considered line is flawless. At the very least I need a tall storage vase and the marble mortar and pestle. And some dipping bowls. And the teeny black pinch pots. And a copper pot or two.
2. My old friend, Montana winegum spray paint. I’ll repaint my thrifted coffee box [identical to my tea box above].
3. Mini shopping basket and mini shopping trolley, both of which I picked up in Tiger. Perfect quirky displays for little things like eggs.
4. A fancy dish rack [but cheaper]. Since we don’t have a dishwasher, any prospective dish racks would need to tolerate an immense level of dishes and pots at a time. Not sure these fancy ones will cut it.  
I’m hoping now that I’ve shared what’s wrong with our kitchen, I’ll be more inclined to actually paint that last door and actually style something half-decent on those shelves. I just have to actually do it. Maybe this weekend will be the one. You know, compared to the last trillion that we’ve lived here. 

Kitchen update – beforemiddleafter

DIY Friday – vacuum cord pendant light

For me, the most exciting part of our spare bedroom tour I shared earlier this week was the upcycled vacuum cord pendant light. Perhaps I need to get out more, but to date it’s been my most proud upcycled, recycled, nearly new challenge project that is full of winning. 

I had the idea of a pendant light for over the bedside table in our spare bedroom for a while now. As it’s a tiny room and it has an even tinier bedside table, the previous light was taking up valuable tabletop real estate so I needed a light that didn’t sit directly on it. I was talking to my dad [aka, Dad DIYer] one day and was telling him about my idea. I explained I was on the lookout for a long cord to make into a statement industrial-style light fixture. “You’ll never believe me, but our vacuum just died and I cut the cord off it before recycling it,” he stated. My eyes widened. It was beyond perfect! And even more importantly, it was going to make an epic upcycling project. Thank the stars my dad’s a bit of a hoarder 😉

So sit down and buckle up because I’m about to show you how I turned this …

Into this …

What you’ll need 
– a vacuum cord or equally long cord [4+ meters long], in working order
– an exacto knife or Stanley blade
– cord grip [I ordered mine here]
– E27 lamp holder [I ordered a white ceramic one here]
– a wire stripper 
– black electrical tape 
– washi tape
– a stud finder
– 2 white cup hooks
– drill 
– 2 hollow wall anchors [plastic]
– a pretty vintage style filament bulb. I bought mine in Industry [a larger version of this Round Edison bulb]

Do not attempt this DIY while the cord is still plugged in for heaven’s sake. I know you’re a lot smarter than that, but I unfortunately need to state the obvious, for safety purposes. So don’t do it. But you knew that already.
Nothing scares me more than dealing with wires and the inner workings of electronics, so I enlisted in help from Dad DIYer for this tutorial, who not only showed me how to DIY the light, but was kind enough to let me take approximately 1,000 photos of his hands and every detail of the tutorial. So you can sleep soundly knowing this DIY has been done by an expert.

Step 1 – thread both pieces of your cord grip onto the cord one at a time, as pictured above. Why use a cord grip? What a cord grip does is it clamps itself to the cable and takes the weight off the wire connections at the terminals [as seen in Step 5]. 

Step 2a, 2b and 2c – next we’re going to remove the black outer wire casing to reveal the two wires underneath; the live [brown] and neutral [blue]  wires. Using your exacto knife / Stanley blade, carefully begin to cut through the outer black casing about 3cm from the bottom of the cord. We want to avoid cutting the brown and blue casings at all costs, so take your time. You may find it easier to bend the cable to cut through [as seen in Step 2b]. When you’ve carefully cut the black outer casing all the way around, pull it off to reveal the two inner wires [blue and brown, as seen above]. 

If you manage to nick or cut through one or both the blue and brown inner casings, don’t worry! Just cut the entire wire through and start over from Step 2a.

Step 3 – using the wire stripper, strip off about 6mm of the plastic casing off each the brown and blue wires, exposing the copper wires underneath.

Step 4 – unscrew the lamp holder and place the top half of the lamp holder onto the cord, as seen above. 

Step 5 – next we’re going to connect the wires to the terminal block. Twist the inner copper wires so they’re nice and tidy and go into the fixture more easily. Don’t forget to loosen the screws on each terminal to allow the wires to be inserted. 

Step 6 – insert the copper wires; one into each terminal and tighten the screws. 

Step 7 – screw the bottom piece of the cord grip [from Step 1] into the top of the lamp holder. 

Step 8 – we’re next going to tighten the screw found on the inside of the lamp holder; this locks the top of the lamp holder to the base of the cord grip. 

Step 9a and 9b – move the terminal block [as seen in Step 4 and 5] into the top of the lamp holder. Ensure the terminal block is placed within the guides on the lamp holder, as shown in Step 9b.

Step 10 – screw the the top piece of the cord grip [the cord grip ‘cover’] on to the threaded cord grip, and tighten well. What this does is tighten the cord grip and clamps the lamp holder in place on the cable. 

Step 11 – add the locking ring [aka, the bottom piece of the lamp holder] to the top piece of the lamp holder and tighten carefully. Be careful, as if you use a porcelain light holder like I did, they’re not easily unscrewed, so double check everything is good to go. 
Step 12 – using a stud finder, find two safe areas to place your hooks. Dad DIYer marked with washi tape the edges of the beams in the ceiling. Using a drill, drill a hole into each beam and add the cup hooks. If the hooks don’t feel like they’re secure enough, screw in a plastic hollow wall anchor to the hole before adding the hook again. This will soundly secure the hooks in place. After this, I simply added the cord to the hooks and played around with the double loop detail. Once I was happy with the double loop [which is strictly for visual purposes, it is not necessary], I secured it in place with a piece of black electrical tape. 
Step 13 – finally, add the piece de resistance and the crowning glory to your project; the vintage bulb. It’s important you add the bulb at this point and not at Step 11, as the bulb is delicate and you might run the risk of smashing it during Step 12
And there you have it! For those of you more familiar with electronics, I may have gone into too much detail, but I wanted to include everything and in crystal clear instructions for anyone out there who like me, might be intimidated by wires. Also, thank you Dad DIYer, who can now add hand model extraordinaire to his resume of skills 😉 
Happy Friday, everyone! So tell me, do you have any DIY plans in mind this weekend? It’s pouring here in Dublin, so it looks like we’ll be staying indoors indefinitely. Whatever you do this weekend, have a good one! xx