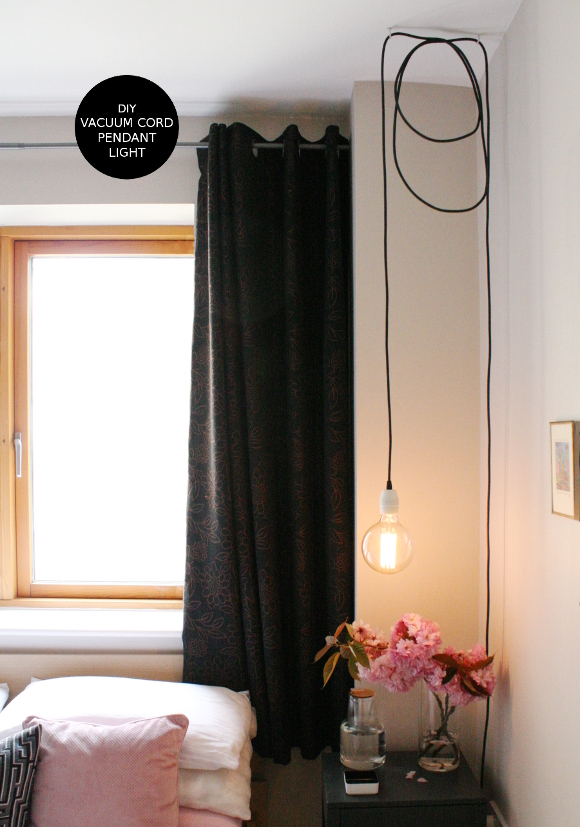
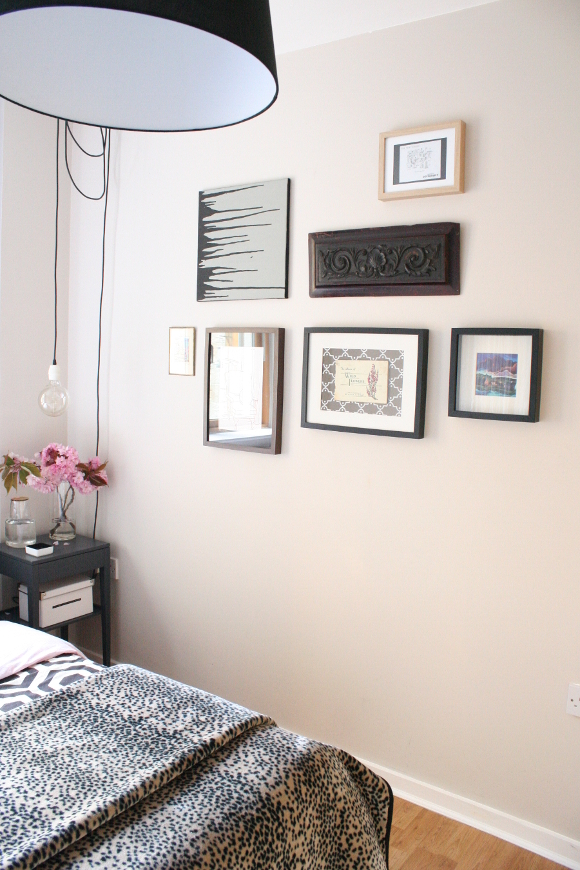
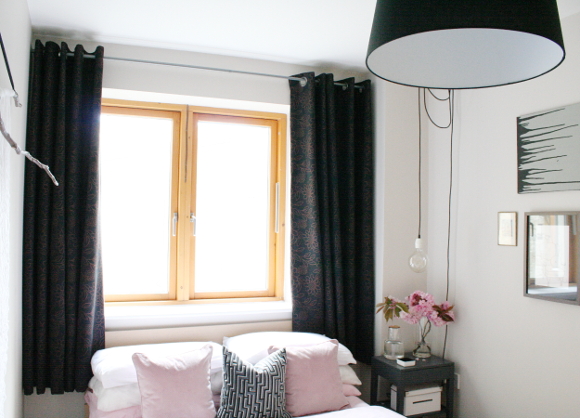
For me, the most exciting part of our
spare bedroom tour I shared earlier this week was the upcycled vacuum cord pendant light. Perhaps I need to get out more, but to date it’s been my most proud upcycled, recycled,
nearly new challenge project that is full of winning.
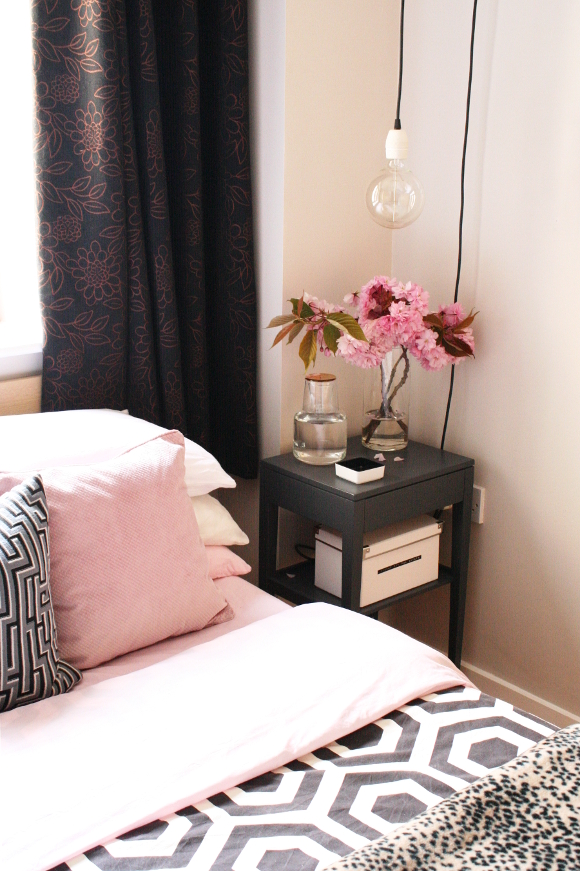
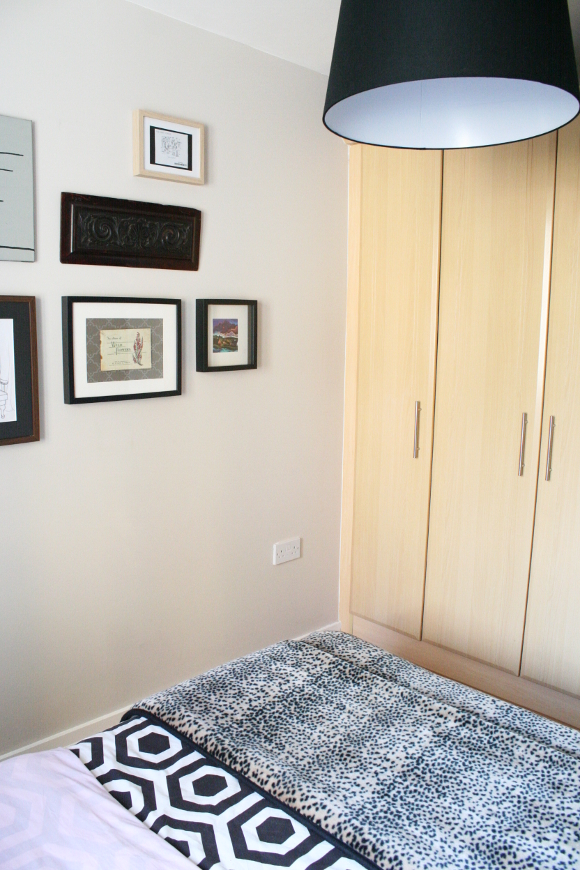
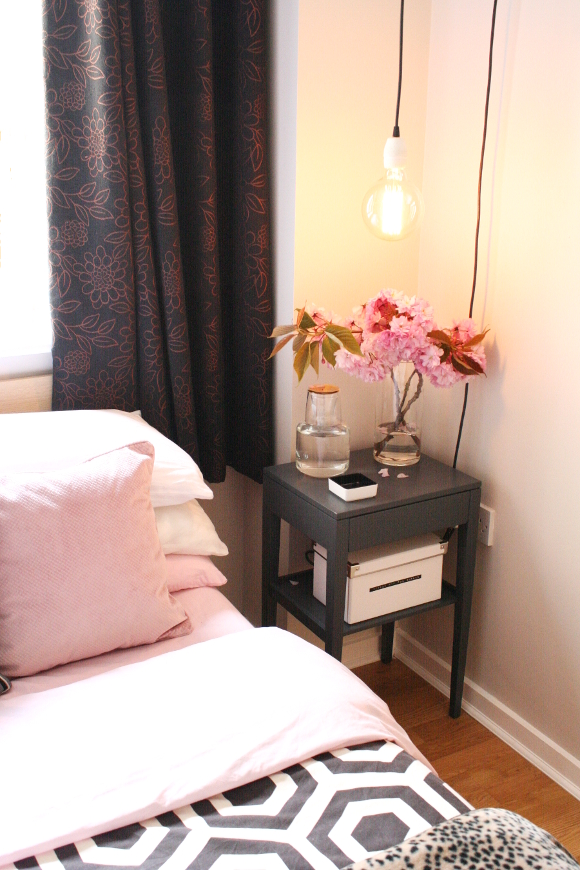
I had the idea of a pendant light for over the bedside table in our spare bedroom for a while now. As it’s a tiny room and it has an even tinier bedside table, the
previous light was taking up valuable tabletop real estate so I needed a light that didn’t sit directly on it. I was talking to my dad [aka, Dad DIYer] one day and was telling him about my idea. I explained I was on the lookout for a long cord to make into a statement industrial-style light fixture. “
You’ll never believe me, but our vacuum just died and I cut the cord off it before recycling it,” he stated. My eyes widened. It was beyond perfect! And even more importantly, it was going to make an epic upcycling project. Thank the stars my dad’s a bit of a hoarder 😉
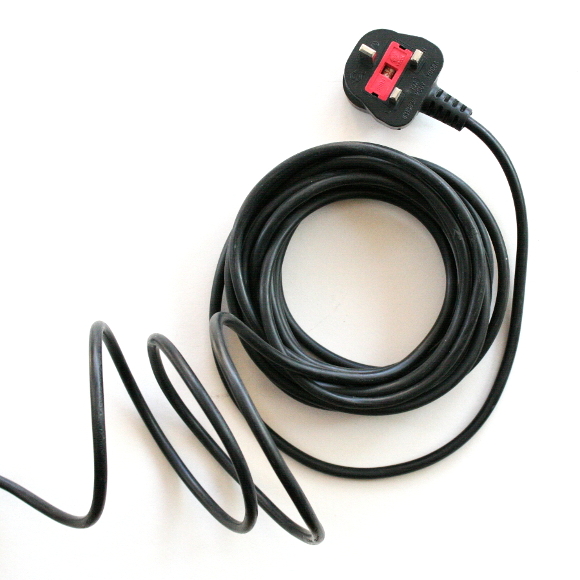
So sit down and buckle up because I’m about to show you how I turned this …
Into this …
What you’ll need
– a vacuum cord or equally long cord [4+ meters long], in working order
– an exacto knife or Stanley blade
– cord grip [I ordered mine
here]
– E27 lamp holder [I ordered a white ceramic one
here]
– a wire stripper
– black electrical tape
– washi tape
– a stud finder
– 2 white cup hooks
– drill
– 2 hollow wall anchors [plastic]
Do not attempt this DIY while the cord is still plugged in for heaven’s sake. I know you’re a lot smarter than that, but I unfortunately need to state the obvious, for safety purposes. So don’t do it. But you knew that already.
Nothing scares me more than dealing with wires and the inner workings of electronics, so I enlisted in help from Dad DIYer for this tutorial, who not only showed me how to DIY the light, but was kind enough to let me take approximately 1,000 photos of his hands and every detail of the tutorial. So you can sleep soundly knowing this DIY has been done by an expert.
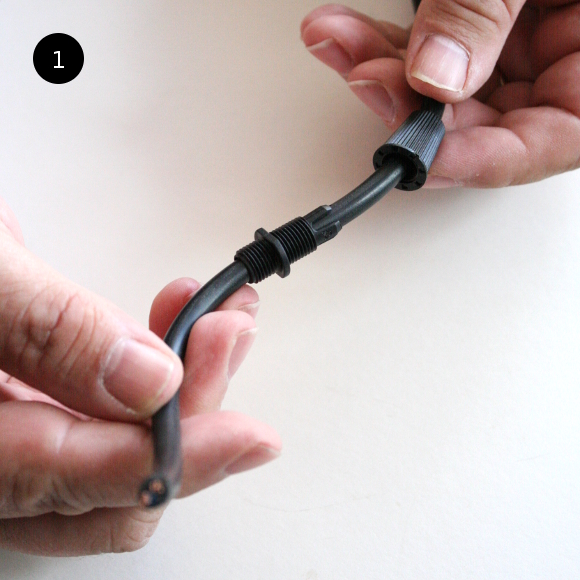
Step 1 – thread both pieces of your cord grip onto the cord one at a time, as pictured above. Why use a cord grip? What a cord grip does is it clamps itself to the cable and takes the weight off the wire connections at the terminals [as seen in Step 5].
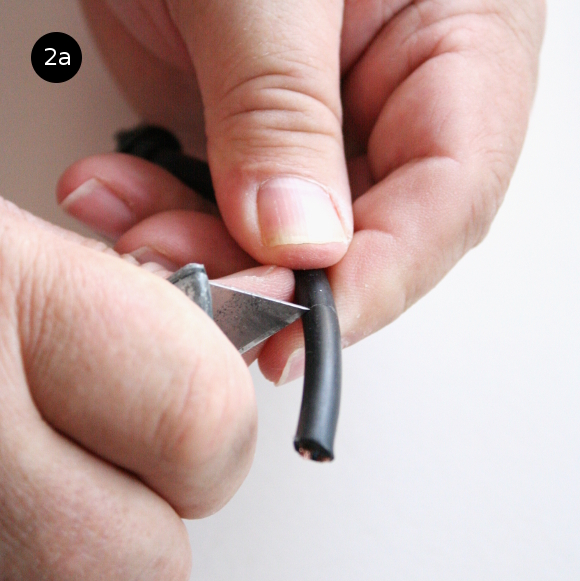
Step 2a, 2b and 2c – next we’re going to remove the black outer wire casing to reveal the two wires underneath; the live [brown] and neutral [blue] wires. Using your exacto knife / Stanley blade, carefully begin to cut through the outer black casing about 3cm from the bottom of the cord. We want to avoid cutting the brown and blue casings at all costs, so take your time. You may find it easier to bend the cable to cut through [as seen in Step 2b]. When you’ve carefully cut the black outer casing all the way around, pull it off to reveal the two inner wires [blue and brown, as seen above].
If you manage to nick or cut through one or both the blue and brown inner casings, don’t worry! Just cut the entire wire through and start over from Step 2a.
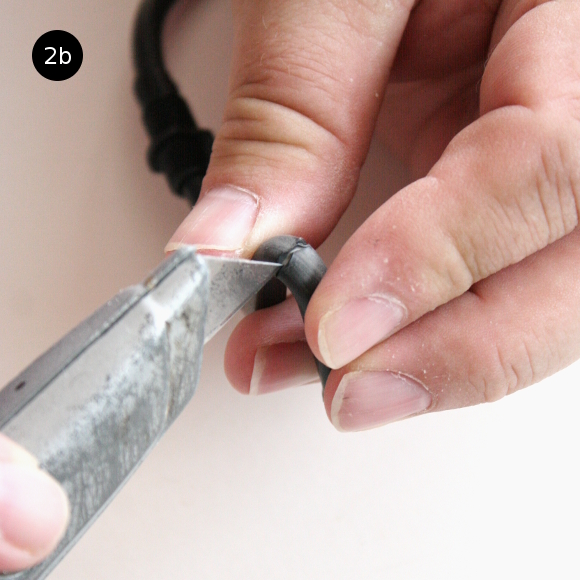
Step 3 – using the wire stripper, strip off about 6mm of the plastic casing off each the brown and blue wires, exposing the copper wires underneath.
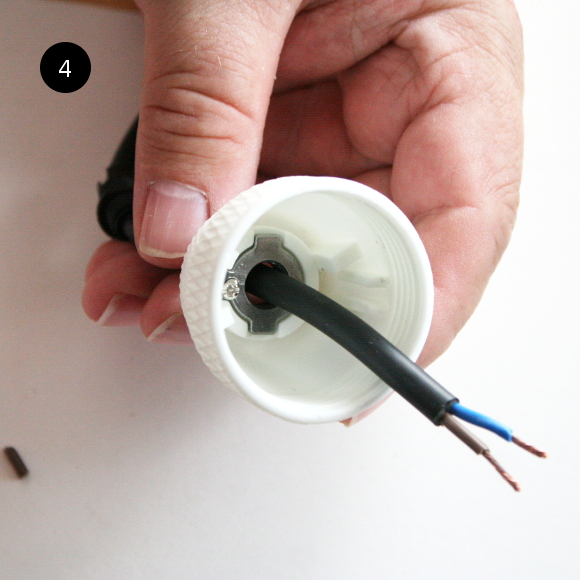
Step 4 – unscrew the lamp holder and place the top half of the lamp holder onto the cord, as seen above.
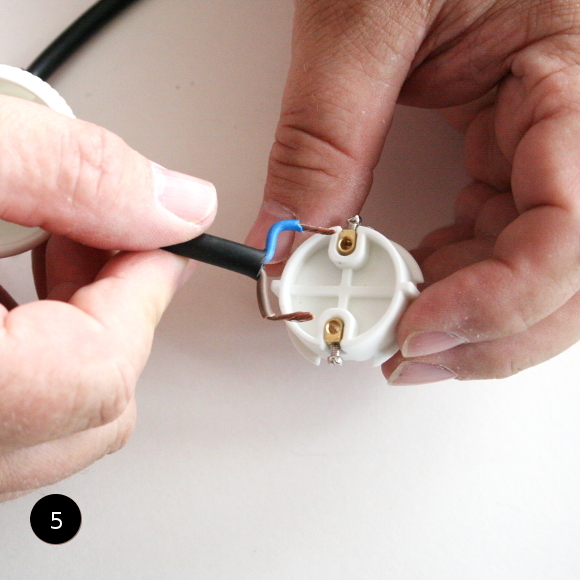
Step 5 – next we’re going to connect the wires to the terminal block. Twist the inner copper wires so they’re nice and tidy and go into the fixture more easily. Don’t forget to loosen the screws on each terminal to allow the wires to be inserted.
Step 6 – insert the copper wires; one into each terminal and tighten the screws.
Step 7 – screw the bottom piece of the cord grip [from Step 1] into the top of the lamp holder.
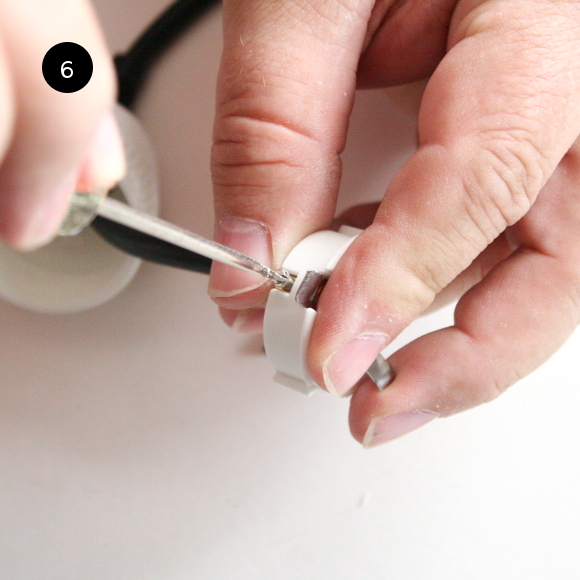
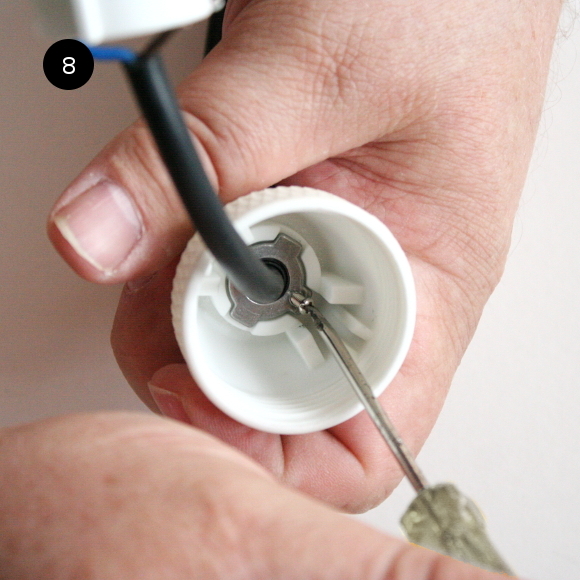
Step 8 – we’re next going to tighten the screw found on the inside of the lamp holder; this locks the top of the lamp holder to the base of the cord grip.
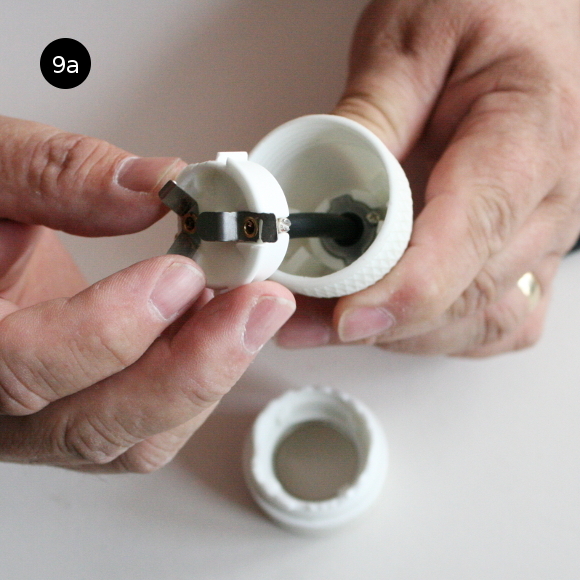
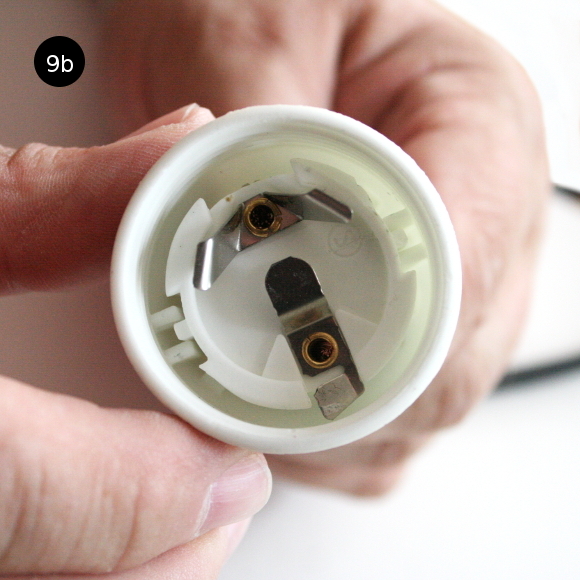
Step 9a and 9b – move the terminal block [as seen in Step 4 and 5] into the top of the lamp holder. Ensure the terminal block is placed within the guides on the lamp holder, as shown in Step 9b.
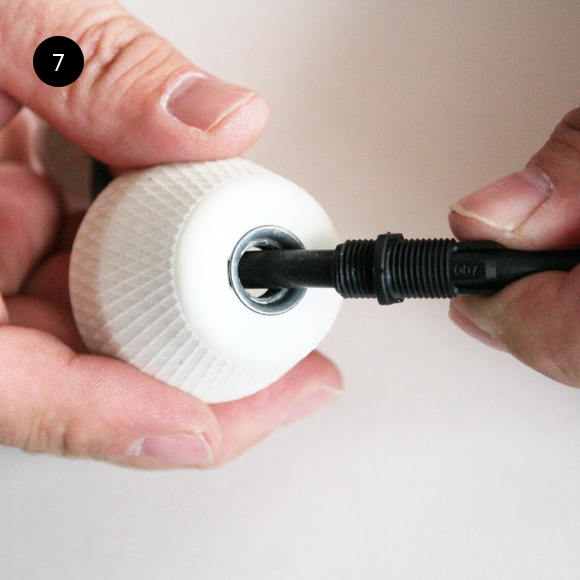
Step 10 – screw the the top piece of the cord grip [the cord grip ‘cover’] on to the threaded cord grip, and tighten well. What this does is tighten the cord grip and clamps the lamp holder in place on the cable.
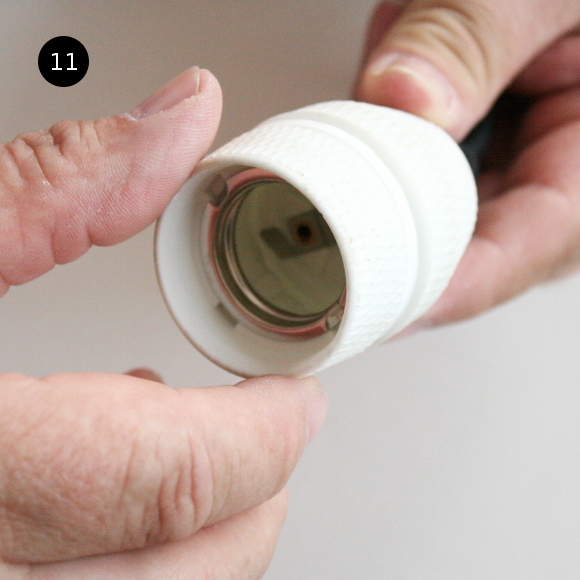
Step 11 – add the locking ring [aka, the bottom piece of the lamp holder] to the top piece of the lamp holder and tighten carefully. Be careful, as if you use a porcelain light holder like I did, they’re not easily unscrewed, so double check everything is good to go.
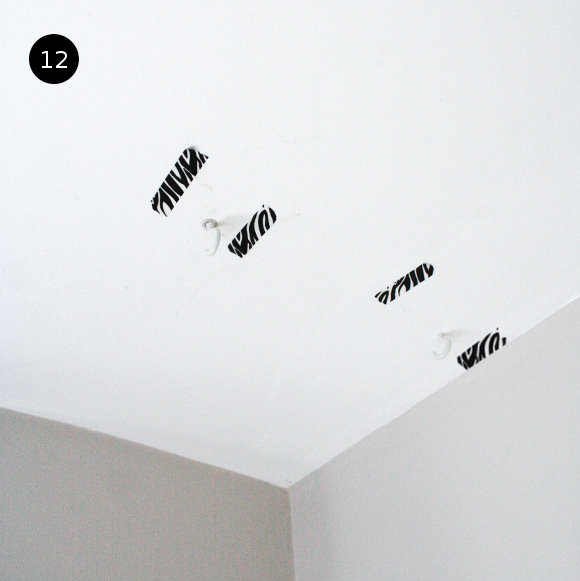
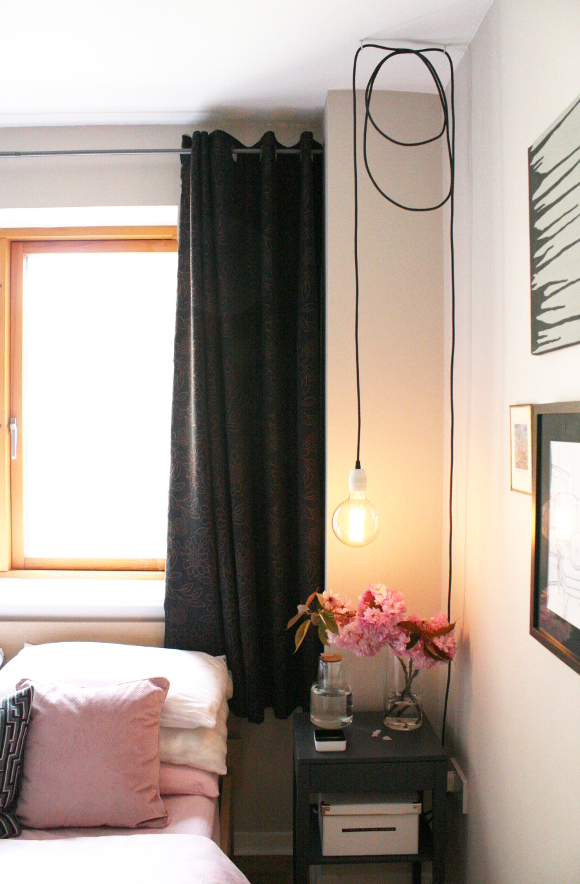
Step 12 – using a stud finder, find two safe areas to place your hooks. Dad DIYer marked with washi tape the edges of the beams in the ceiling. Using a drill, drill a hole into each beam and add the cup hooks. If the hooks don’t feel like they’re secure enough, screw in a plastic hollow wall anchor to the hole before adding the hook again. This will soundly secure the hooks in place. After this, I simply added the cord to the hooks and played around with the double loop detail. Once I was happy with the double loop [which is strictly for visual purposes, it is not necessary], I secured it in place with a piece of black electrical tape.
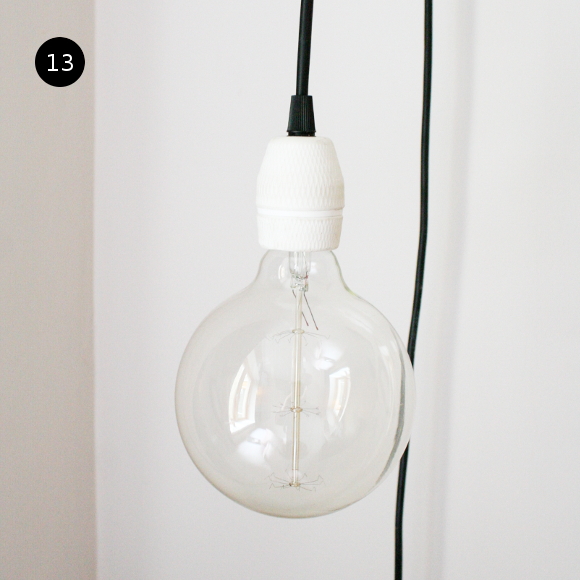
Step 13 – finally, add the piece de resistance and the crowning glory to your project; the vintage bulb. It’s important you add the bulb at this point and not at Step 11, as the bulb is delicate and you might run the risk of smashing it during Step 12.
And there you have it! For those of you more familiar with electronics, I may have gone into too much detail, but I wanted to include everything and in crystal clear instructions for anyone out there who like me, might be intimidated by wires. Also, thank you Dad DIYer, who can now add hand model extraordinaire to his resume of skills 😉
Happy Friday, everyone! So tell me, do you have any DIY plans in mind this weekend? It’s pouring here in Dublin, so it looks like we’ll be staying indoors indefinitely. Whatever you do this weekend, have a good one! xx