DIY Friday – painted outdoor rug

As and from yesterday and just in time for summer*, my latest DIY project for Woodie’s has gone live – how to DIY your own outdoor painted rug! Perfect for making the most out of your al fresco dining this year that’ll also bring a little bit of indoors out. It’s a very easy tutorial and you can choose whatever rug colours and pattern you like – I kept it simple as a black and white rug to show how even the most basic design can have a huge impact. Not to mention it’s a perfect little project to encourage you to make the most out of your backyard. 

Check out all the details and the full tutorial for the painted outdoor rug here

Happy Friday, homies, and cheers to the weekend.

*Hey, will someone please tell Ireland it’s now June and I shouldn’t still be needing my electric blanket every night. Thanks. 

How to repair cat scratched leather


Today I’m sharing my second installment of “embarrassing repairs I’ve made, but I’m sure I’m not the only one with this problem so I’ll share how I fixed it“. The first installment being how to repair a flatwoven rug.

As any cat owner will know, cats have a natural urge to sharpen their nails. I would like to take this opportunity to say our apartment is not tore up from the floor up. It is not shredded and covered in cat scratches. I have zero tolerance for those things. It’s a case that Juniper chose to pick one of our dining room chairs [seen as the farthest right chair in this post] in a place that we don’t see. This is the worst damage they’ve done to date as I’m usually pretty on the ball. I’ve gotten Juniper something else to scratch since, so let’s not get too mad at her. She is after all, adoraballs and just doing something natural.

But should you also have a furry friend than enjoys using leather furniture for target practice, do not fret. You are among friends. There is a way.

What you’ll need
– curved manicure / fine scissors or nail clippers
– leather shoe polish to match


Step 1 – using a fine or curved pair of manicure scissors, trim the stringy scratches off the leather. Trim them as close to the leather as you can, without cutting the leather itself. This is where I find manicure scissors and / or nail clippers very good. Take your time. The more detailed you are, the better it will turn out.

You’ll end up with something like this …


Step 2 – once you’re happy with your trimming and you’ve cut the loose scratches as close to the leather as possible, it’s time to add the shoe polish. As the scratches are a much lighter colour than the leather, make sure to mush the polish into every part of the scratches. I did this in a circular motion. I didn’t have to do many layers and the shoe polish quickly covered the damage. Allow to dry for a couple of hours before use*.

No, it’s not a perfect finish. No, I’m not a furniture restoration expert, but I have repaired a couch or two in this way over the years and it’s worked a treat. I repaired the chair to the point that it is unrecognizably scratched, unless you point it out.

I do however know that the only way to prevent this from happening again is to make sure your cat has cat-friendly items to scratch and to keep an eye on what areas of your home they are choosing to scratch in. Our girls have their recycled cat scratching post and Toshi occasionally has a good go at our basket, which I’m okay with for the moment. I also trim both our cats nails every two weeks to make sure they don’t do too much damage.

*ADDITIONAL NOTES:
the shoe polish I use doesn’t rub off once dry [I used the W5 series shoe polish available in Lidl]. I didn’t buff it, but just let it dry. Please be aware that some polishes may rub off, so follow the instructions on your polish accordingly.

To conclude this post and to hopefully cancel any ill thoughts you may have towards her, here’s Juniper doing what she does best – exposing her fluffy belly and softer-than-clouds paws. I dare you to get mad at that face.


How to repair cat scratched leather using just two household items!

Five steps to a festive table

Last weekend we had some dear friends over for dinner. As per the usual, the table was one of the last things sorted. I’m the kind of person who over-cleans for guests; I end up cleaning areas of our apartment that I’ve never even seen, never mind our guests. Because you know, in case they find themselves on top of the cupboards in our bathroom, I’d like it to be presentable. You never know.
When I finally tackled the table, I kept it relatively simple, but I wanted some impact so I went with some bold colours. With Christmas fast approaching, the decor for this table doesn’t necessarily scream Christmas, but it can easily be adapted and customized to whatever time of year you want – birthdays, Easter, Thanksgiving or set for two for Valentines Day. So here’s what I did … 

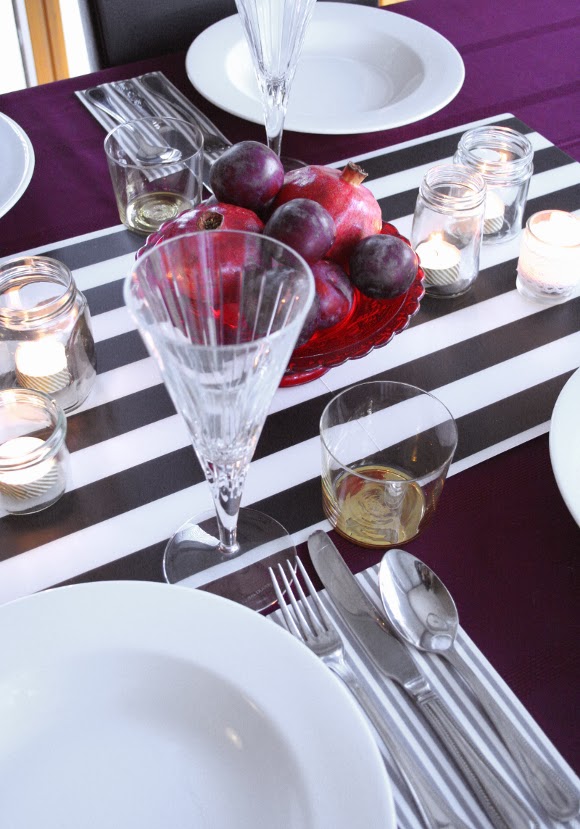
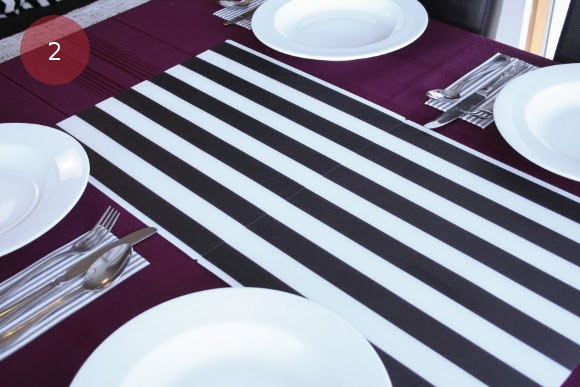
^ Step 1 – keep it basic with a table cloth and runner. I have a plum table cloth I stole borrowed from my parents years ago because it’s my favourite colour. I didn’t have a runner so I cheated and put two IKEA LJUDA placemats together and added them to the centre of the table. If you don’t have a table cloth – no need to panic. The same goes for a runner – just use what you have – some unfolded napkins, a scarf or even a section of wrapping paper will do the trick. Think outside the box.

^ Step 2 – napkins, cutlery and plates. Keep it simple. I went with plain white plates, some LAGLIG grey and white stripe napkins we already had {which tie in with the striped ‘runner’}, and I used our really standard cutlery. No need to faff about with the good cutlery.

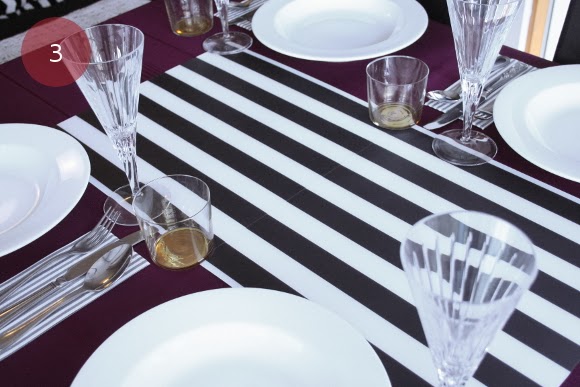
^ Step 3 – glassware! Normally I wouldn’t add tumbler glasses to a table, but I couldn’t resist bringing out my gold tumblers while I was taking these pics {they usually lay dormant on our bar cart}. Otherwise we’d just have wine glasses. Because just, well … wine. No explanation necessary.

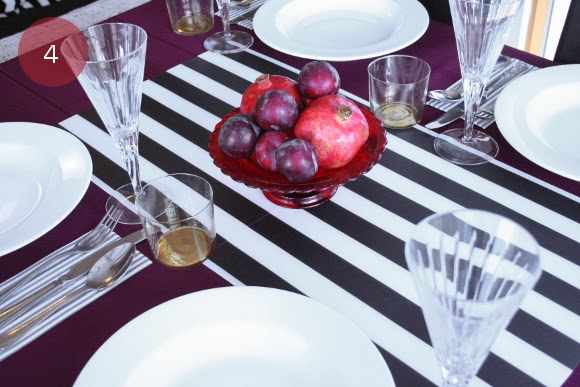
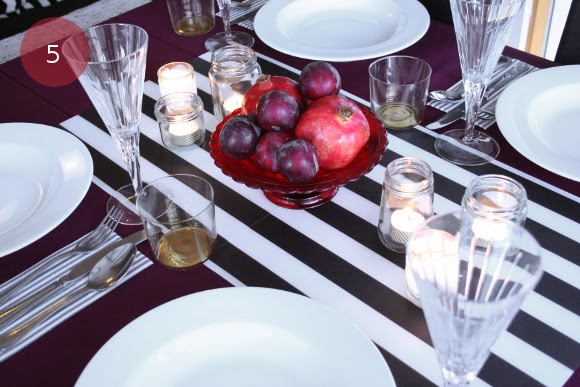
^ Step 4 – a centre piece. I kept it really easy and used what I had at my disposal. I had a little red cake stand and some fruit in the kitchen that matched the table. I bought these pomegranates the other day as they were reduced to clear {€0.60 each}, I loved their colour, and to be honest I bought them ’cause they’re pretty. I piled on some plums and there’s a centre piece for under €3. You like my plums?

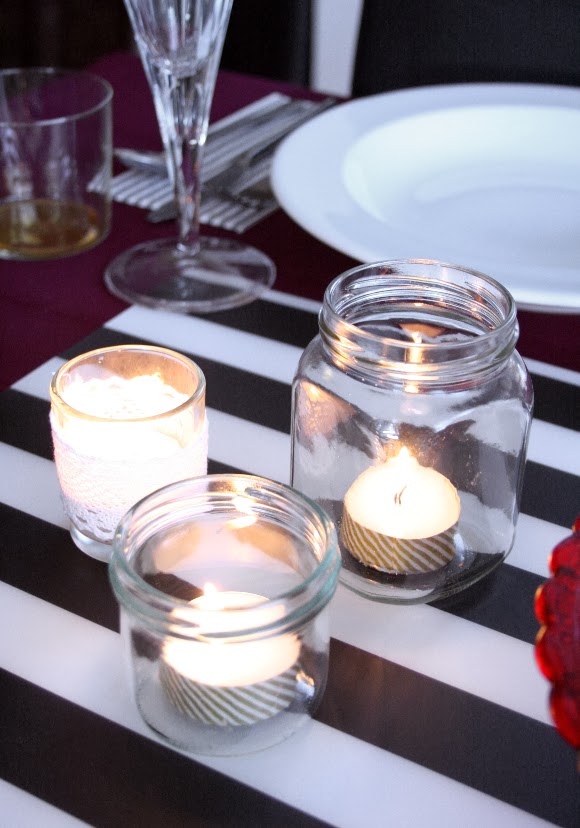
^ Step 5 – tealights. Confession: I’ve hated tea lights for years. They’re so tiny. What’s the point? But recently I’ve started rooting for them and they’re especially handy for decorating tables. What I did with my tea lights was add some gold striped washi tape to each tea light {thanks Pinterest} and popped them into clean jam jars. I think it’s a perfectly quirky and a bit of a rustic addition to the table.
You of course can add as much or as little stuff as you want, but I found sticking to these basic five steps really handy when I was decorating our table. So there you have it. Happy entertaining! xx A