From skirt to pillow

Here’s a pillow cover tutorial that will have you keeping your eyes peeled for discounted skirts …

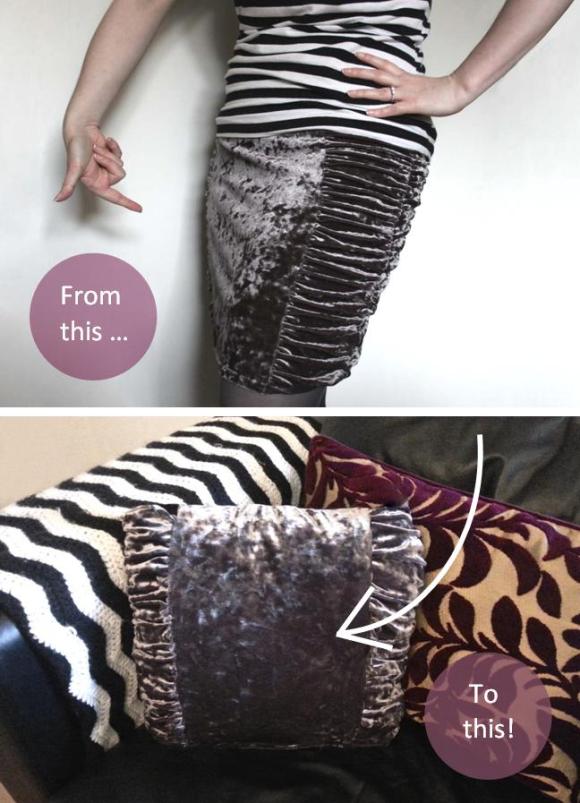
I bought this skirt three years ago because – 

   a) I liked the colour.
   b) I really liked all the rouching it had going on.
   c) It was velvety and I like velvet.
   d) It was on sale for €1. Hells yes.

Too bad I never tried on said skirt before purchasing it. It fits, but it’s a bit disastrous. So, the reason I upcycled this skirt is – 
   a) I really adore the fabric so I’m not ready to part with it. Yes, it was dirt cheap, but I think it would make a fabulous pillow.
    b) When wearing this skirt, this particular fabric makes my thighs look like two sea lions fighting on a beach. Hand me the scissors.

What you’ll need : a skirt you no longer wear {or a super-cheap one you spot on sale}*, a pillow the same size or slightly smaller than your skirt, scissors, a needle and thread – or if you’re fancy, a sewing machine. Alas, I do not have one. Woe is me.

* This really only works if your skirt is the same width from top to bottom – i.e. a pencil skirt of sorts.

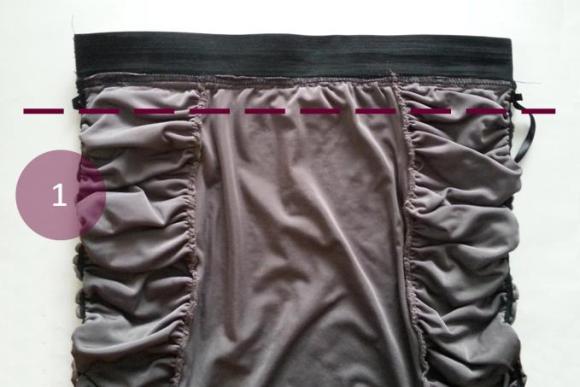
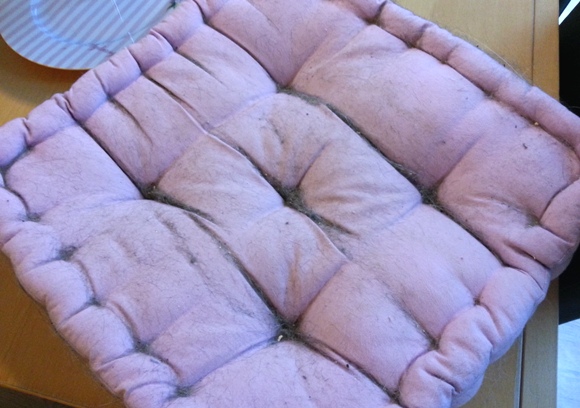
Step 1 : turn the skirt inside-out. Sew across the top leaving a bit of space from the edge. This particular skirt had an elasticated waist, which I cut off before sewing.


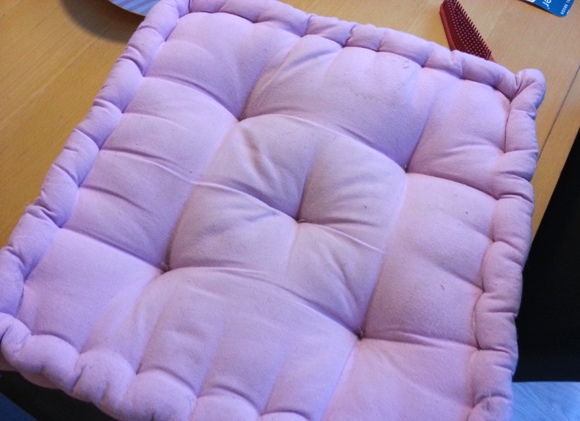
Step 2 : turn the skirt right-side out, and stuff with a pillow. From here, you can gauge if the sides need to be taken in a bit to better fit the pillow. If they do, turn your skirt inside-out again, and sew where necessary. Step 3 : once the pillow snugly fits inside the skirt, turn it right-side-out, stuff pillow inside, and sew the pillow closed using a ladder stitch. There is the option to sew  this opening a third of the way closed from either side while your skirt is still inside-out and has no pillow in it. This gives a cleaner line on the outside, and once you feed the pillow through the remaining opening, it means you have less of a ladder stitch to do.

Et voila! This will hopefully feed my pillow obsession for the next week or so. And I hope I’ve otherwise saved some skirts from the skip 🙂

p.s. It was complete coincidence that I paired skirt / pillow with black and white stripes in both the before and after pictures. I nerded out over that a little once I noticed it. Because I’m big time lame.

I love cleaning my dirty pillows

I’m about to sing some praises about a brush. So, if you don’t have a pet or a particularly hairy person in your life, it’s about to get very boring all up in here.

I’m probably the last person to learn about these rubber brushes. Unfortunately, I don’t know the brand of the one I own so I’m already off to a bad start. Alls I know is I picked one up a couple weeks ago from our local Home Store + More.

As a pet owner to two indoor {and incredibly furry} cats, this brush is just what I needed – it claims to brush away all sorts of stuff. We have two shneaky cat cubbies in our living room shelving unit, which both our cats adore. Especially the cubby on the left, which is worse furrier …

Above – the before picture – I let said pillow get particularly furry before I attacked it. I’m all about keeping it real, so take it all in. Previously I would have had to go outside to clean them as best as I could. Keep in mind this is strictly a cat pillow, not a human pillow, so it wasn’t going to be perfect {I don’t want you thinking our entire apartment is like this}.

After a couple of minutes with said brush, the pillow looked like this … It makes me feel all kinds of shiny on the inside.

This brush is great especially on tightly woven fabrics such as velvet or wool, when the odd fluff or fur annoyingly sticks to it. One foul swoop and they’re gone. It has blown my little mind. And after I attacked our entire apartment, I felt very much like this …

Yes, yes.

Image cred 1 and 5.

Living room makeover – update

Parting is such sweet sorrow. But in this case, it was well overdue. One Sunday morning I had had enough of our blackboard wall, so I painted over it. Don’t get me wrong, I’m not ruling out the possibility of a blackboard wall in the future. I haven’t tired of them fully just yet – it just wasn’t working in our living room and it was time to cut the cord.

After the elimination of the blackboard wall, I added a few pieces to our living room to make the scale of it seem less overwhelming. To give you an idea of the scale, our TV is 50″ and that bell jar is the size of my torso. Unfortunately medium sized objects get lost on our shelf and make it look cluttered. Go big or go home seems to be the motto here. 

I then tried my hand at painting for the first time in a long time {that is, ‘artistically’}, except I’m not happy with the result. Please, do not look directly at my painting. It is much like the sun and will burn your corneas right out of your head. I will be making changes to it for the better. 

I also managed to successfully fill our massive cloche / bell jar – yay! I stuffed it with a hookah I bought during our Tunisian travels, which had otherwise been gathering dust in our storage cupboard. For the moment, it’s a perfect fit.
An oldie but a goodie from our cupboard was this little gargoyle. I made him from clay as part of my final art project in secondary school, close to 10 years ago {oh god, I feel old}. I spotted him the other day and thought he aught to take his place on the shelf. He’s been waiting long enough.

And on a slightly different note, I’m hoping to invest in either a studio light or take a photography refresher course with the aim to take better interiors photos. I’ve mentioned before, our apartment is like a cave, which is why I avoid taking full room pictures because they look like they’ve been dragged through a puddle. And I’m getting tired of it. Fingers crossed I find something. In Dublin. And soon. 
Happy Thursday homies! Just one more day … xx A