I am so excited to reveal this weeks DIY Friday! It’s something I’ve wanted for a lawng time – my own little footstool. You see, I am lacking in the leg department and when I sit on a normal chair / couch, my legs dangle = tres embarrassment. For a normal person this won’t seem like a bit deal, but if I sit with said legs dangling for an extended period of time, I get insane leg cramps and that can’t be good. I know I sound like a prood, but I’ve wanted a little footstool for a really long time now, and thank the baby jesus, I found one!
I spotted an adorable square footstool in
Oxfam a couple weeks ago, but I did the worst thing possible – I hesitated to buy it. That was major dumbness because of course, someone bought it the next day. I had a massive sad, but was determined to find another.
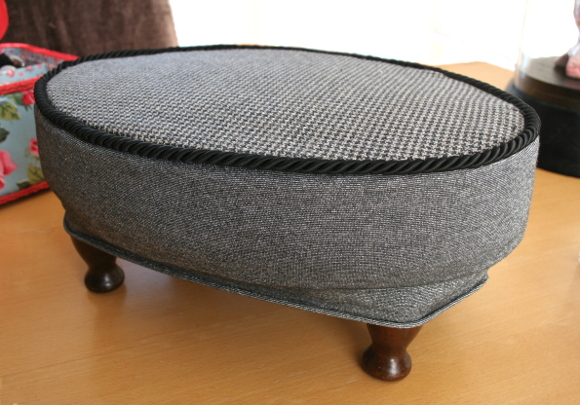
Last weekend hubby told me of a new charity shop he found and was excited to show me. We checked out Second Abbey {so new that it doesn’t have a website}, and there was my future footstool. Sitting in the window. This sad little beige bundle of wonderfulness was looking for love. And I made sure to not leave without it.
I brought it home and immediately got to work on it. Here is what you’ll need should you like to fancy-up a footstool of your own …
What you’ll need – enough fabric to cover your footstool {I used two different fabrics to make it a little fancier}, trimmings for the top seam and bottom {I picked mine up from
Home Focus at Hickeys}, paper and a marker for making a template, scissors, stapler, a needle, matching thread, pins and a some patience.
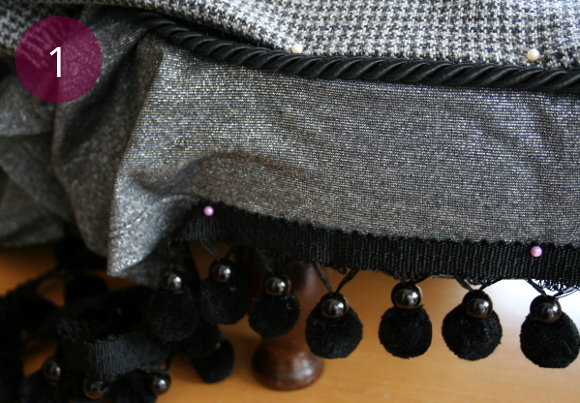
Step 1 – find the right combination of fabrics and trimmings to cover your footstool. I used a tough and durable fabric on top and a softer somewhat glitzsy fabric on the sides {both were fabric I had in my ammunition already}. I tried pinning loads of different combinations of fabrics in different sections, and this was the combo I immediately adored.
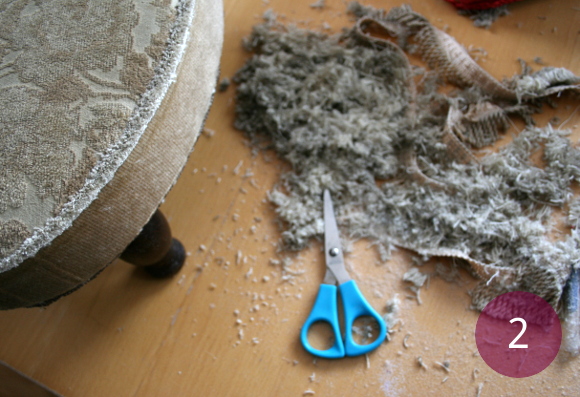
Step 2 – I trimmed all the unnecessary bits off the existing footstool. This puppy was in serious need of a haircut. I should point out that I wasn’t confident enough to take the existing fabric off – my sewing skills are not that good {yet}, and this was my first reupholstering gig so the shape the existing fabric held helped a lot. Step 3 – turn your footstool over and trace it onto a piece of paper to make a template. You’ll need this to shape the top piece of fabric.
Step 4 – use your paper template to draw onto your top piece of fabric. It was around this time that I was seriously doubting my oval sewing skills. Step 5 – pin together your side fabric {in this case, my glitzy fabric} and your top trimming. Sew snugly all the way around {I’ve indicated my sew line in purple} until you have enough to cover the body of your footstool.
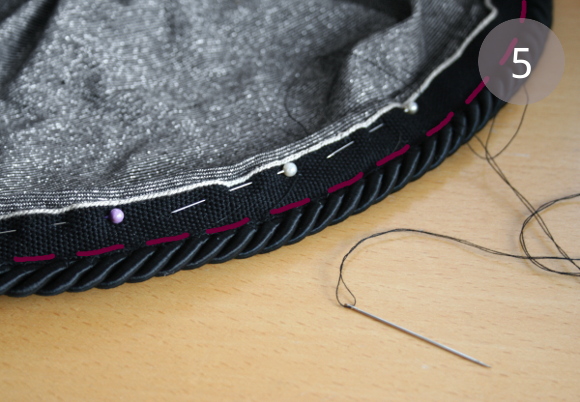
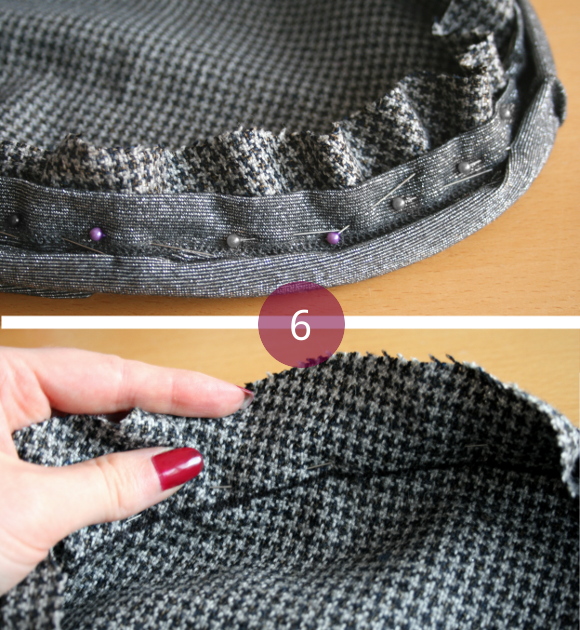
I was constantly fitting it onto the footstool as I went along to make sure I was on track at all times. You can see this in the picture above. Fits like a glove. Step 6 – I will try my best not to confuse the hell out of you with this next step. Take your oval fabric template and pin it to the inside of the black trim that your side fabric is sewn to. Both pieces will be inside out for this step. Align your marker line with your trim and pin in place. You will be sewing along the same line as step 5, but along the inside/marker line in order to sew the top into place. Have I lost you completely? Oh god I hope my pictures make more sense than my mouth.
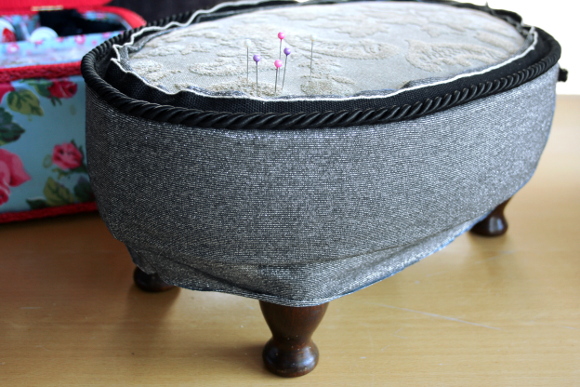
When you’re finished sewing all the way around, turn it right-side-out, and the worst will be over! It’s a lot easier than it looks and it’s most definitely mind over matter. Please keep in mind I’m neither a good or experienced sower.
Keep checking your cover by placing it on your footstool ad nauseum. That’s what I did and it ended up snug as a bug. Seriously, if I can get to this point, anyone can …

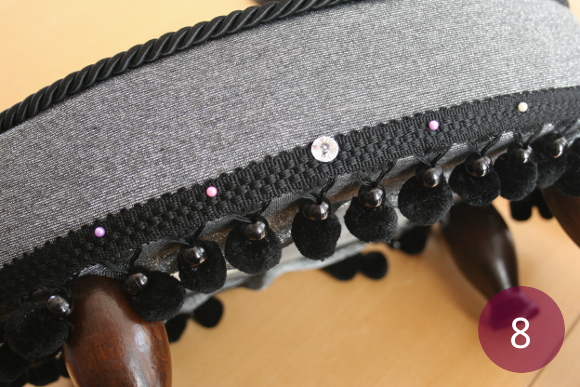
Step 7 – flip your footstool over, pull the fabric tight and staple it in place. Don’t worry about it being perfect. Remember that this is something that will be viewed from above, so any lumps and bumps underneath won’t be seen. Unless you have incredibly nosy house guests. In that case, pour yourself a G&T. Step 8 – pin your finishing trim of your choice along the base of the footstool. I very simply sewed along the top of the trim to secure it to the footstool. NOTE: it is important to sew the trim at this point and not earlier – if you were to sew the bauble trim onto the fabric at an earlier stage, when you stretch the fabric to be stapled, you may end up with a wonkey / uneven trim along the base. By sewing the trim on at the end, you are ensuring it’s being sewn on in a straight line.
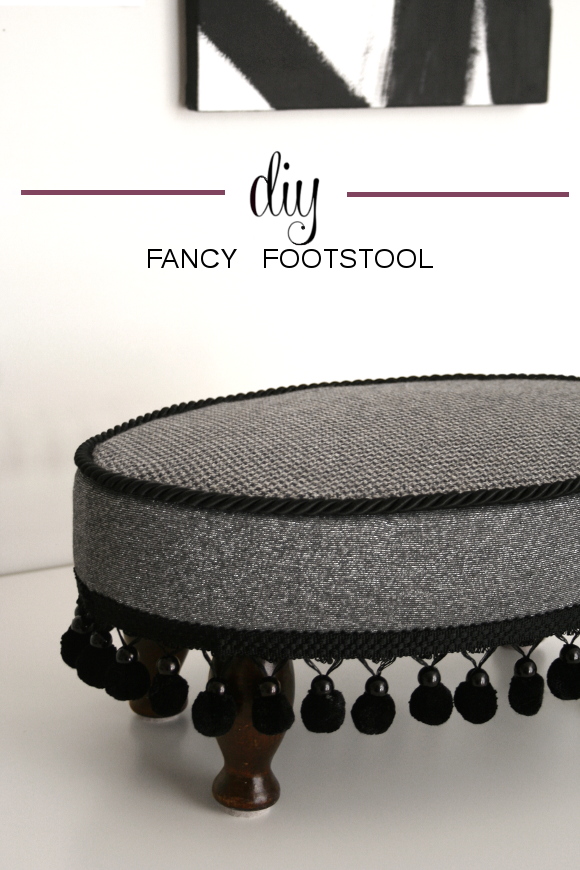
And there you have it! Your very own little bespoke footstool. I really hope all of that made sense and wasn’t too wordy.
And for those of you who guessed correctly at this weeks DIY Friday sneak peek – gold stars all around. I have such creative internet friends. Happy Friday all, and see you on the other side 🙂 xx A