
Today I’m sharing my second installment of “embarrassing repairs I’ve made, but I’m sure I’m not the only one with this problem so I’ll share how I fixed it“. The first installment being how to repair a flatwoven rug.
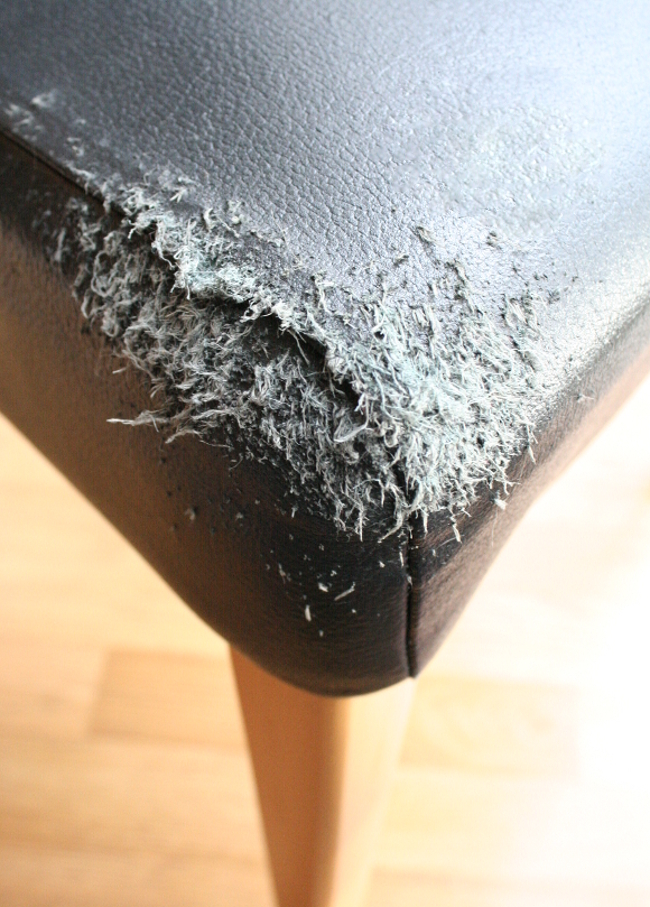
As any cat owner will know, cats have a natural urge to sharpen their nails. I would like to take this opportunity to say our apartment is not tore up from the floor up. It is not shredded and covered in cat scratches. I have zero tolerance for those things. It’s a case that Juniper chose to pick one of our dining room chairs [seen as the farthest right chair in this post] in a place that we don’t see. This is the worst damage they’ve done to date as I’m usually pretty on the ball. I’ve gotten Juniper something else to scratch since, so let’s not get too mad at her. She is after all, adoraballs and just doing something natural.
But should you also have a furry friend than enjoys using leather furniture for target practice, do not fret. You are among friends. There is a way.
What you’ll need
– curved manicure / fine scissors or nail clippers
– leather shoe polish to match

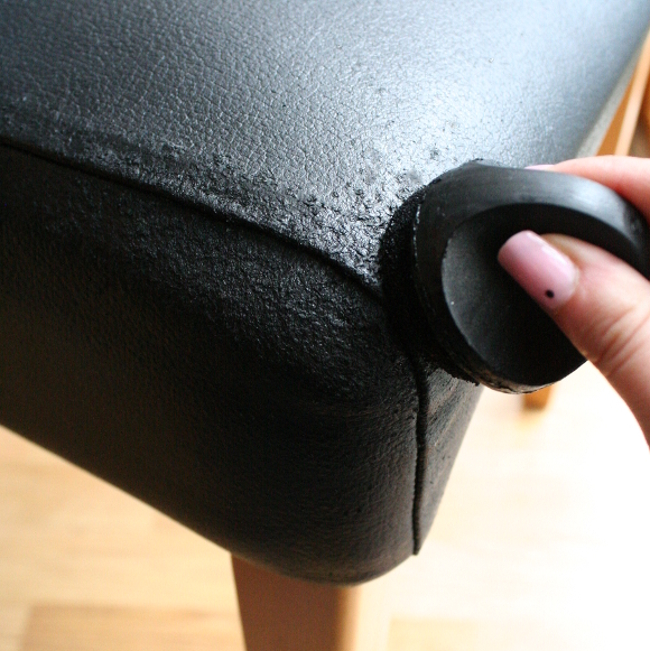
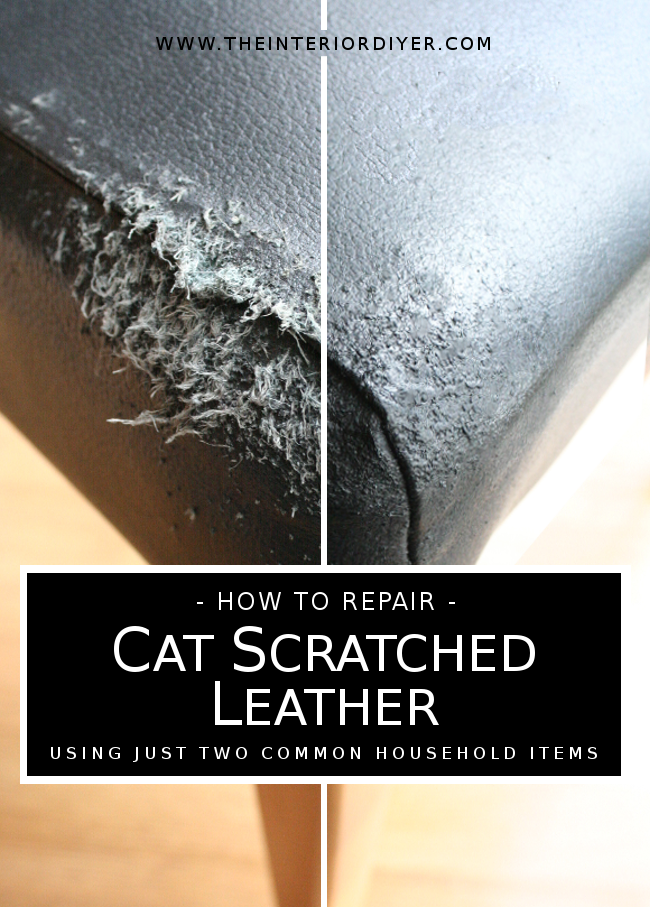
Step 1 – using a fine or curved pair of manicure scissors, trim the stringy scratches off the leather. Trim them as close to the leather as you can, without cutting the leather itself. This is where I find manicure scissors and / or nail clippers very good. Take your time. The more detailed you are, the better it will turn out.
You’ll end up with something like this …

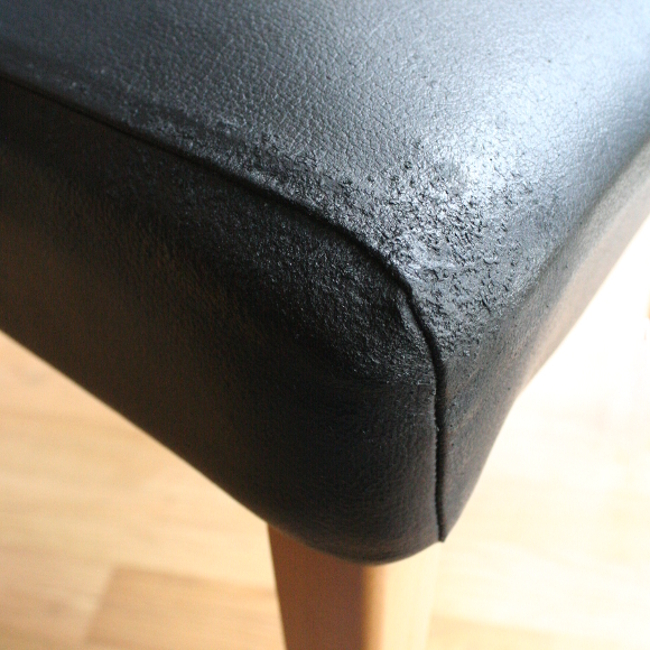
Step 2 – once you’re happy with your trimming and you’ve cut the loose scratches as close to the leather as possible, it’s time to add the shoe polish. As the scratches are a much lighter colour than the leather, make sure to mush the polish into every part of the scratches. I did this in a circular motion. I didn’t have to do many layers and the shoe polish quickly covered the damage. Allow to dry for a couple of hours before use*.
No, it’s not a perfect finish. No, I’m not a furniture restoration expert, but I have repaired a couch or two in this way over the years and it’s worked a treat. I repaired the chair to the point that it is unrecognizably scratched, unless you point it out.
I do however know that the only way to prevent this from happening again is to make sure your cat has cat-friendly items to scratch and to keep an eye on what areas of your home they are choosing to scratch in. Our girls have their recycled cat scratching post and Toshi occasionally has a good go at our basket, which I’m okay with for the moment. I also trim both our cats nails every two weeks to make sure they don’t do too much damage.
*ADDITIONAL NOTES:
– the shoe polish I use doesn’t rub off once dry [I used the W5 series shoe polish available in Lidl]. I didn’t buff it, but just let it dry. Please be aware that some polishes may rub off, so follow the instructions on your polish accordingly.
*ADDITIONAL NOTES:
– the shoe polish I use doesn’t rub off once dry [I used the W5 series shoe polish available in Lidl]. I didn’t buff it, but just let it dry. Please be aware that some polishes may rub off, so follow the instructions on your polish accordingly.
To conclude this post and to hopefully cancel any ill thoughts you may have towards her, here’s Juniper doing what she does best – exposing her fluffy belly and softer-than-clouds paws. I dare you to get mad at that face.

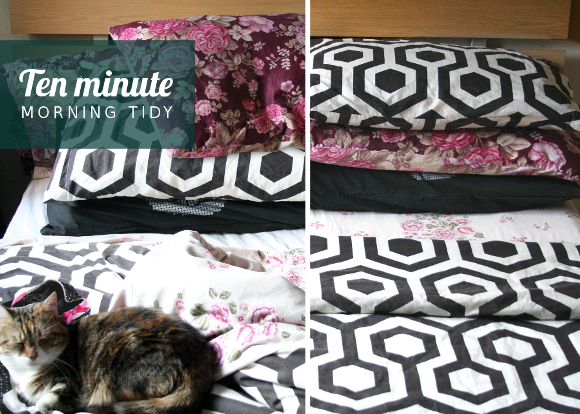
Ten minute morning tidy
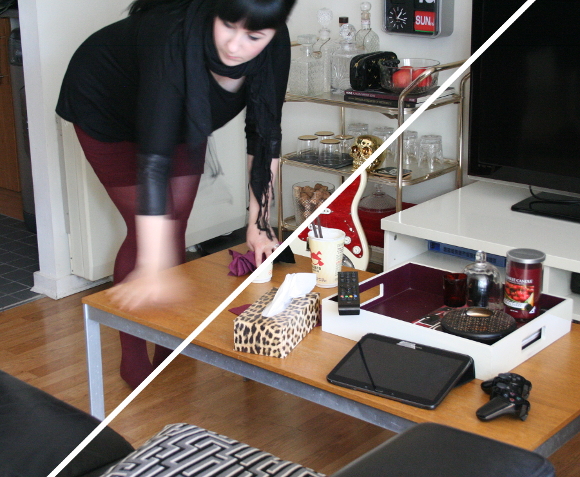
While I’m chasing my field of interiors dreams, I work an office job by day during the week. I wake up early, feed the cats, apply my face, get dressed, make a lunch, but one thing that will always be part of my morning routine before I go to work is that I set aside 10 minutes to tidy our apartment.
I know a large number of you are currently recoiling at the thought of it and serving up some serious stink-eye. Something along the lines of this comes to mind …
But today I’m going to convince you that yes, you do have time fo dat. And it will surprisingly make your day so much easier. And here is my one reason to convince you –
- If you spend 10 minutes tidying your home in the morning, when you get home in the evening, exhausted from work, you will be walking into an already tidy home. More time for dinner, more time shooting the breeze with your spouse, more time chillaxing. The less chaotic your surroundings are, the more calm your mind is and the better quality your home life will be.
Have I convinced you? Good. Here are my tips for the 3 main areas of your home that you should consider for your ten minute morning tidy …
BEDROOM
My first real job when I was a teenager was working as a housekeeper in a Travelodge Hotel a stones throw from home. I learned not only how to change and make a bed in under 2 minutes, but the importance of a tidy bed. Your bed is the biggest thing in your room and the first thing you see when you walk into your bedroom. If it’s chaos, your room is chaos. It doesn’t have to be made perfectly, just a couple seconds of effort to straighten your bed sheets.
LIVING ROOM
Our living room is the heart of our home and therefore the quickest to fill with junk. It’s the messiest room so I’ll spend the most time tidying it. Still, I only allow myself 5 minutes, otherwise I’d never leave the house. I start off by putting the living room items back where they should go – tablet goes on our desk, the PS3 remote goes into the PS3 / husband accessories drawer, any notebooks go back onto our shelves etc. Anything that needs to go into the kitchen gets put on the counter and anything that needs to go elsewhere in our home I put in our chuck it bucket. Don’t waste time by running into every room of your house.
We’re at a good place now as I’ve been avidly downsizing, organizing what we have and working on giving all our stuff its own place. A home for everything and everything has a home. If you need a bit of inspiration to get you started you can check out my 5 decluttering tips or my less 365 mission.
KITCHEN
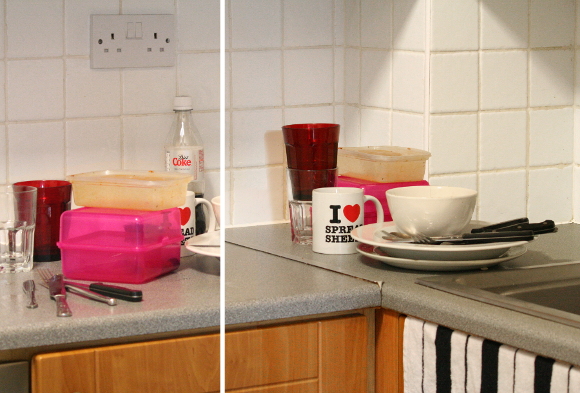
There’s nothing I despise more than doing the dishes. We’re not blessed with having a dishwasher in our apartment so we have to clean our dishes old school style. And because of this, there are always dishes haunting our kitchen counters. Let me get one thing straight, I do not clean dishes in the morning [that’s were I say ain’t nobody got time for dat]. I like to think of our kitchen as in a constant state of contained chaos. I stuff things in the recycling where necessary and stack all the dishes in the corner by the sink so they’re not all over the counter, where they patiently wait for my husband to come home and wash them.
But for those of you who have the luxury of owning a dishwasher? Bend over and I’ll show you where you can put your dishes. You have no excuse.
xx A
Step stool saga
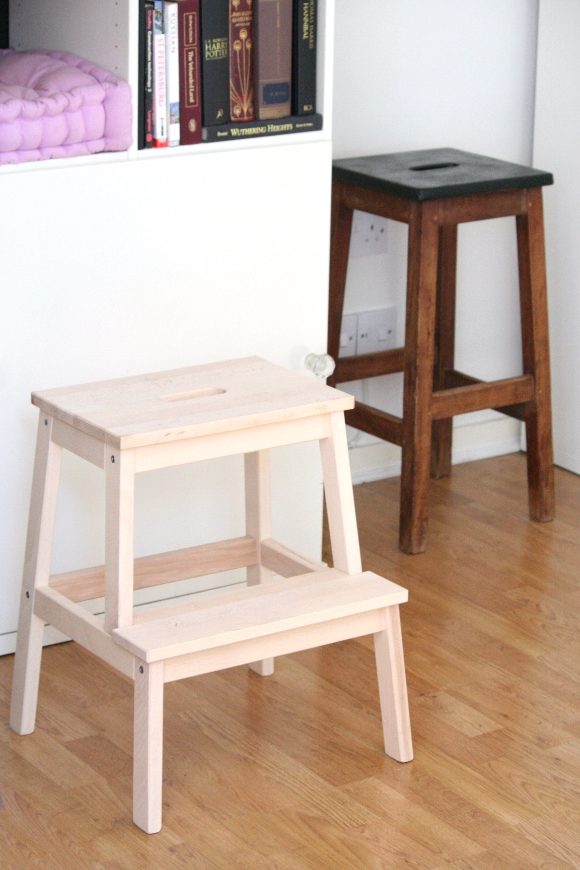
Last week I wrote about my new step stool combo and how I wanted to coordinate my BEKVAM stool with my salvaged skip stool in a way that would fit in with our living room a little better. To give you some history, long ago I found this broken bar stool in a skip, cleaned it up and repainted the top black. When I bought our new BEKVAM stool a couple of weeks ago, I saw their potential and was prompted to give them both a little makeover.
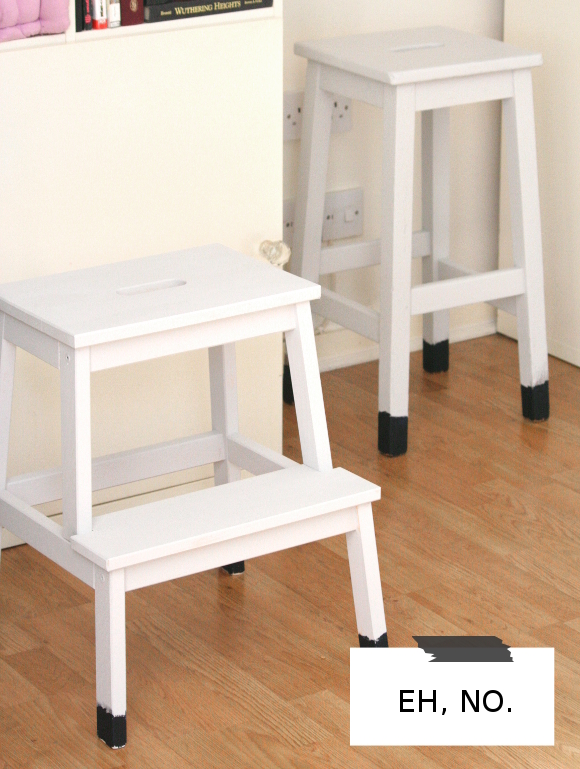
I did a lot of head scratching and googleing of IKEA hacks and I eventually decided to paint them light grey with black dip-dye legs. I like the dip-dye trend that all the cool people are trying out these days so I thought I’d try it for myself. And it looked meh.
There are a couple of factors to consider here –
- You can’t really tell from the above picture, but our / our landlords 10-year-old IKEA shelving is what I like to call IKEA ‘white‘. Which in fact is not white. Hence the italics and quotation marks. The shelves are a light shade of cream. So anything that isn’t progressively more yellow than them looks blue. Meaning, the light grey paint on the stools looks blue in front of the yellow, I mean white, shelves.
- The grey just wasn’t dark enough so while clashing with the shelves, the stools also blended into the background as well. Do you remember those eye puzzle posters that were huge in the 90’s? You’d stare at them and then all of a sudden a 3D image would pop out? That’s what happened to my stools when they were this colour. You didn’t really see them but once you do, you feel like reality has been altered ever so slightly. Not what I was going for.
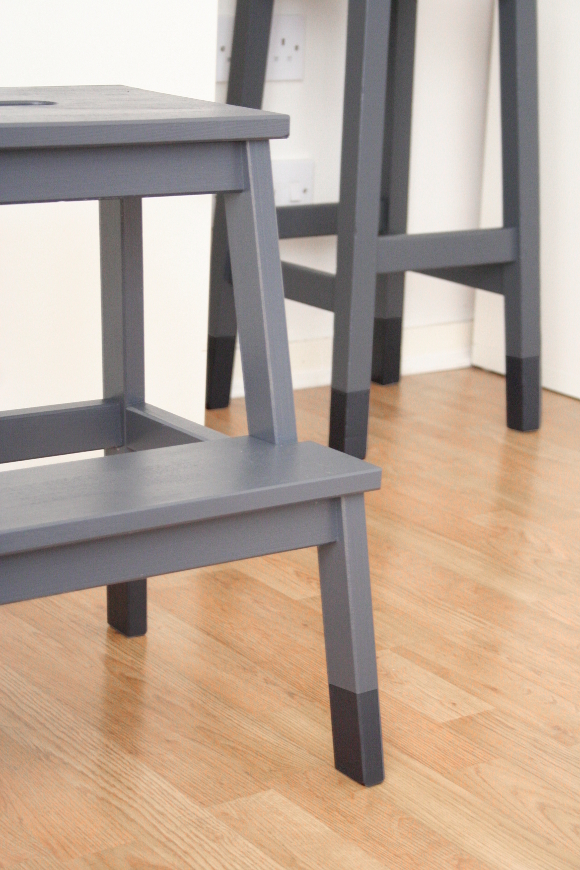
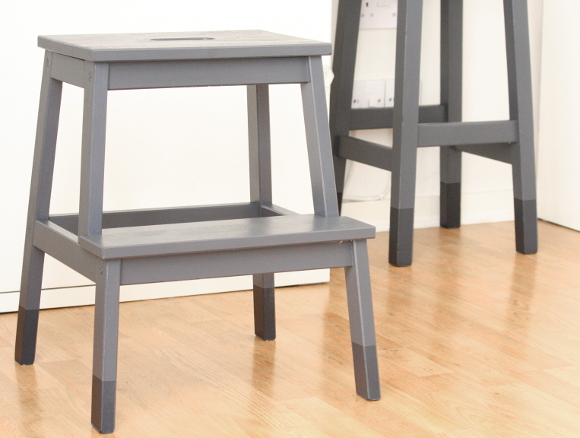
So back to the drawing board. I knew I wanted to go darker, but I didn’t want to go black. I went to my local hardware store, saw the Dulux Exterior SatinWood paint in ‘iron clad’ [sorry, no direct linkage available], and I couldn’t resist trying it out. Yes, it’s paint meant for front doors and the likes but I’ve got to say, this paint is kind of amazing.
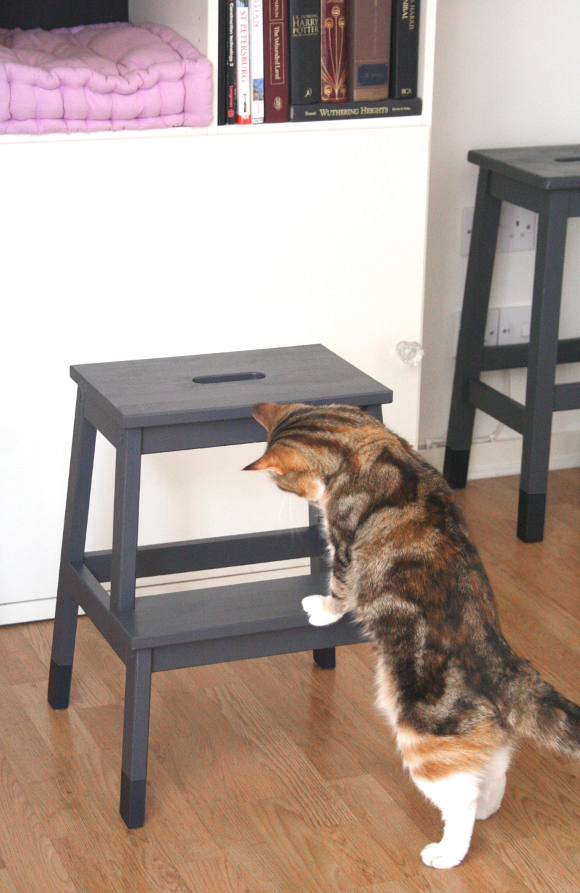
A couple of you had asked what I was hoping to use our new BEKVAM stool for. It’s really just to replace something else. I used to have a miniature chest in that spot [which you can see here] which as a secondary function housed all my extra yarn. I was getting tired of it and wanted something fresher, so I upgraded to the BEKVAM stool. “What an odd place to have a stool / miniature chest“, I hear you say. Well I haven’t let you in on its primary function as it’s there for one reason. Well, for two furry reasons. See that pinkish-lilac cushion up in our shelves? That’s one of Juniper and Toshi’s favourite cubbies and in order for them to climb into it, they need some assistance …
Yep. I have a stool for our cats. I of course actually use the step stool, but while it’s not being used by humans, our cats get full use of it. p.s. I can’t handle how cute and curious Juniper looks in this picture. It’s like she’s inspecting my painting skills.
I’m so glad I used this paint as it dries so fast. I was able to paint two coats on both stools in an hour and that’s including drying time. They have a lovely satin finish and aren’t tacky to the touch like some paint can be. In fact, I was so enthusiastic that I repainted our entire bedroom dresser in it this morning. From start to finish with two coats of paint and dry within an hour. That’s what I’m talkin’ ’bout.
I know this makeover isn’t a monumental change to our living room, but it’s a little step. xx A
- Newer Posts
- 1
- 2
- 3
- 4
- 5
- 6
- Older Posts