DIY Friday – recycled cat scratching post

Roughly this time last year I spotted this pin from Design*Sponge on Pinterest and I knew I had to recreate it in our home. Their pin was all about their stylish cat scratching post tutorial which showed you how to make a pretty cat scratching post to hang on your wall. 
I thought of that pin every time I saw our current haggard cat scratching post. Just look at it, cowering behind the dresser in our bedroom … 

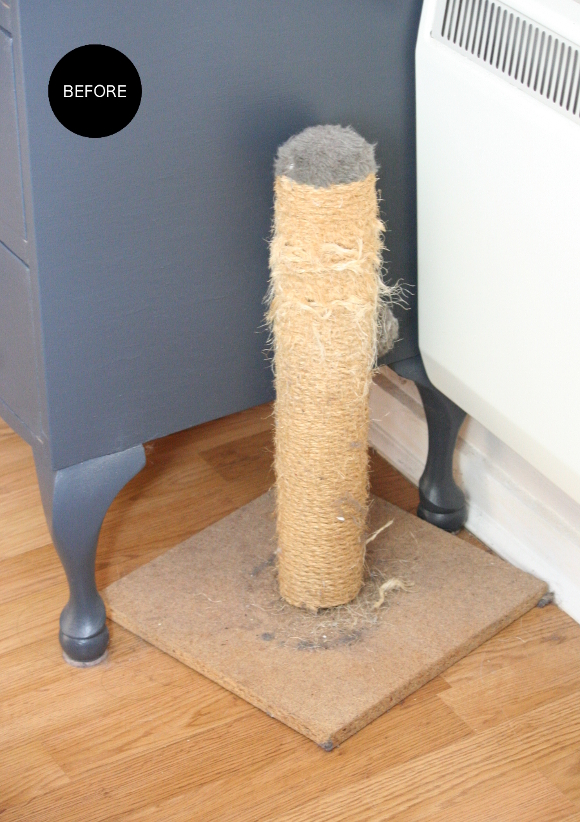
I bought this scratching post close to 7 years ago when Toshi was a kitten. And if you’re curious + I want to share a picture of how painfully cute Toshi was as a kitten, whether you like it or not, here’s what our cat scratching post looked like way back then …

Squee! Our scratching post hasn’t aged very well thanks to two sharp cats, but that’s what it’s supposed to do, right? I kept remembering Design*Sponge’s tutorial and thanks to my recent nearly new wood challenge, I thought hey – I could just recycle our scratching post by reusing all its pieces in a new way! And so I did. And here’s how I did it … 

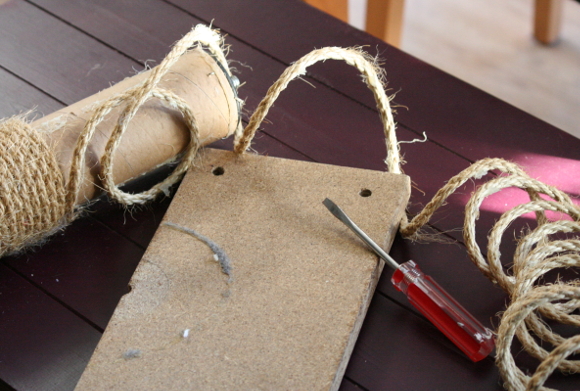
What you’ll need – an old cat scratching post, a saw and a drill, a staple gun, a screwdriver [for removing staples, if needs be], paint and some ribbon, but these aren’t necessary. You could leave the board au naturale and use extra twine at the top in stead. 

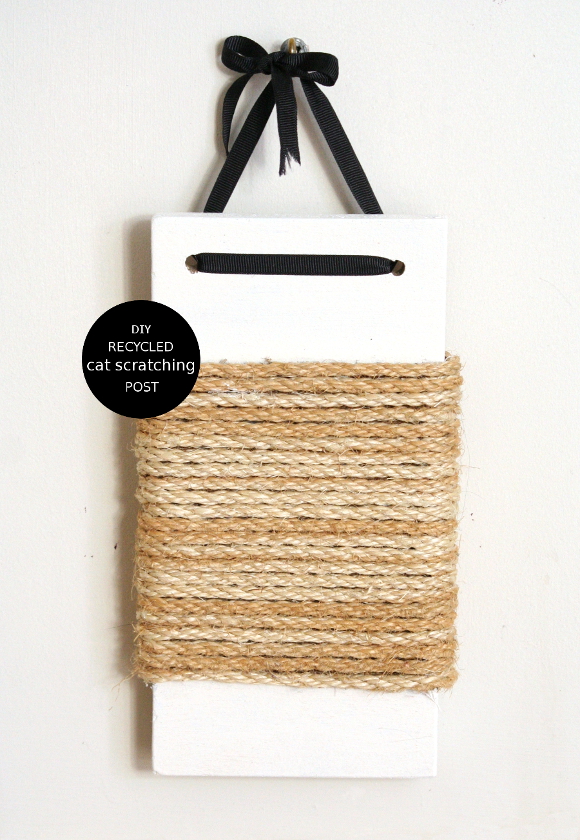
Method – I unscrewed the original scratching post from its base, enlisted in some DIY-expert-dad help and asked him to saw the base in half then drill two holes in the top; in order to hang it up [thanks again, dad!]. I unravelled the twine from the original scratching post and added it directly to the ‘new’ base.

TIP: if you want to paint the base, do that now. I only decided to paint it at the very end, and it would have been easier if I painted it at this point. 

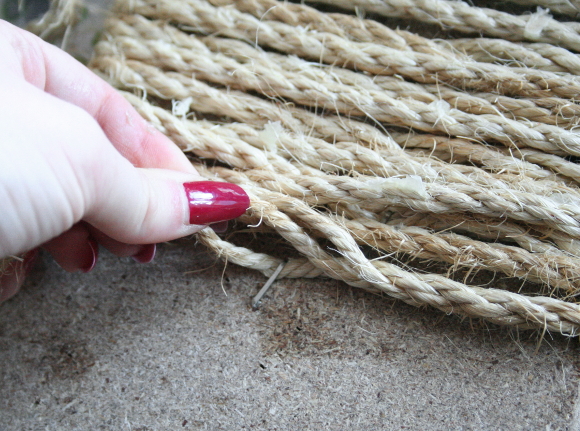
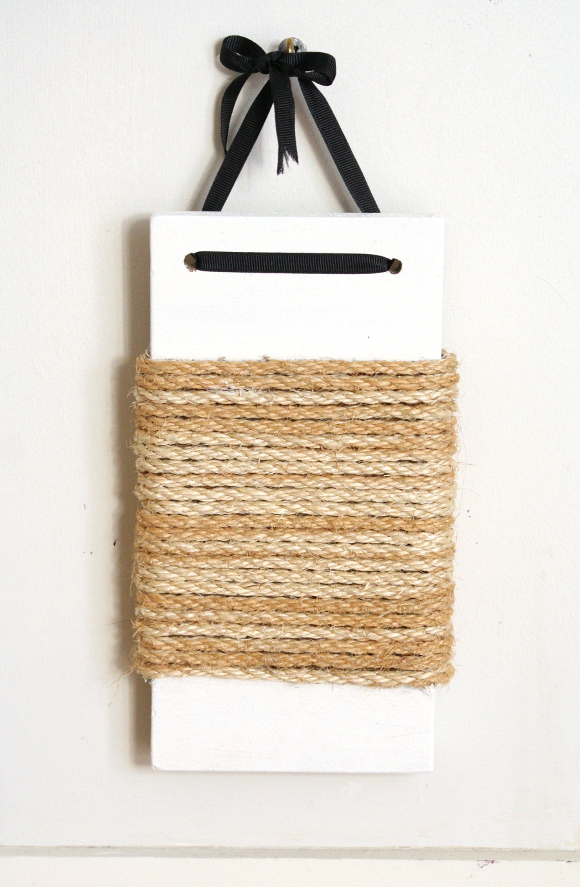
I stapled the twine on the back of the board and started winding it around. Every second row I un-twisted the twine and stapled it to the back of the board [as seen above], to ensure the rope was extra secure. After all, there were going to be two cats picking at it. 

I wound the twine around until I was happy with the amount, and then stapled the twine a couple of times at the back to finish it off. I threaded a spare piece of black ribbon through the two holes and tied it tightly in a knot, then made it pretty by tying it into a bow.

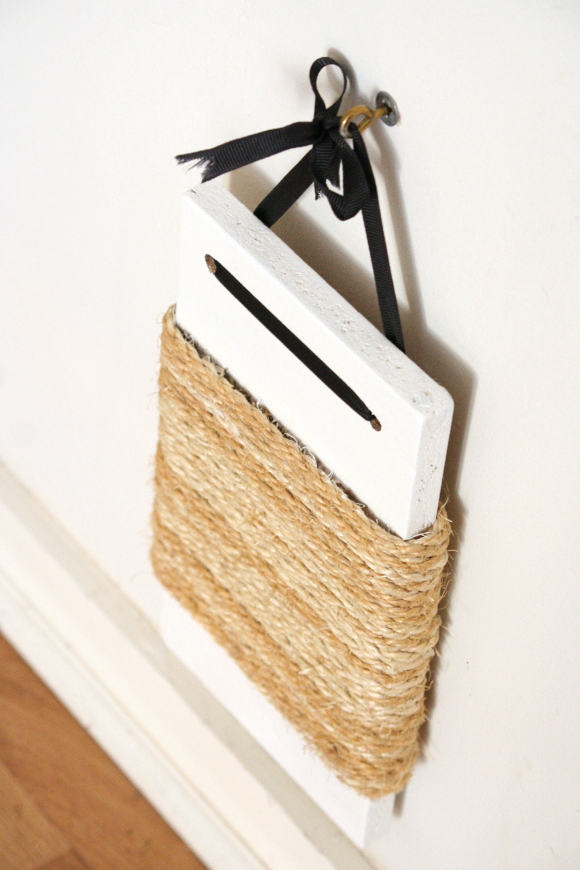
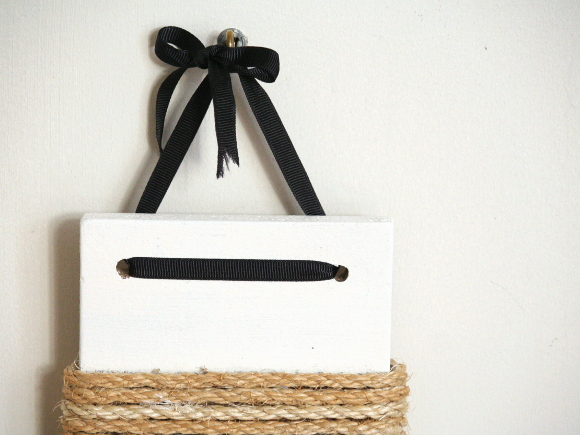
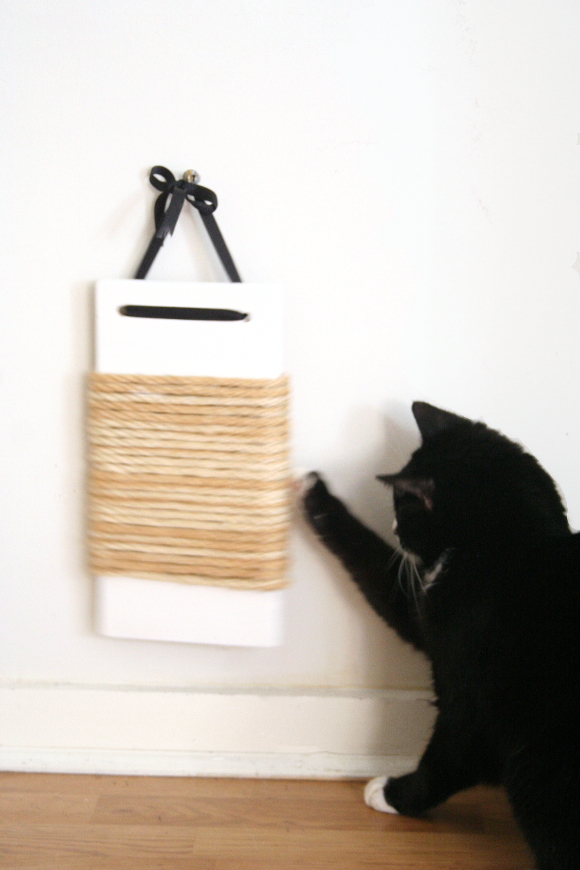
Since there would be two cats hanging out of the new scratching post, I needed something tough that would hold up so I used a wall anchor. I measured the previous height of the scratching post and the height that our cats prefer to scratch at, and hung the new scratching post at this height. I threaded the ribbon through an eye hook and wound the eye hook into the wall anchor. Snug as a bug. 

So if you have an old eye-sore of a cat scratching post and want to have something a bit more chic for your feline friends, fear not for you already have the materials at hand.

And there you have it! I just hung up the new scratching post the other day and I have yet to see either Juniper or Toshi properly use it. Just yet. I had to trick Toshi to get that picture of her playing with it, but I know you won’t tell anyone. Us Bloggers are just a bunch of liars. 

 xx A

How to repair a very worn rug (and why flatwoven rugs suck)

Yes. The wildly shameful image above is our IKEA Stockholm rug. This is it, 18 months after we bought it. 

When I first brought our new rug home, it was heaven. It fit perfectly under our couch and coffee table, and gave a serious punch of black and white to the room. It really anchored the look of the space and I couldn’t have been more smitten. However, as the months went on, I realized exactly how difficult it was to keep. And I realized why.


The IKEA Stockholm rug is a flatwoven rug; meaning, it is tightly woven in a loop vs. regular low pile rugs that aren’t woven in a loop. Meaning, it ages quickly. 

The area between the coffee table and our couch got the most ware. This is where we would walk from our kitchen [to the left of the picture above] and cut across the living room to get to our dining area [on the right]. We also spent a lot of time here as this is where we watch TV, entertain guests and sometimes work.

Another reason why flatwoven rugs are a bad idea is cats. For anyone who doesn’t have a cat, I will explain that cats have a natural urge to sharpen their nails. As Toshi is demonstrating so gracefully below. I trim our cats nails regularly, so that minimized the damage that could have happened to the rug. Whenever they picked at the rug, it would pull at the flatwoven closed-loops and sometimes snag. Not cool.

It’s something that didn’t even occur to me when we bought the rug. But now I know. I’m in no way mad at our cats because it’s a natural urge of theirs. They can’t help it. So maybe if you have a cat and are on the lookout for a rug, you’ll know too. Learn from my mistake. Low or high pile rug = good. Flatwoven rug = bad.

Case in point – we have a black and white IKEA Virring rug which the cats also scratch, but because it’s a low pile rug, their nails sail through it like a breeze and it has zero damage.

So if you have a flatwoven rug that is damaged like some of my incredibly embarrassing photos above, do not fret. There is a way. And it is a breeze.

I first started to trim the rug with scissors. That was laborious and tedious. I quickly had a eureka moment and realized – why not just use husbands electric hair trimmer? So I plugged it in and it was like some form of wizardry …

Trim. Vacuum. Literally good as new. I was nearly in tears. It was perfect. No word of a lie. I will accept baked goods or folding money as a thank you. You’re welcome in advance. 

I should explain that my husband doesn’t use this hair trimmer so it was okay to use it. When I was finished, the trimmer wasn’t dirty and was in perfect working order for the next flatwoven mistake that comes our way. Or you know, for hair. 

Our rug turned out so neat, tidy and nearly new that I was in fact able to sell it. I wouldn’t have been able to sell it if it wasn’t to a high standard. It’s all part of my attempt to make our apartment less obviously IKEA and I already have my eye on a couple of second hand low pile rugs to replace it. These colder months really call for rugs. Neatly trimmed rugs.

Thrifty things – a clowder of teapots

No, do not re-adjust your screen. This is not a vision into the depths of your nightmares, it’s just my new cat teapot. And may I add with pride [quickly followed by a hint of shame], I now have a cat teapot collection. A clowder of cat teapots, if you will.

I suppose it all started way back when Emily and I visited the Merchants Market for a blogger feature of hers. That’s when I spotted my first cat teapot; the little portly lady-cat teapot who looks like she rather enjoys sausages. Then the other day I spotted this gentleman-cat teapot in the window of NCBI Charity Shop. It was after hours so the shop wasn’t open, so the next day I cycled over and scooped up my purchase.

Do you have cats?“, the lady at the till inquired. “Oh I do. I have two kitties“, I said. She then looked me up and down with a puzzled look on her face. “You aren’t covered in cat fur though“. I laughed and I told her my anti-furry-clothes tip … 

PRO TIP – run your hand under the tap and using the palm of your hand, begin to brush your clothes. The water on your hand will collect any fur. When your hand stops collecting fur, simply run it under the tap again. Repeat until all the lonely people glitter, I mean fur, is gone. Voila!

I’m not entirely sure where I’m going to keep Mr. and Mrs. Cat Teapot, but I quite like where I styled them on our shelves. Not too bad. And please don’t tell me I’m the only one with a porcelain animal collection? Don’t leave me hangin’.

xx A