Life imitating catalogue

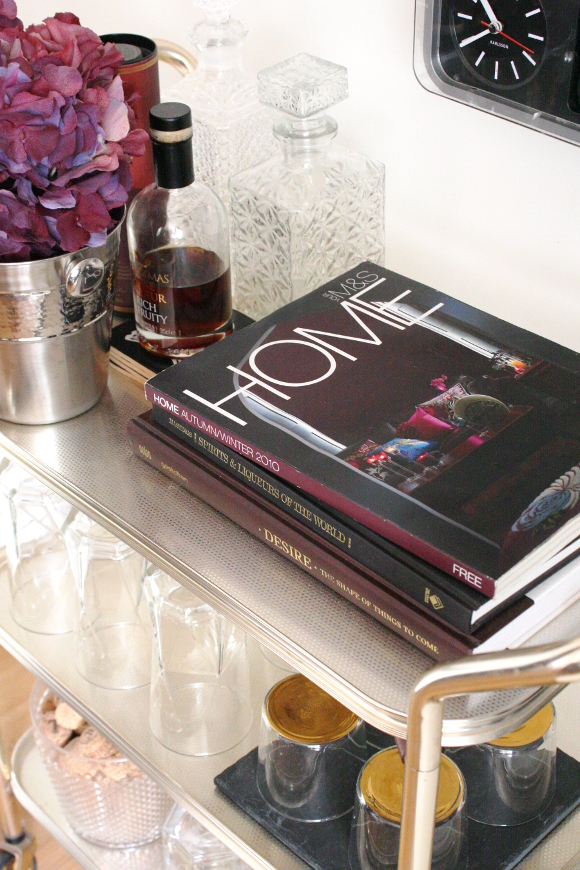
Over the weekend I was fussing over our bar cart; rearranging stuff, adding new tumbler glasses and finally getting around to re-syncing our clock. And then I had a teeny, tiny, mini ‘aha’ moment. 

In the winter of 2010 I brought home the current Marks & Spencers Home catalogue at the time, solely for its cover. It gave me heart-eye emojis, inspired a lot of what I did to our apartment afterwards and pretty much summed up everything I was digging at the time [I even blogged about it]. All those dark moody hues mixed with pops of bold pink and turquoise viridian really got me right in the feels. That catologue has been on display in our apartment since the moment I got it. For anyone who’s crept my blog for the past 5 years, you will have seen it from time to time. It wasn’t however until this weekend while I was dusting off said catalogue that I realised our couch is a little bit nailing it … 

Overcrowded with pillows, velvet and throws in lots of yummy dark colours and not forgetting the burgundy wall in the background [but let’s quickly forget my landlords hot mess of a leather couch]. I find it funny and kind of weird when things come around like that. Hardly blog worthy I know, but it was a funny realisation for me at the time. I’ve adored these colours for so long that this has only cemented how I feel about them.
It took me 5 years, but at least I took the scenic route. 

Hanging accents for small spaces

I’ve written about our spare bedroom a good few times before. It’s a tough little room as the bed pretty much takes up the whole space, so adding things like accessories, can be challenging.

A couple of months ago I was struggling to get our spare bedroom ready for a guest coming over. I had some magazines, a little vase of flowers and some knick-knacks on the bedside table to make it feel a bit more welcome. Not to mention the lamp as well. Once I was finished, I realised there wasn’t enough room for said guest to even put their phone on the bedside table.

Insert obvious pun relating to being driven up the walls here. And then it clicked – the only way was up!

I bought these velvet hangers from Dunnes Stores (€5 for a set of 10), perfect for hanging up magazines and the likes above the bedside table. I didn’t put much thought into the placement of the hangers, just somewhere easily within reach from the bed, and stacked them to add a bit of variety.

I spied the glass hanging vase from Tiger just before Christmas and thought it was perfect for the spare bedroom wall. That’s the thing with Tiger – if you see something you like, you have to grab it with both hands, hold on tight and lock it down, because chances are the next time you stop in, the stock will have changed and it will be GONE. Like that girl in that GONE GIRL movie*. So I grabbed it with both hands [and paid for it, obv].

Also, don’t always believe what you see in online (and magazine) features. The rest of the room is chaos …

Just keeping it real. Bloggers are humans too.
And don’t worry Kimberly and Maria, it’ll be tidy for April. Promise. xx A

Also featured – bedside table and lamprescue kit for unexpected guests

*I have not seen Gone Girl so I don’t know if this is a reference that makes sense. It sounded like it would fit at the time of this being published. It’s tough trying to be a lyrical genius. 

Bolder shelves on a budget

A couple of weeks months ago I shared a snippet of the changes I was making to our monstrous living room shelves. I started to make changes just after we took down our Christmas decorations at the beginning of the year. I really think monumental changes in our home go hand in hand with the new year – starting over and putting away all the Christmas decorations really encourages me to make changes. 

This year I really wanted to work on making our living room shelves sleeker and bolder. They’re large, cumbersome shelves that take up one end of our living room. For a long time, our shelves looked like this – 

And before that? Yeesh. Not to mention my previous photography ‘skills’. MINE EYES. So, it was time for a change.

I wanted to make a bold statement, but because these shelves belong to our landlord, it had to be a statement that could be easily undone. And let’s face it, done as cheaply as possible. I loved the look of black-backed shelves, so I thought, hey – black construction paper. A perfect way to update our shelves! I bought two A2 pieces of black paper {for under €5 total}, and got cutting.

TIP – rearrange and style your shelves before adding paper to the back of them. Once I was happy with what was in each cubby, I added the necessary amount of paper to the back. For example, the top right cubbies on each shelf had tall books, so I only needed to tape paper to the top half of the back of that shelf. The same with the cat cubbies. Very few shelves had paper on the entire back of the cubby.
I also took my sweet-ass time rearranging our shelves. It’s April and I started this project in February. I didn’t want to do a sloppy, rushed job on it, and I wanted each shelf to look minted. I put lots of thought into balancing and contrasting the shelves and some quite severe downsizing {for some tips on decluttering, you can check out my blog post and top tips here}. 

The biggest change I made to our shelves was removing the middle section. And it took a long time for me to make that decision. Those middle shelves drove me insane. It was impossible to style them and they caused a lot of heartache. So one Sunday when I was doing some serious spring decluttering, I just pulled that section of shelves out and immediately fell in love with our living room all over again. I know, a bit too gushy and overenthusiastic for a Monday, but it really changed the feel of our living room.
Not to toot my own horn, but I’m really over the moon with how our shelves turned out. And of course, stay tuned to see where those middle shelves went! They really look top drawer in their new home. xx A